Search for answers or browse our knowledge base.
Can't find the answer you need here? Contact our support team and we'll gladly help you.
Portrait Workflow Course – Module 9: Adapting for other Shoot Types
Now that you’ve got a great set of workflows which are working as expected for your chosen common Shoot Type, it’s time to adapt them for the other work you do.
👉 If you’ve not already tested and previewed this first set of workflows, please go back and complete Module 8 before starting this one.
It’s very easy to take existing workflows and make some bigger changes, like adding new steps or deleting unnecessary ones, or even changing the resources assigned to a task. It’s also super simple to make much smaller changes, like subtle changes in words within your client messages.
Light Blue’s “Duplicate Record” is the key to making this happen so let’s go through how you would do this.
The example Shoot Type we’ve used so far has been family portraits. But say you do pet portraits too and you know the workflows you’ve already created are a good base for how you work with your pet clients.
Shoot Date Workflow
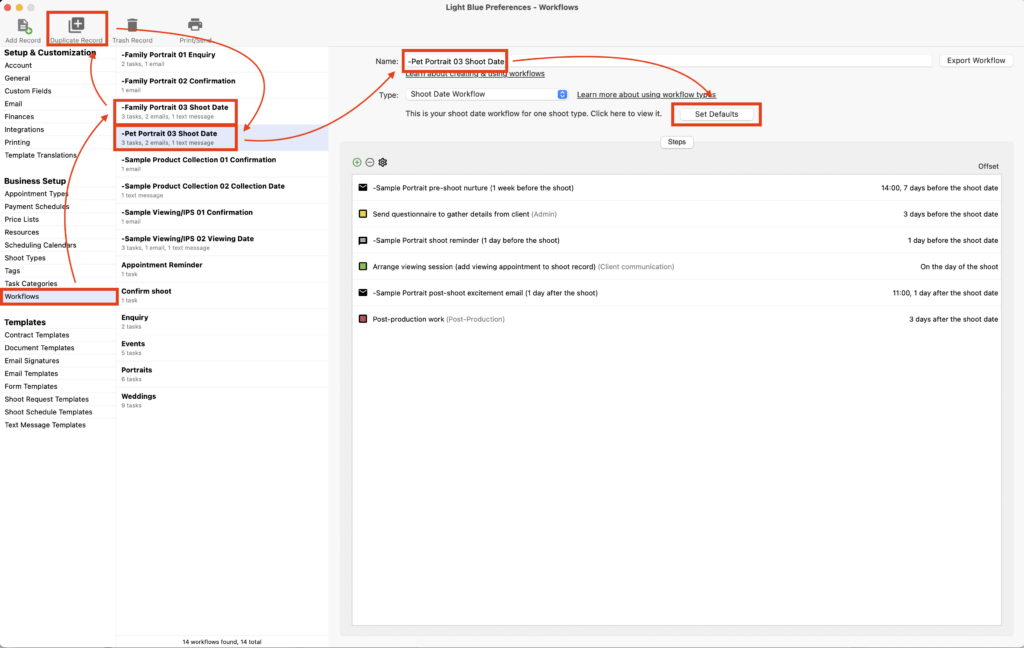
Duplicate the workflow
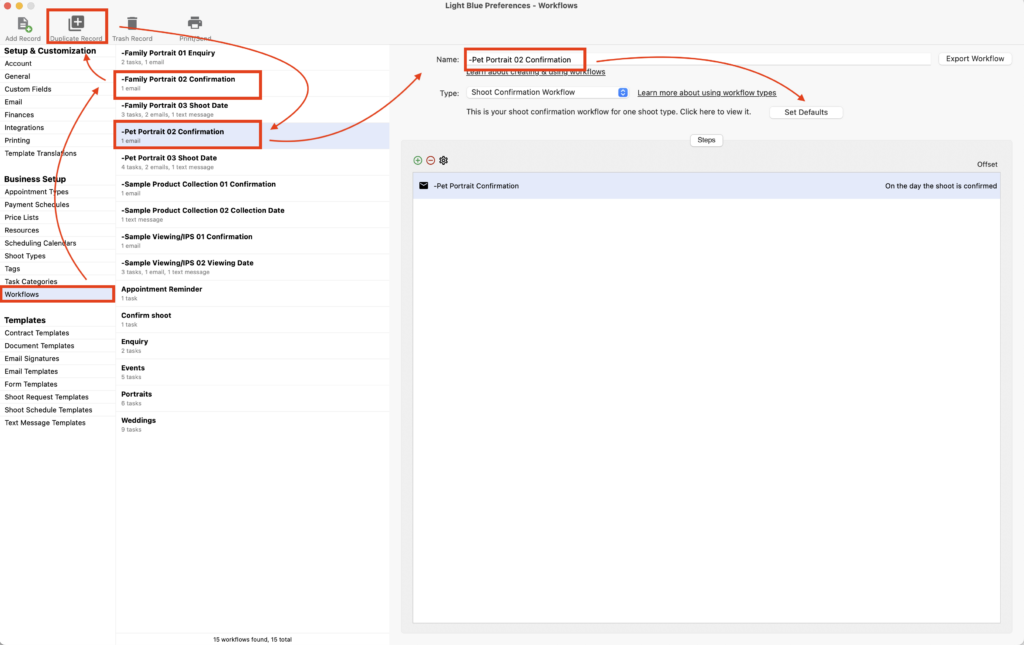
- In the Preference pane, click on “Workflows” in the “Business Setup” category.
- Choose the “-Family Portrait 03 Shoot Date” workflow.
- Click on “Duplicate Record” in the toolbar.
- Rename to “-Pet Portrait 03 Shoot Date”.
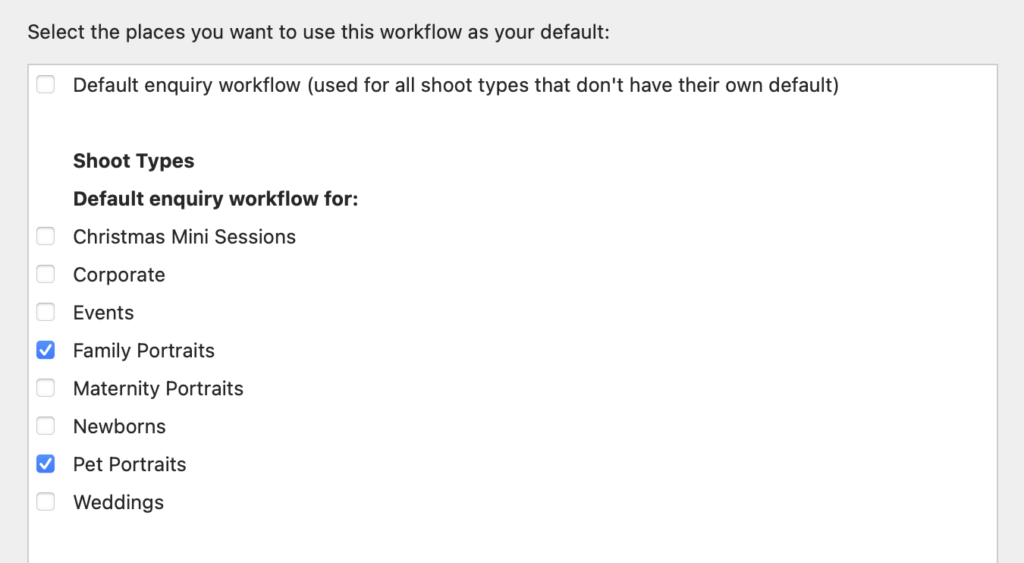
- Click on “Set Defaults” and check the “Pet Portraits” box.
- Click “Done”.
⭐️ Top Tip: Structuring your naming convention carefully will make them easier to understand at a glance. Our preference is “Shoot Type – sequence number – type of workflow”.
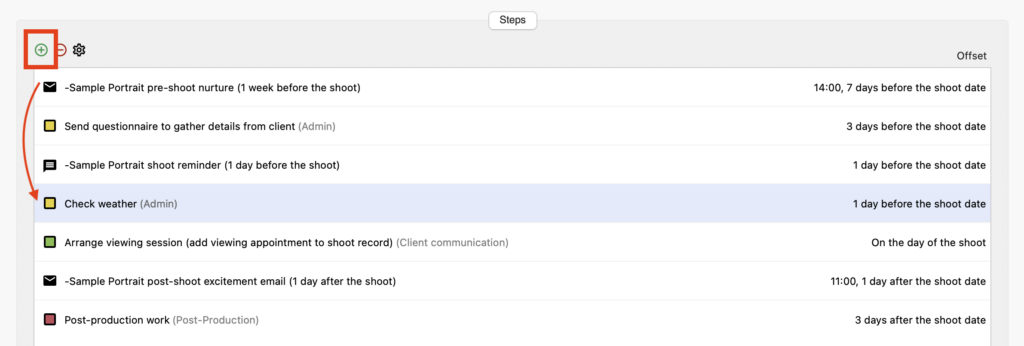
Amend the workflow
- Review the steps and adapt as necessary for your new Shoot Type; perhaps all your pet photography is shot outside so you like to check the weather the day before the shoot.
- Click the green “+” button and add the task step set to one day before the shoot.
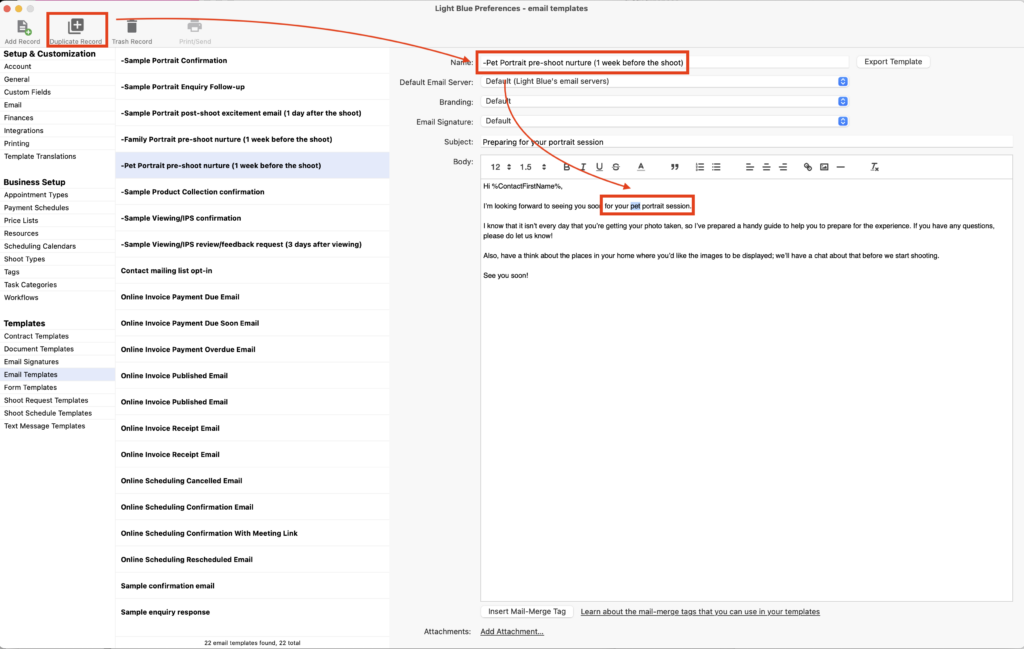
Amend the messaging
- Double-click on the first step, an email, in the new pet workflow, “Sample Portrait pre-shoot Nurture”.
- Click “Open Template”.
- Click “Duplicate Record” in the toolbox.
- Rename to “-Pet Portrait pre-shoot nurture (1 week before the shoot)”.
- Make the adjustments to the template.
- And if you’ve not already done so, rename the original template to reflect it’s for family portraits.
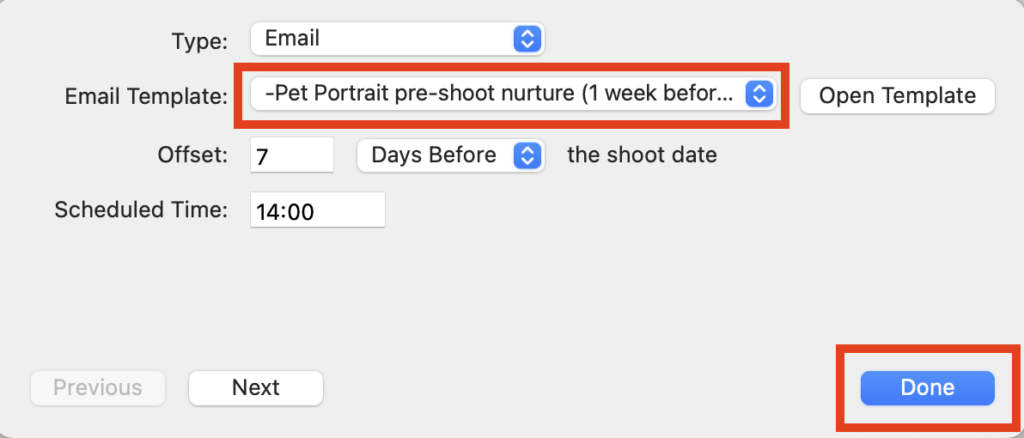
Linking the amended message to the new workflow
- In the Preference pane, click on “Workflows” in the “Business Setup” category.
- Choose the workflow title “-Pet Portrait 03 Shoot Date”.
- Double-click on the first step (now with the name “Family Portrait pre-shoot nurture” as it’s just been renamed).
- Choose your amended message “Pet Portrait pre-shoot nurture” as the Email Template.
- Click “Done”.

Confirmation Workflow
We amend and adjust the email in this exactly as we did for the Shoot Date workflow.
- Duplicate the Family Portrait Confirmation workflow.
- Rename it.
- Set the default Shoot Types.
- Double-click on the email step in the workflow and open the template.
- Duplicate the original template.
- Rename both templates.
- Make the amends to the new one.
- Go back to the new workflow.
- Double-click the email step.
- Change the template to the new one.
Enquiry Workflow
You may decide that this workflow is the same for your Family and Pet portraits and no changes are needed.
- Simply rename it to reflect that.
- And update the default shoot types to both Family and Pet Portraits.

Appointment Workflows
You can apply exactly the same amendment steps to these workflows too.
You might not need multiple production collection workflows or production and viewing confirmation workflows. but you may have different types of viewing sessions depending on the shoot type.
- Duplicate the Viewing Date workflow.
- Rename it.
- Set the default Shoot Types.
- Adjust the workflow as needed.
- Double-click on any message steps in the workflow and open the template.
- Duplicate the original template.
- Rename both templates.
- Make the amends to the new one.
- Go back to the new workflow.
- Double-click the message step you’ve just been working on.
- Change the template to the new one.
Then simply repeat as many times as you need to so all your Shoot Types have their full workflow in place!
And if you want to jump back to other modules in the course here are the links for each of them:
Module 1: Downloading and installing the templates
Module 2: Template overview
Module 3: Shoot Date Workflow
Module 4: Confirmation Workflow
Module 5: Enquiry Workflow
Module 6: Viewing Session Workflows
Module 7: Production Collection Workflows
Module 8: How the Workflows actually work