Search for answers or browse our knowledge base.
Can't find the answer you need here? Contact our support team and we'll gladly help you.
Portrait Workflow Course – Module 3: Shoot Date Workflow
In Modules 3 through to 7, we’re going to take each of the template workflows and show you how you can customise them to your way of working – and to make sure they sound like you too!
The workflow we’re going to cover in this module is the “Shoot Date” Workflow.
NB. Remember at this stage in the course we’re concentrating on one type of shoot only; your chosen common shoot type from Module 2, and customising the workflows to that. Adapting them to create workflows for your other shoot types will be covered in Module 9.
👉 If you’ve not already set up the default shoots and appointments for each workflow, head back to Module 2 which covers that.
As we talked about in Module 2, the most critical workflow is the one based on the date you’re actually taking the pictures; the shoot date itself.
The template workflow we’ve provided for you has a combination of automatic nurture and reminder emails/texts being sent to the client before and after their shoot, along with tasks split across different categories; again before, on and after the shoot date.
There are three areas we need to look at to make sure the workflow is tailored to your business.
- The actual steps themselves.
- The timings of those steps.
- The wording within the email/text templates.
Workflow steps
- In the Preference pane, click on “Workflows” in the “Business Setup” category.
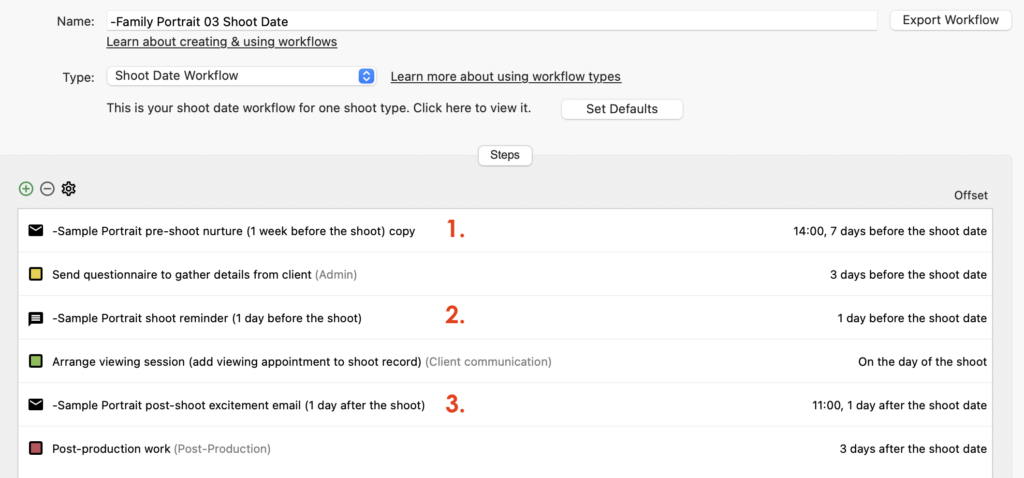
- Choose the “-Family Portrait 03 Shoot Date” workflow.
- Firstly check that all the particular steps you take in your business for the shoot type you’re working on are included in the workflow.
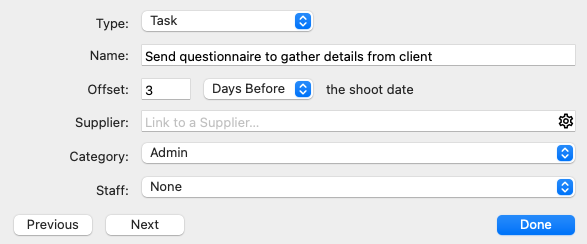
- If you need to add another one, simply click on the green “+” to add the details.
- Choose what type of step it is from the dropdown menu beside “Type”. NB. With “Tasks” you simply name the step, and with “Email” and “Text Message” types, you choose the appropriate template to use.
- Enter the “Offset” details for when you want the step to happen in relation to the date the workflow is based on, in this case, the shoot date. NB. With emails and texts, they will automatically be set to 9.00 am unless you specify a different time.
⭐️ Top Tip: Using the “Category” dropdown menu is a great way to categorise your steps so you can clearly see the different kinds of activity needing to be completed. Light Blue has already set up Admin, Client Communication and Post-Production but you can easily amend these.
Workflow timings
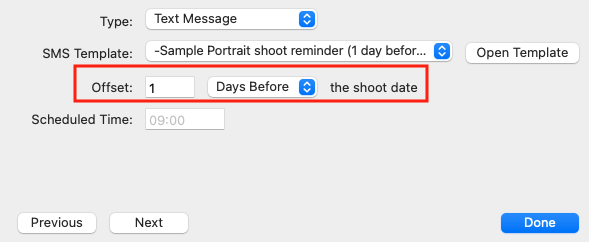
- Check that the “Offset” timings of each step fit with how you run your business.
- If you need to change any, double-click on the step.
- Change the number of days and whether it’s before or after the shoot date as required and, if applicable, the time of day.
Email/text wording
We suggest that you review each of the automatic email and text messages we’ve included in the template so the subject line and wording are personalised to your business and how you would actually speak to your clients.
For the “Shoot Date” workflow you’ll need to review three templates:
- Pre-shoot nurture email.
- Portrait shoot reminder text.
- Post-shoot excitement email.
Simply work your way through each one in turn until you’re happy with it; the steps below explain how to view the templates and personalise them further.
Viewing the automatic email/text templates
Depending on how many email/text templates you have set up, it could be a little confusing to try and find the ones included in this workflow if you simply go to the “Templates” category in the Preference pane; whether you’re looking for an email or text template.
However, it’s very straightforward to go directly to them from the workflow itself; indeed there are two ways you can do so.
- In the Preference pane, click on “Workflows” in the “Business Setup” category.
- Choose the “-Sample Portrait 03 Shoot Date” workflow.
- Click on the first step “-Sample Portrait pre-shoot nurture” and right-click.
- Choose “Go To Template” and you’ll be taken to the template.
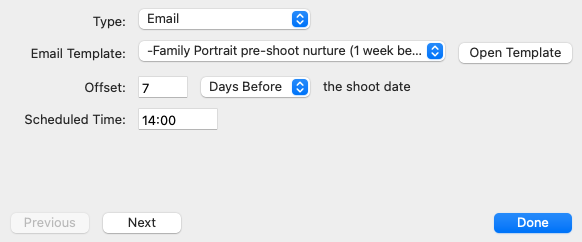
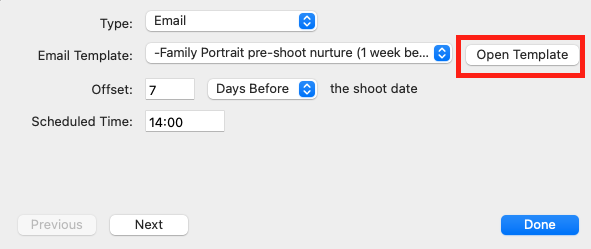
- For the second method, go back to the first step in the workflow, but this time double click it.
- In the pop-up window, you’ll see the name of the email template.
- Click on “Open Template” and you’ll be taken to the template.
Email design, hyperlinks and attachments
As well as changing the actual words themselves, there are a few extra things you can do within the email template. You can:
- Change the formatting to say emphasise different points.
- Add hyperlinks to a specific page on your website perhaps.
- Include images to maybe share some examples or hero images.
- And add attachments such as a price list or FAQs.
👉 If you’ve not already set up your branding within Light Blue, this help article goes through the necessary steps to do so.

Mail-Merge Tags
In the templates we’ve set up, you’ll see certain words are contained within “%”’s, e.g. “%ContactFirstName%”. These are Mail-Merge Tags which pull information from the relevant Light Blue record and automatically populate and personalise your email or text.
👉 If you’re not familiar with Mail-Merge Tags, this article explains how they work in more detail.
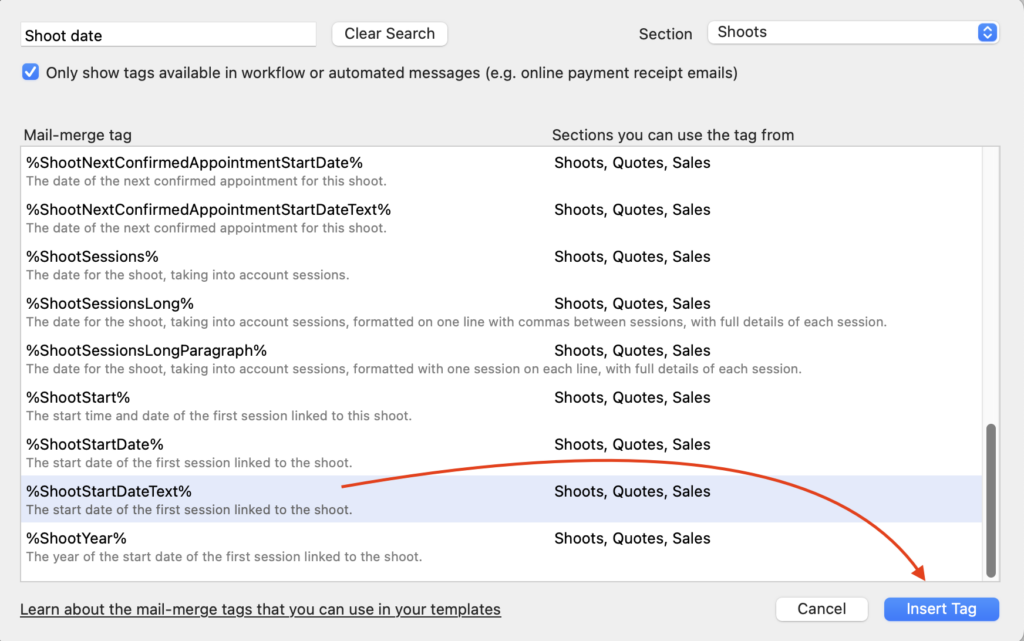
- Whilst all the basic ones are already included in the templates, if you want to insert another one, simply click on on “Insert Mail-Merge Tag” at the bottom of the template.
- From the list shown, choose the one you want to insert and then click “Insert Tag”
- This tag will now appear in your email/text template.


Confirmation Workflow
Now we’ve got the “Shoot Date” Workflow customised it’s time to look at the next one; the “Confirmation” Workflow which we’ll cover in Module 4.
👉 When you’re ready, here’s the link to Module 4.
And if you want to skip ahead (or indeed jump back!) to other modules in the course here are the links for each of them:
Module 1: Downloading and installing the templates
Module 2: Template overview
Module 4: Confirmation Workflow
Module 5: Enquiry Workflow
Module 6: Viewing Session Workflows
Module 7: Production Collection Workflows
Module 8: How the Workflows actually work
Module 9: Adapting for other Shoot Types