Search for answers or browse our knowledge base.
Can't find the answer you need here? Contact our support team and we'll gladly help you.
🎥 Light Blue Contracts: an in-depth look at how they work
Light Blue’s online contract signing service is a powerful tool that simplifies and speeds up the booking confirmation process, not only for yourself but your clients too. What’s not to like about that!
The video below expands on our introductory one providing a bit more information about the more advanced options available; though if you prefer to learn by words and pictures, have a read of the help article instead!
Contract Templates
Before you can send your client a Contract you need to have at least one Contract Template set up. Creating these allows you to quickly pick and choose the correct Contract to send to your client to confirm their booking. Or even if all clients receive the same one, it does need to be created as a Template before you can send it! NB. As with many Templates within Light Blue they’re a starting point and, if needed, can be easily amended before sending to your clients. 👉 This help article guides you through setting up your Contract Template/s.
Sending a Contract
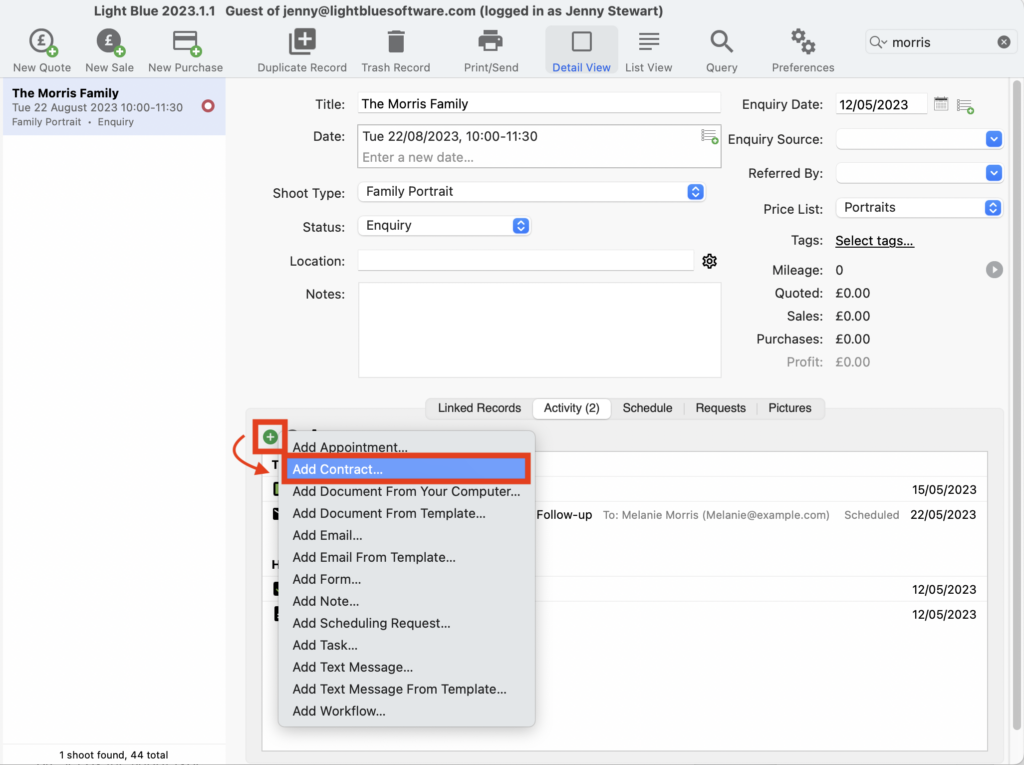
- To send a Contract it needs to be linked to a Shoot Record so head to its Activity panel.
- Click on the green “+” and choose “Add Contract…” from the drop-down menu.
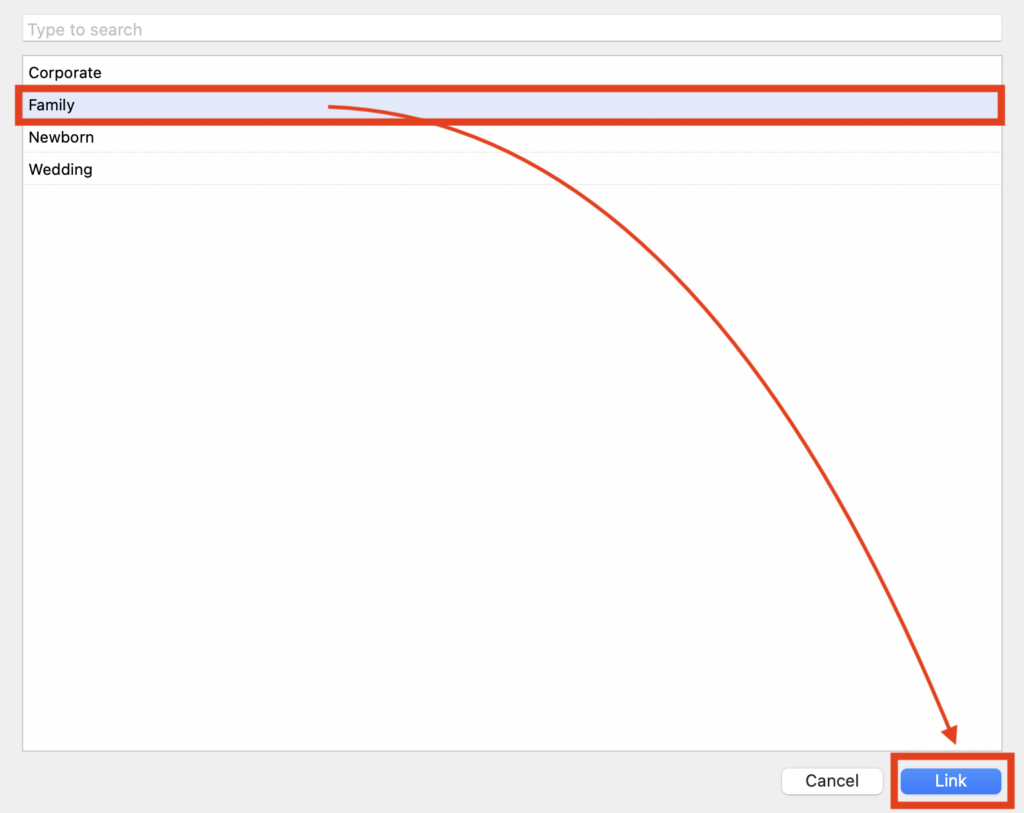
- Pick the Contract Template you wish to use and click “Link”.
Customising the Contract
Choosing the Signatories
- In the Contract tab, choose the Signatories from the list of Contact Record/s; if required you can check multiple Signatories. NB. Contact Records only appear here if they are linked to the Shoot Record with the first linked Contact Record being automatically checked when you create the Contract.

Adding a Form
- The default Form you set in the Contract Template will already be included at the bottom of the Contract tab; amend if needed.

Selecting Quotes
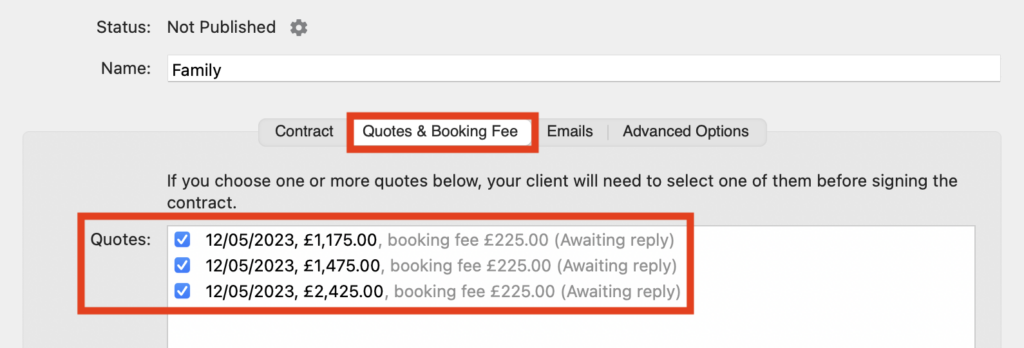
- Then in the Quotes & Booking Fee tab, check the quote you’d like your client to agree to. You can select multiple quotes giving your client the option to choose which one they want to go ahead with. You can also choose not to include a quote! NB. Quotes will only appear here if they are linked to the Shoot Record. 👉 This help article guides you through creating Quotes.
Charging a Booking Fee
- The default Booking Fee you set in the Contract Template will already be checked in the Quotes & Booking Fee tab. Amend if needed from the four options:
- ‘Don’t charge a booking fee when signing contract’.
- ‘Charge booking fee from your client’s selected quote’. 👉 This help article explains how to add a Booking Fee to a Quote.
- ‘Charge the full amount from your client’s selected quote’.
- ‘Charge a different booking fee’. NB. If you set “Charge a different booking fee” as the default in the Contract Template unless you specified the Booking Fee in your Price List you will need to add the appropriate Booking Fee to ensure your client is charged; simply click on the cog to link an Item from your Price List.

Further amends
- Make any other amends required to the Contract; as with many Templates within Light Blue they’re a starting point and, if needed, can be easily amended before sending to your clients.
- You can also change the default Client Portal Branding and email settings if required. NB. These are set by the Shoot Type.

Publishing the Contract
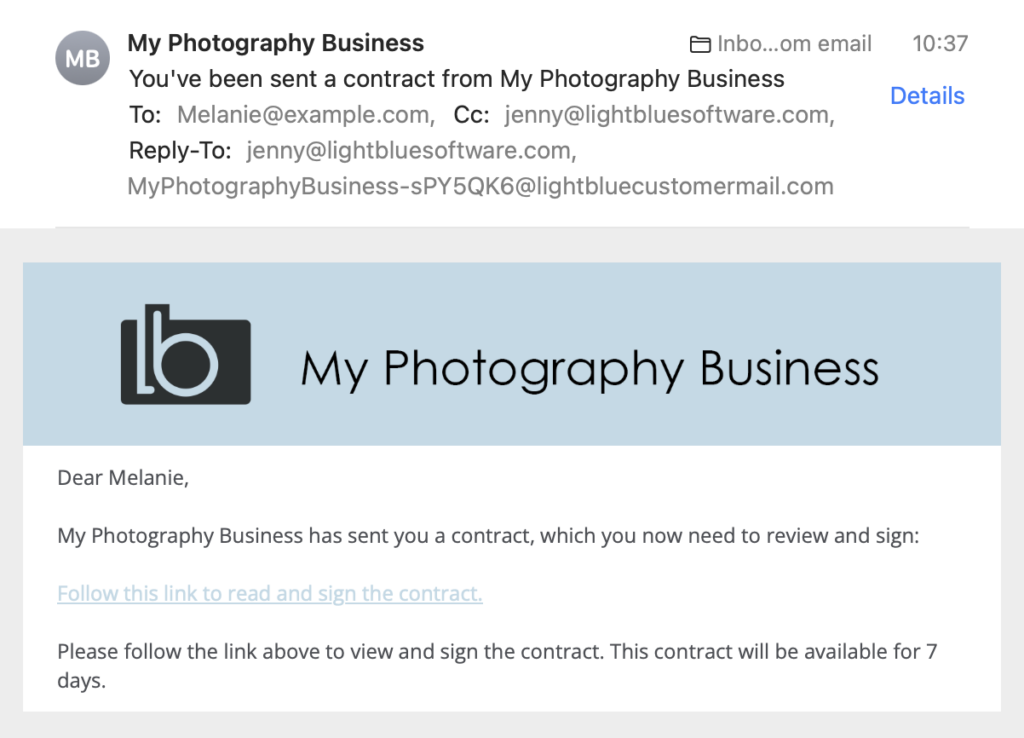
- Once you’re happy with the Contract, click “Publish” at the bottom of the Contract tab to automatically send an email to your client/s containing the link to it. NB. The wording of this email is set in the Publication Email tab of the Contract Template.

Your client’s experience
- When your client receives the Publication Email it’s very straightforward for them to click the link to take them through to their online Contract.
- If you’ve added a Form to the Contract it will be populated with the details you already have; your client simply has to complete any missing information you’ve requested.
- If you’ve added a Quote/s to the Contract, they then choose the Quote they want to go ahead with.
- And finally, they will then pay any Booking Fee you’ve charged.
- Once they’ve signed the Contract they’ll receive a PDF copy of it by email including, if applicable, any Booking Form information and the Quote they’ve accepted. 👉 This help article takes you through the steps to create your Contract PDF.
- As you can see both the email and the online Contract can be customised to reflect your business branding. 👉 And this help article guides you through setting up your online client portal branding.

Accepting a contract
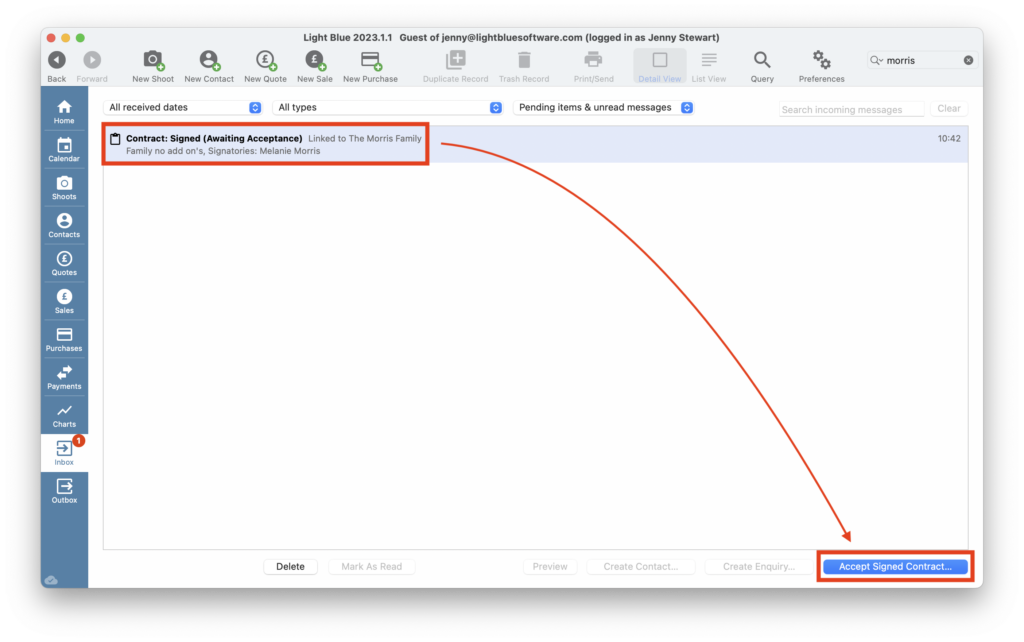
- When a Contract is signed it will appear in your Light Blue Inbox.
- Click on the “Accept Signed Contract” button and then a range of different choices will be triggered.
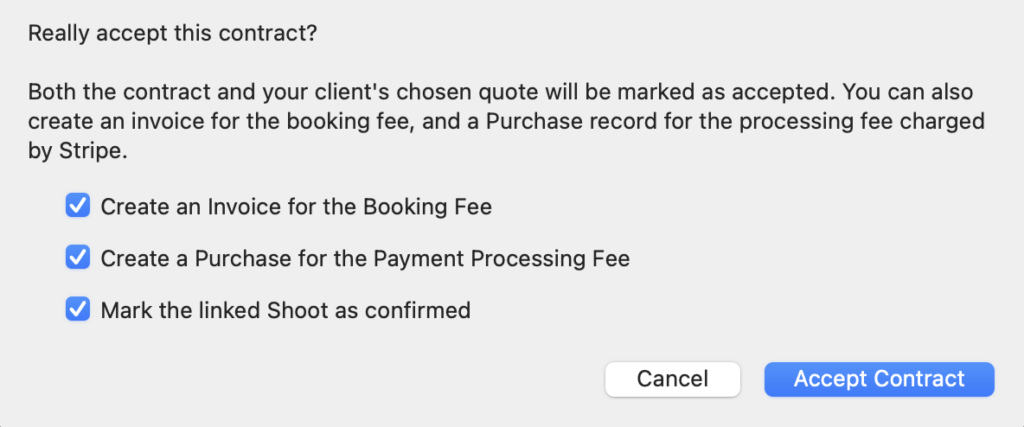
- Initially you’ll be asked if you want to create an Invoice for the Booking Fee, a Purchase for the Payment Processing Fee and whether the linked Shoot should be marked as confirmed.
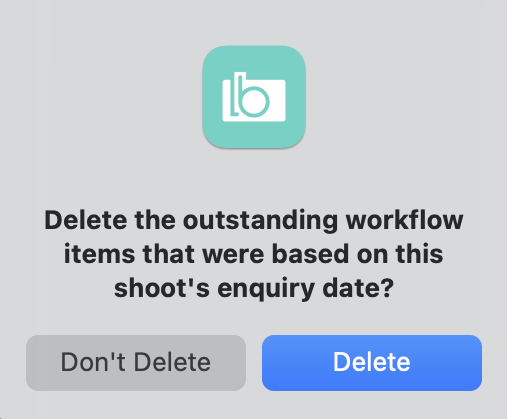
- If you’ve any outstanding Workflow items that were based on the Shoot’s Enquiry Date you’ll be asked if you want to delete them.
- You’ll then be asked which Confirmation and Shoot Date Workflows you’d like to add; these are automatically populated with the Defaults you set for the Shoot Type but can of course be changed if needed.

- And then finally you’ll be asked if you want to update the Shoot Record with the information from the Booking Form.
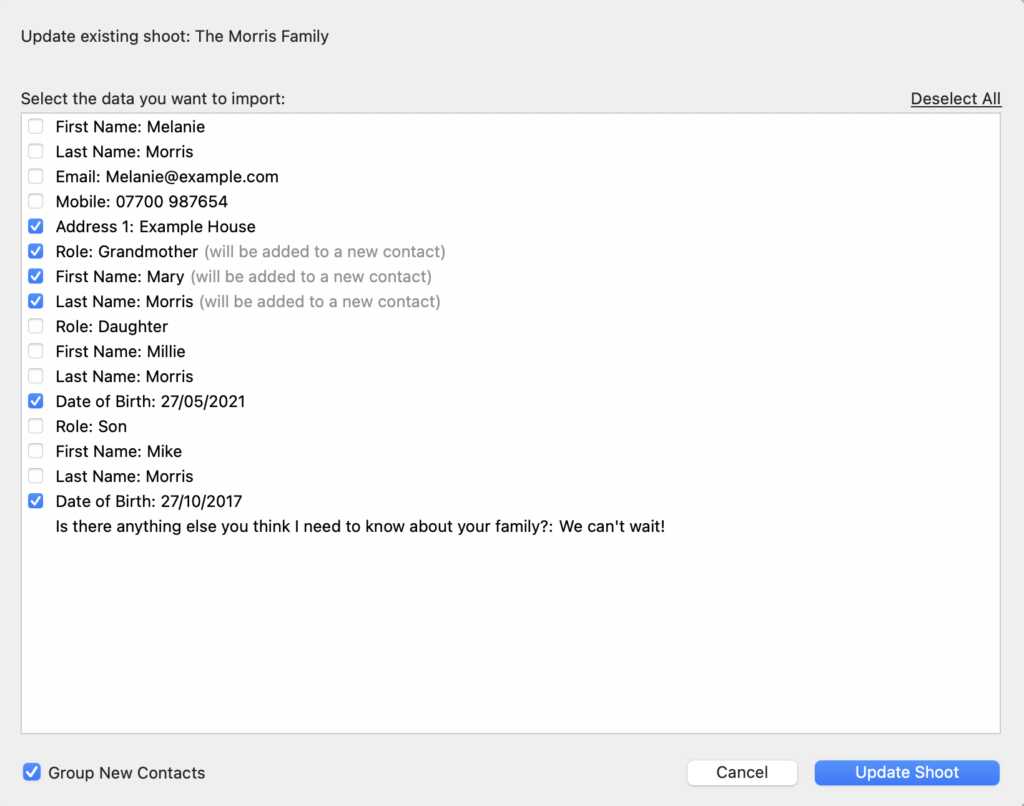
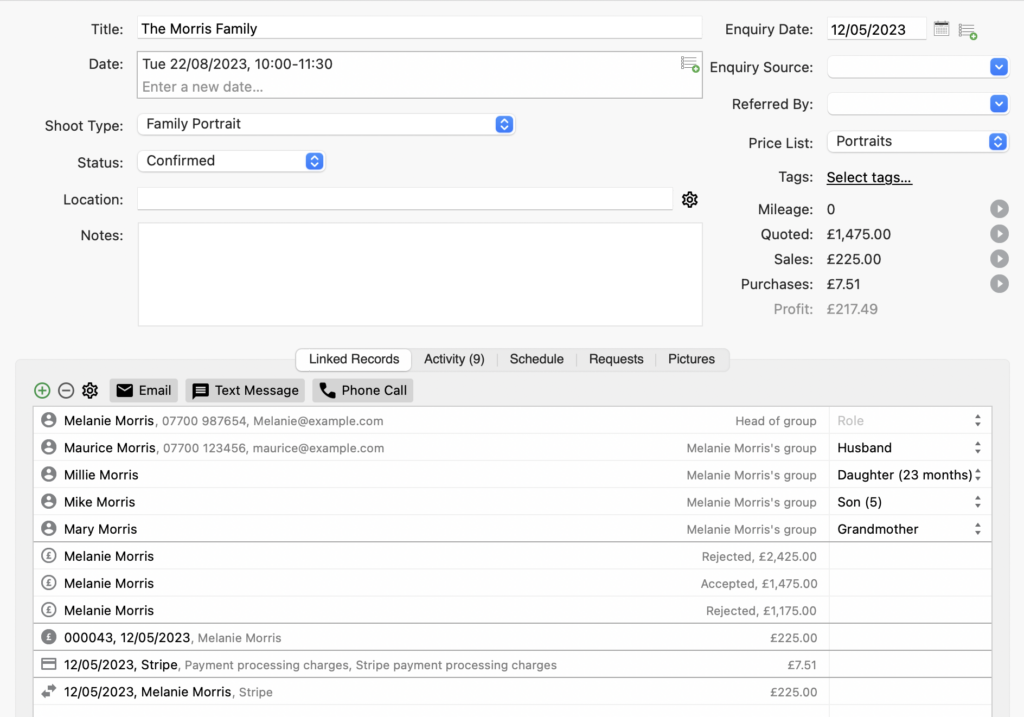
- All the information and linked Records will now show in the Shoot Record.
