Search for answers or browse our knowledge base.
Can't find the answer you need here? Contact our support team and we'll gladly help you.
Mastering your workflow
Introduction
When you’ve only got one or two shoots in your diary, it’s easy to remember all of the important things that you need to do. However, once you’re at the stage where you’re dealing with multiple jobs that are all at different stages, keeping track of what needs to be done next can be a headache!
Whether or not you’ve planned it that way, every successful photography business has a series of steps that you need to go through to make sure that you’re delivering the best possible service to your clients. Light Blue’s powerful workflows can add a list of tasks and automated messages based around the date of the shoot (or another important date), so you are reminded with a task when you need to do something and important emails and text messages are sent automatically.
👉 Need more help? Book a free 1:1 session.
Get a guided walkthrough with some starting templates
Designed to be taken at your own pace, there are eight bite-sized modules to go through, and we’ve included several templates to shortcut that process even further for you!
👉 Follow the Workflow for Portrait Photographers course, here.
What is a workflow?
A workflow is a list of tasks and messages that are based around an important date. Tasks can become due, and messages scheduled to be sent, a set number of days before, on or after an important date.
You will have several different important dates for a shoot, so you can set up a different workflow to be based around each of them.
For example, you may have:
- An enquiry workflow based on the date that your client first got in touch with you.
- A confirmation workflow based around the date that your client confirmed that the shoot was definitely going ahead.
- A shoot workflow based around the date that you are taking the photos.
- Product or marketing workflows based around any date you like.
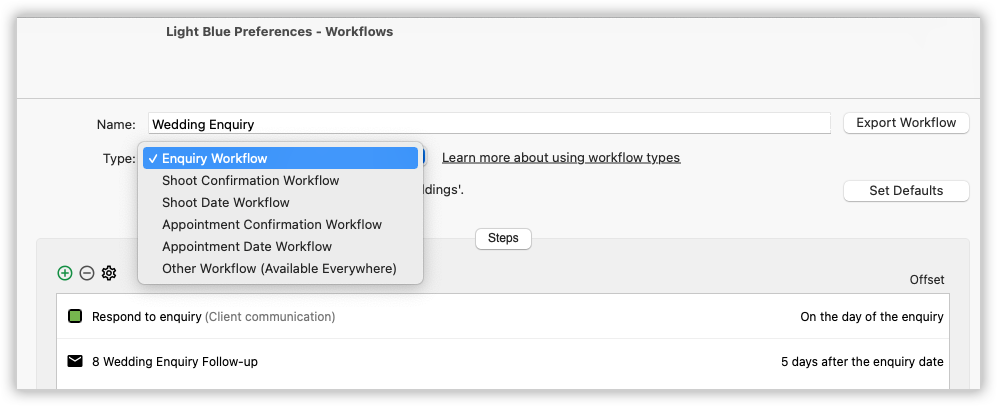
Workflow types
When adding workflows to shoots and appointments, Light Blue will show the workflows of the relevant type so can choose the workflow that’s right for the situation.
👉 Learn more about the different types of workflows that you can use in Light Blue here.
Setting up a simple workflow
You can set up workflows in the Preferences window, in the Workflows section. If you want to create a new workflow, click the ‘Add Record’ button in the toolbar. You can add new steps to a workflow by clicking the plus button, and edit an existing step by double-clicking it.
In this example, there’s a workflow called Enquiry, and within that, two tasks: the first is ‘respond to enquiry’, and the second is ‘follow up enquiry’, a week later.
Different items that you can include in a workflow
Tasks
Tasks are the most basic part of a workflow. These are reminders that would appear on your to do list as tasks to be completed.
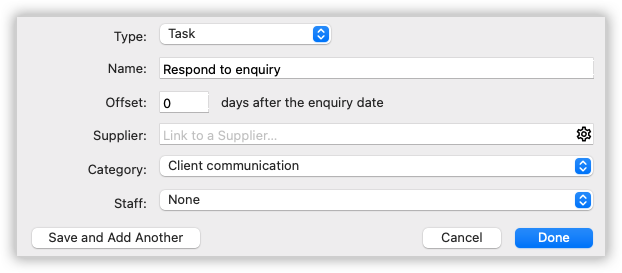
Name: A short description of the task that you wish to complete. For example “check equipment“, “edit images“ or “ make follow-up phone call“
Offset: The number of days before or after the important date that the workflow is based around when this task will become due.
For example, if the workflow is going to be based around the date of the shoot and you want the task to be due the day before the shoot, the offset would be -1. If the workflow is going to be based around the enquiry date (the date that you received the enquiry) and you wish to have a task due one week later, the offset would be 7 days.
Staff: Tasks can be assigned to specific staff members within your team. If a certain staff member always undertakes a certain task, for example you have a dedicated editor, then the task can be assigned to them. If you’re not sure, leave this blank.
Category: You can group your tasks into categories. This is helpful when you want to concentrate on a particular type of work (for example doing all of your post production at once). You can create as many task categories as you like. Some typical examples would be post production, marketing, admin, or phone calls.
Emails
When you include an email in a workflow, the template message will be scheduled and sent automatically. If your email template uses mail-merge tags, then light blue will use the most up-to-date information from the shoot and contact record when sending the message. This means that if you’ve changed some details about the shoot between and in the workflow and the message getting sent, the right details will be included in the message that goes to your client.
👉 Want some inspiration? Read our guide on sending automated messages to your clients.
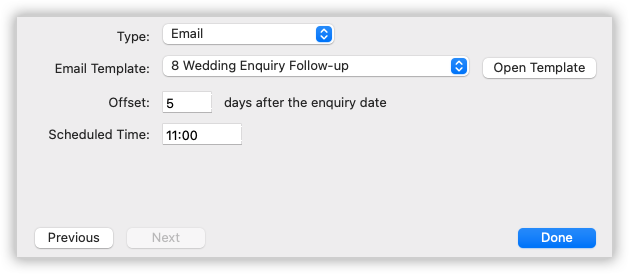
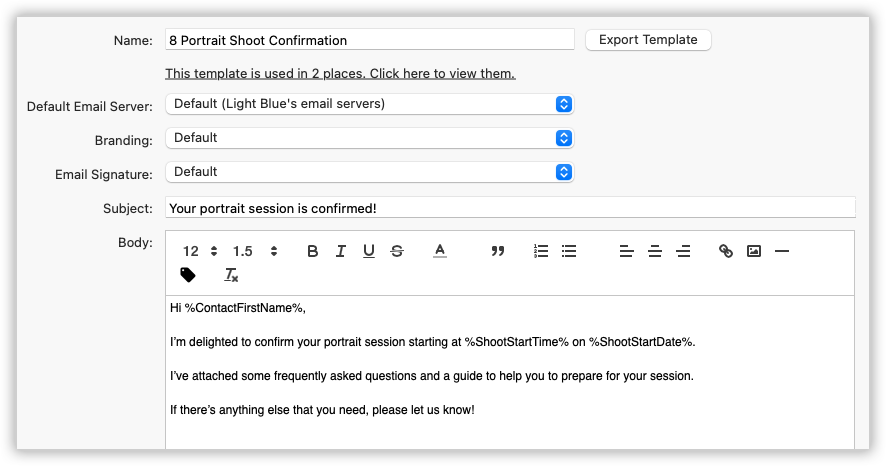
Email template: The email template that you want to use. 👉 Read more about email templates here.
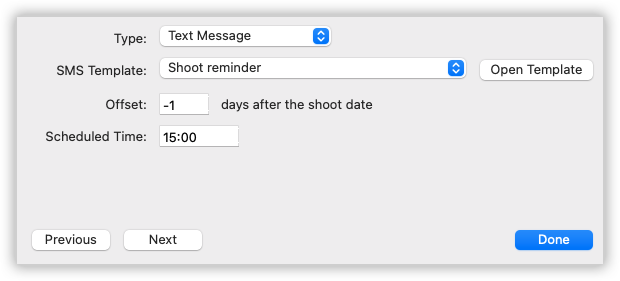
Offset: The number of days before or after the important date that the workflow is based around, that you want the message to be sent. For example if you want to send a reminder email to your portrait clients a couple of days before the shoot, the offset would be -2. If you want to send a follow-up email a few days after the enquiry, the offset could be 5 (five days after the enquiry). If you wanted to send a confirmation email on the day that your client confirmed the booking, you could set the offset to 0.
Time: if you want the email to be sent at a particular time of day, then you can set a time here. We will use your local time zone to send the message. If you leave this time blank, then we’ll send the message at 9am.
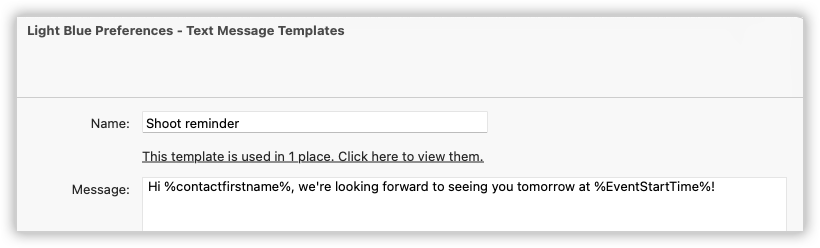
Text messages
Similar to emails, it’s possible to schedule text messages to be sent as part of a workflow as well. All of the same principles that apply to emails also apply to text messages in workflows.
👉 Want some inspiration? Read our guide on sending automated messages to your clients.
Forms
New in Light Blue 2023.1
You can also include forms in a workflow, which allows you to automate double-checking your clients’ details and requests in the run-up to a shoot. For example, you could include a “check wedding schedule” step in your workflow a month before the wedding, or a “check the family’s details” a week before a family portrait session. The workflow would automatically email one of your forms to your client on the date that you’ve chosen and when they fill it in it will appear in the Inbox in Light Blue.
Light Blue’s forms are pre-filled with the information you already have about your clients and shoot, which makes it really easy for your clients to fill out because they only need to type in new or updated information.
To include a form in your workflow:
- Add a step.
- Set the “Type” of the step to “Form”.
- Select one of your form templates.
- Use the offset and scheduled time settings to tell Light Blue when to send the form to your client.
Adding workflows to shoots
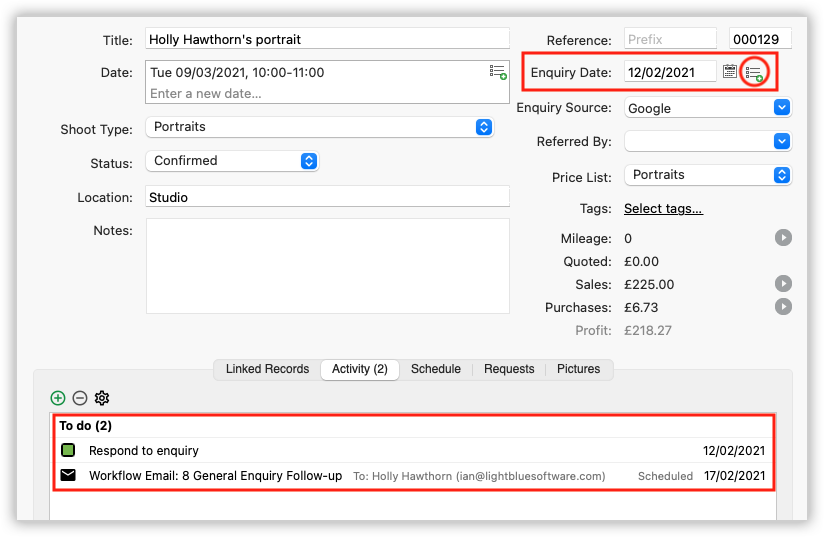
You can add the enquiry workflow to it by clicking the workflow icon next to the enquiry date. You’ll see that the two tasks have been added to the Activity panel.
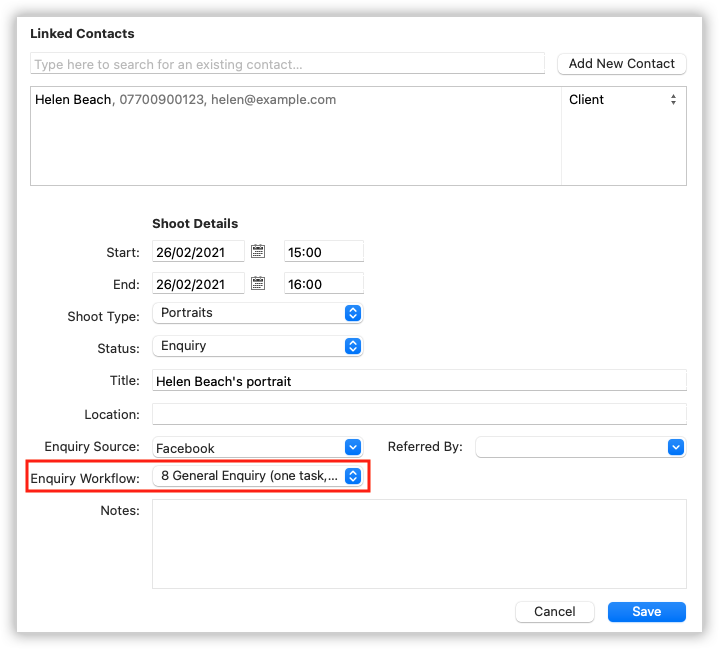
If you’re creating a new shoot, there’s an option to choose the enquiry workflow that you want to add to the shoot once it’s created.
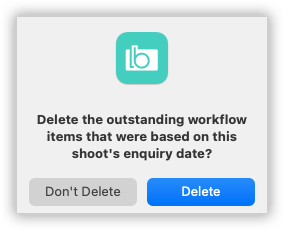
If you change the status of a shoot from “Enquiry” to “Confirmed”, Light Blue asks you if you want to keep or remove any uncompleted tasks and unsent messages from your enquiry workflow. After all, you may not want a reminder to follow up an enquiry that has already been booked!
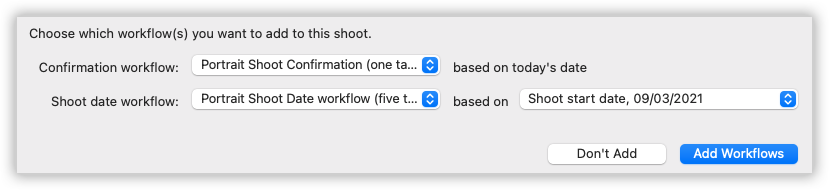
Light Blue then asks if you want to add the tasks from both the shoot confirmation workflow, which will be based around today, and the weddings workflow, based around the shoot date.
Looking on the “Activity” panel, you’ll see all of those tasks in there. They’re also showing up on the Home screen in the task manager, which is where you can see all of the tasks that are due from all of your shoots.
Read on to learn how to set default workflows so that the right workflow is always used at the right time, without you needing to make a choice.
Setting default workflows
Once you’ve created your workflows, you can make sure that they’re used at the right time by setting them as default workflows.
If all your shoots will use the same workflows, you can do this in the “Shoots” tab of the “General” section of the Preferences window.
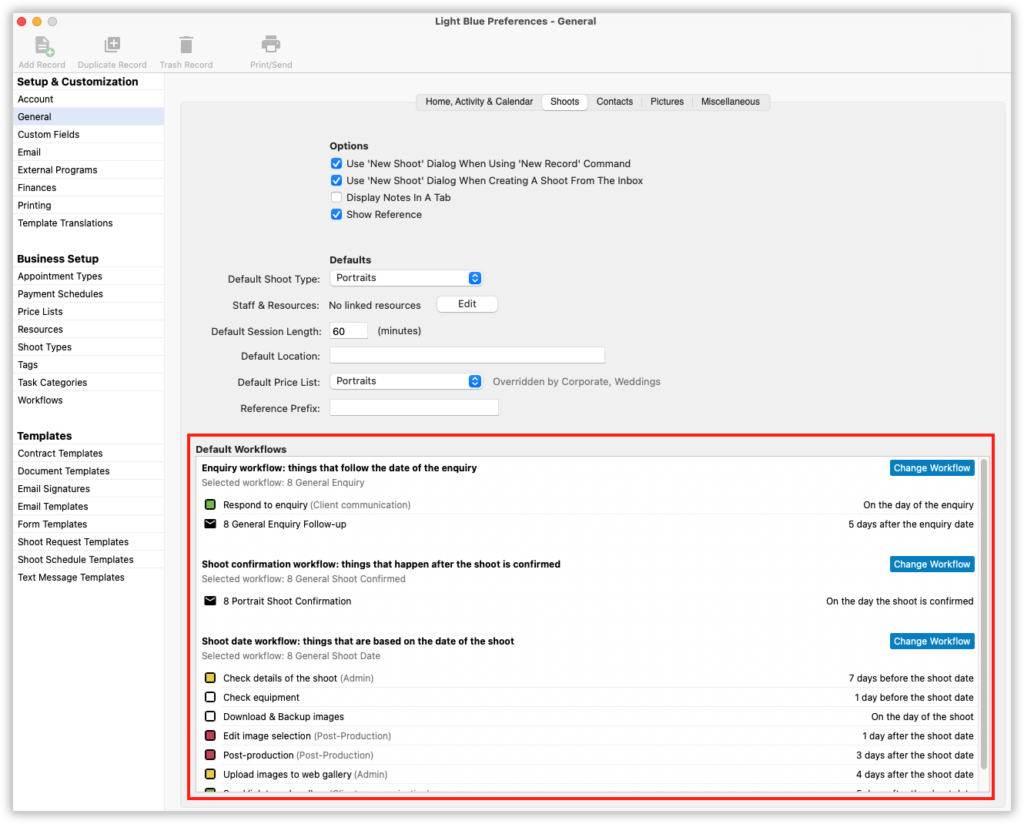
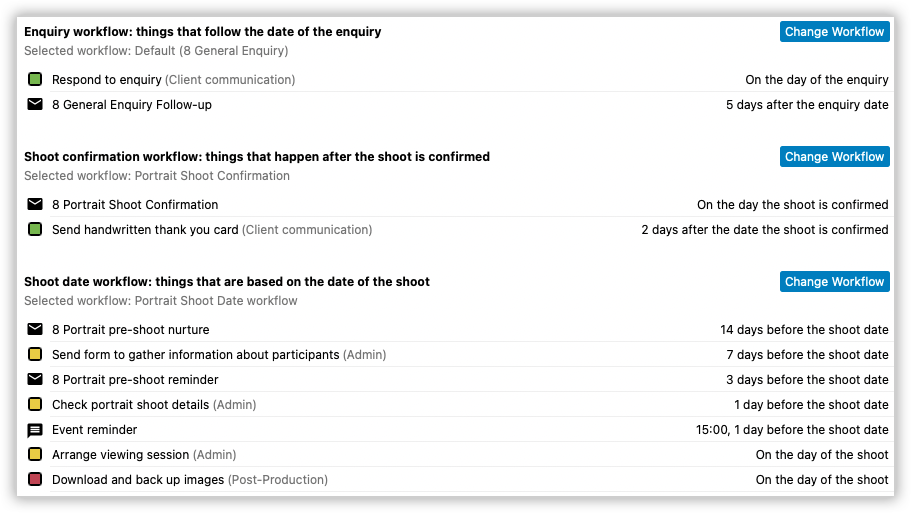
Here you can see that the “General Shoot Date” workflow is set as the default shoot workflow and will be added relative to the date of the shoot.
The “General Shoot Confirmation” workflow is set as the default confirmation workflow, this workflow will be added relative to the date that the shoot changes from an enquiry to a confirmed shoot.
The “General Enquiry” workflow is set as the default enquiry workflow, and will be the first choice when I click on the add workflow button next to the enquiry date in a should record.
If some shoot types will use a different set of workflows then you can set different defaults for each shoot type, in the shoot types preferences.
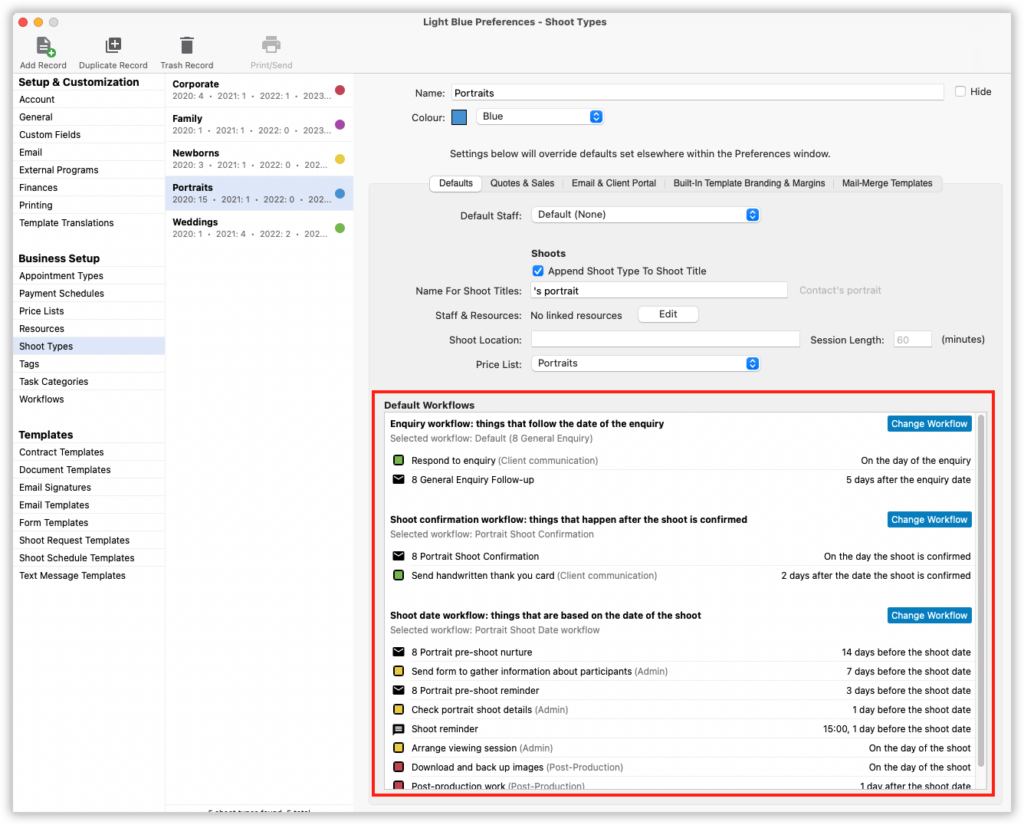
In the example above there’s a different set of workflows that are used for portrait shoots, so these have been set separately in the Portraits shoot type. When working with a portrait shoot, Light Blue will use these workflows instead.
Also note that the enquiry workflow is set to “Default” – that means it’ll use the workflow that’s set on the “General” preferences.
Example workflows
To help you to get off to a good start, we’ve prepared some example workflows for you to use. 🗄 You can download them from here.