Search for answers or browse our knowledge base.
Can't find the answer you need here? Contact our support team and we'll gladly help you.
How to start using Light Blue as a diary
With so many features available within Light Blue it can perhaps feel a bit overwhelming to get up and running or even to know the best place to start.
However, if you want to use Light Blue more, whilst at the same time getting more organised with your business, using it as a diary for your shoots is a great way to get going.
In this video, Ian and Sarah walk you through how to go about this. Though if you prefer to learn new things by reading, just head to the written steps below the video!
Essentially what we’re going to do is begin to replace the diary that you already have in place for your shoots; whether that’s a paper diary or perhaps an online calendar.
And setting up your shoots in Light Blue is a great foundation for using the app more fully. Once you’ve got this basic step in place it’s much easier to gradually start to build on the features that you use; indeed some features such as Contracts aren’t possible unless you have an associated Shoot record.
And what’s great is that the shoots you add to Light Blue can be automatically published to your online calendars to save you from entering them twice!
Setting up your Shoot Types
The first thing we have to do is create these for the different areas of your business.
Now you may wonder about the benefits of this, but doing so allows you to tailor elements within Light Blue to that particular Shoot Type; branding, finance details, workflows, and the words you use in client communications can all be adjusted. And of course, with different Shoot Types you can analyse your business in much more detail.
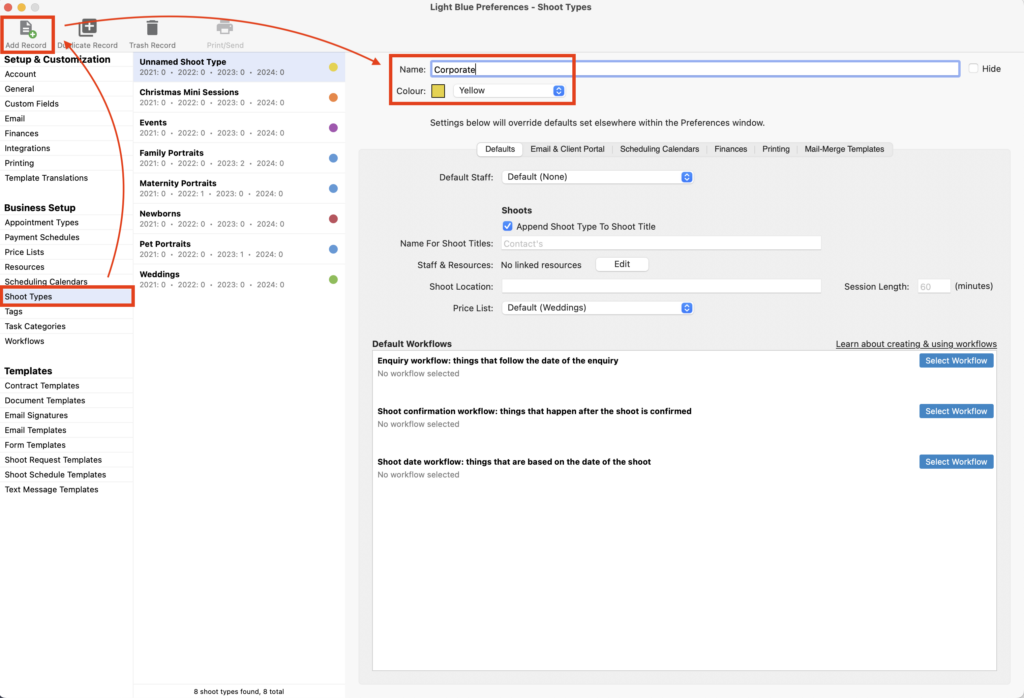
- In Preferences head to the “Shoot Types” section.
- Light Blue has already created a few for you, but if you need to add any more, click on the “Add Record” in the menu bar.
- Name the new Shoot Type.
- And if needed, change the Colour; a handy feature so you can see at a glance in the Light Blue Calendar what type of shoot you have on and when. NB. At this stage, we’re only building our foundation so no need to add any other details.
Manually adding a Shoot record
As you start to use more of Light Blue’s features you’ll discover automatic ways that shoots can be added to Light Blue but let’s stick to a simple manual addition for now.
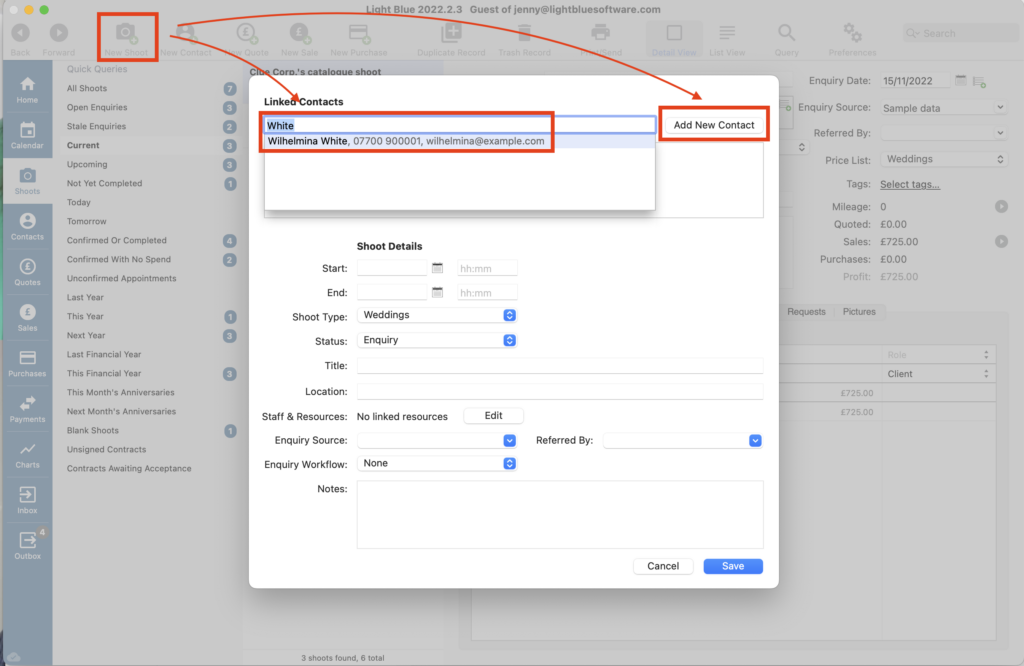
- Click on “New Shoot” in the main menu bar.
- Start to type the name of the contact.
- If they’re already a contact in Light Blue, their full details will appear and you can select their details by clicking on them.
- If they’re a new contact, you can click the “Add New Contact” button to add them to the Shoot record and into Light Blue with the contact information you have.
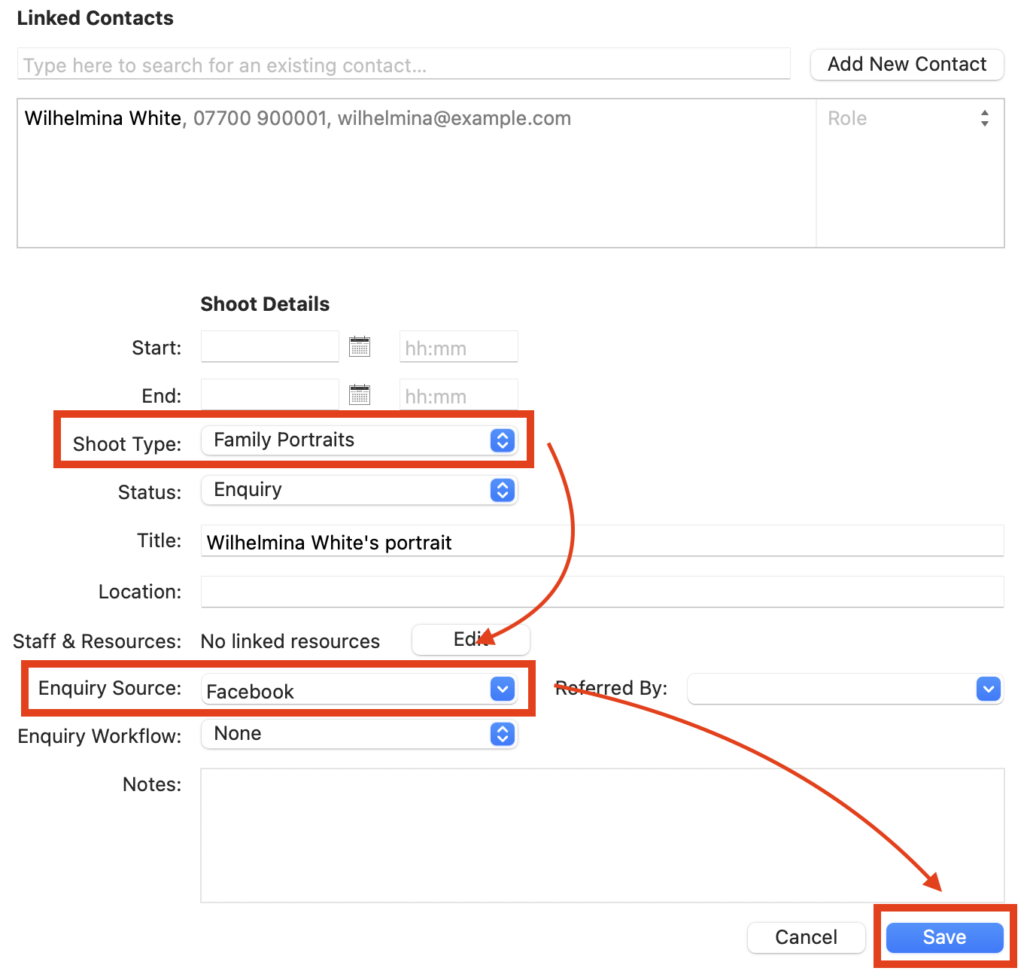
- Complete the rest of the shoot details making sure to choose the correct “Shoot Type”.
- If you don’t have a date it’s quite okay to leave the date field blank – just keep the Status as “Enquiry” to help you keep track of your enquires.
- And if you know how your client found you, it’s great to fill in the “Enquiry Source” field so you can track the performance of your marketing activity.
- Click “Save”.
Adding a date to a Shoot record
If you didn’t know this when you created the Shoot record there are two ways you can add a date; directly to the Shoot record or through the Calendar view.
Directly to the Shoot record
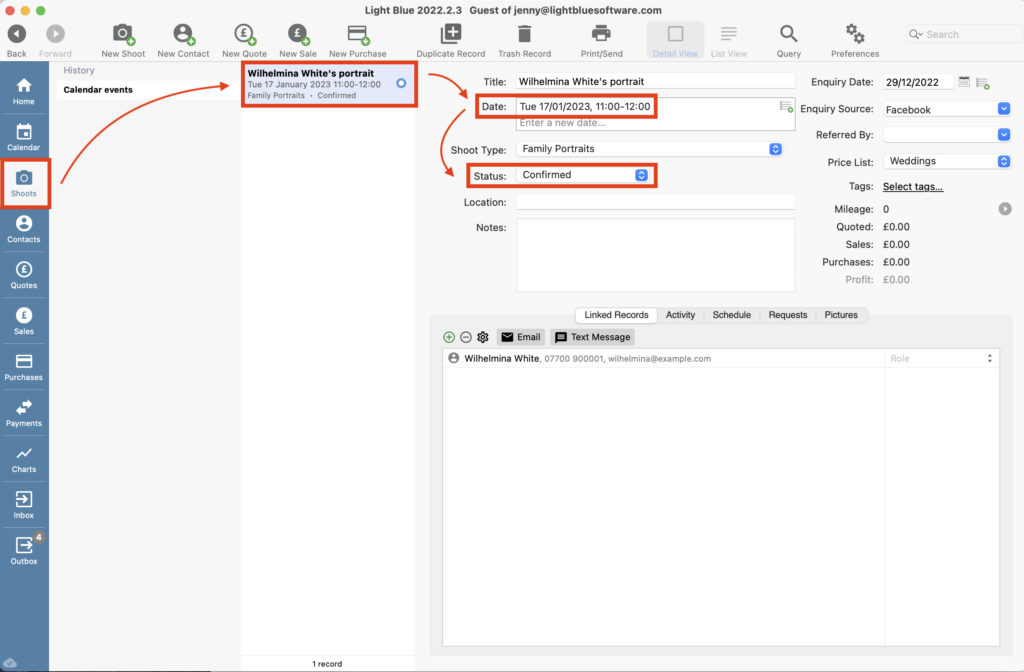
- Find the relevant shoot in the “Shoots” section of Light Blue.
- Click on “Date”.
- Either type in the date or use the date picker.
- Add the time.
- And if applicable, update “Status” to “Confirmed”.
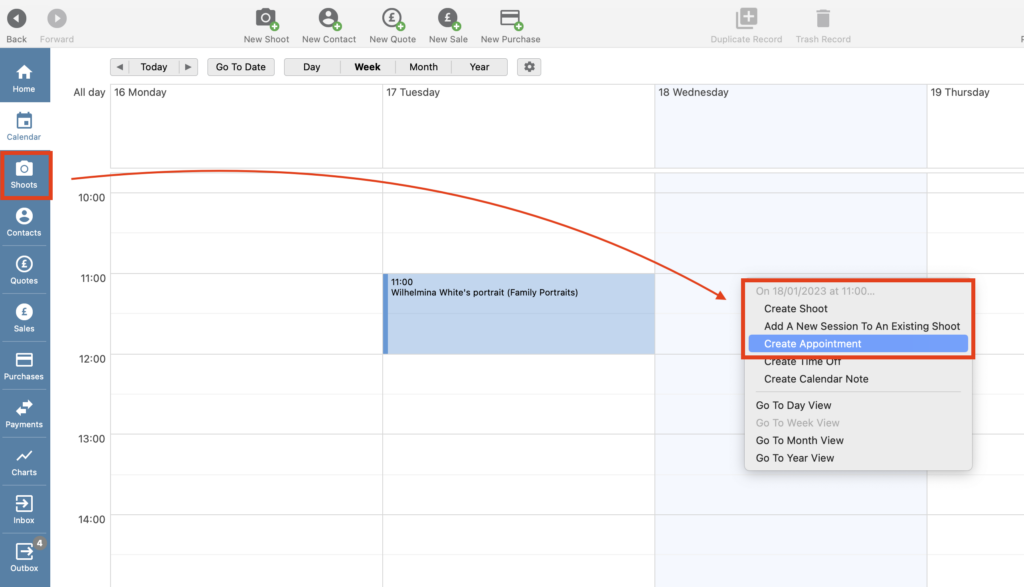
Through the Calendar view
This method is handy when you want to see other shoots and appointments in your diary so you can pick the best time.
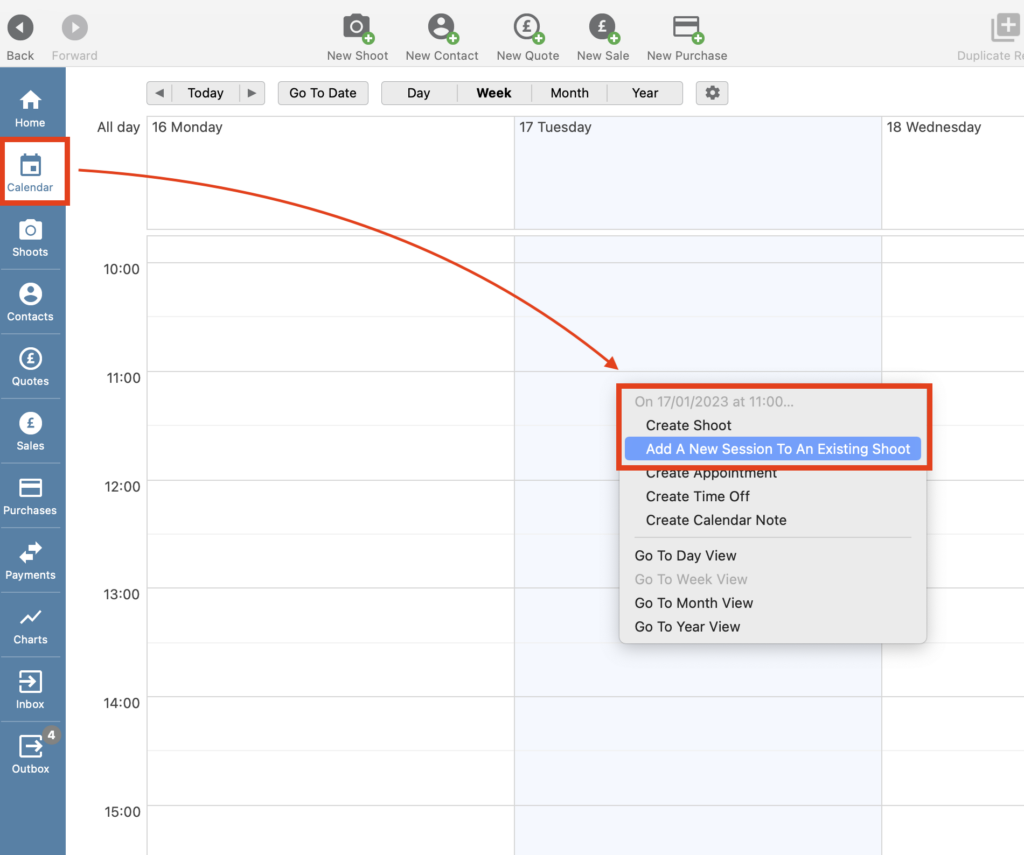
- Click on the “Calendar” section of Light Blue.
- Right-click on the date and time.
- Choose “Add A New Session To An Existing Shoot”.
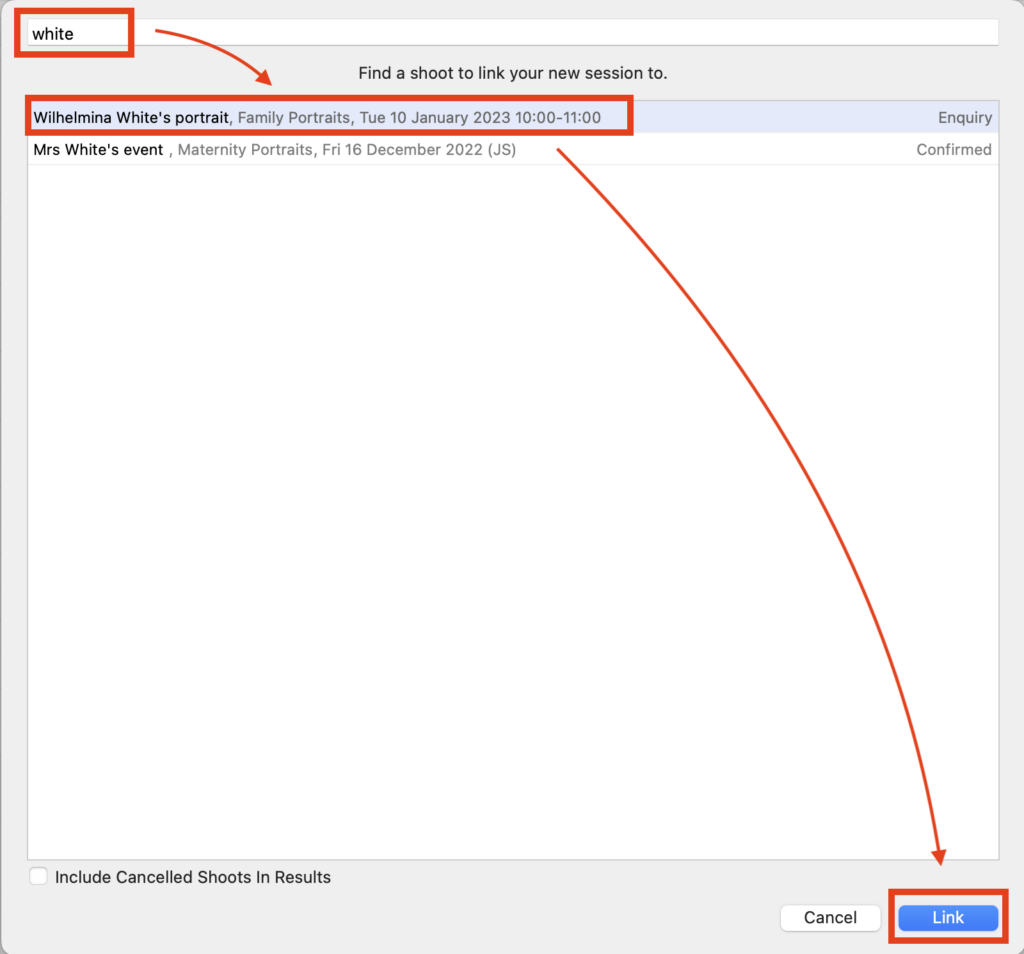
- Start to type the name of the contact and pick the relevant shoot.
- Click “Link”.
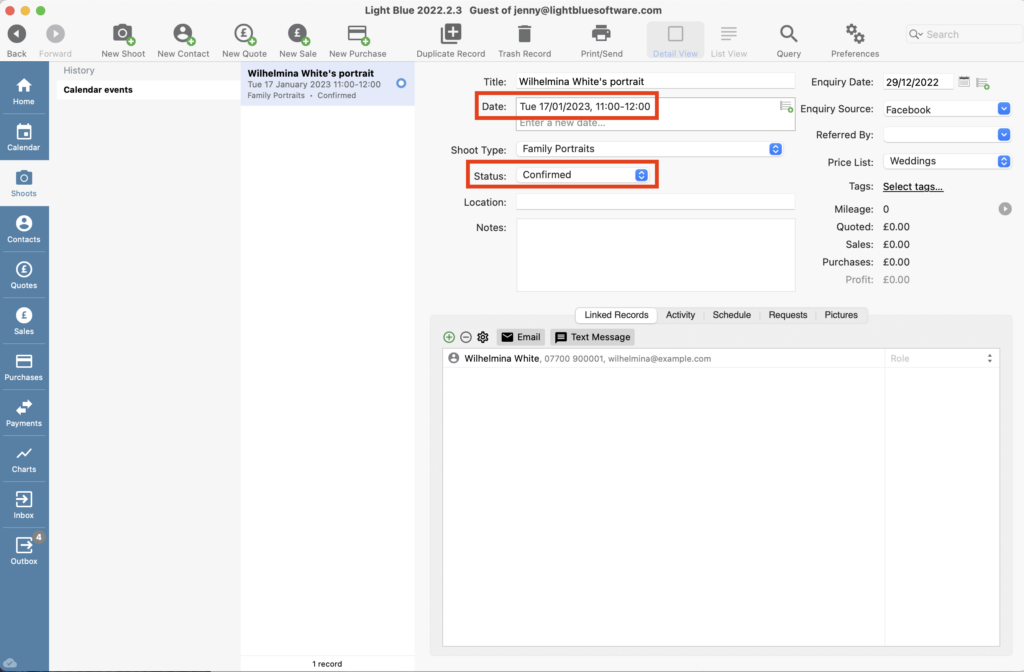
- The date and time are now showing in the Shoot record and if applicable, update the “Status” to “Confirmed”.
Alongside shoots, it’s likely you’ll have other meetings, appointments or scheduled calls that’ll you want to include in your Light Blue diary. And as we did with shoots, it’s helpful to create different Appointment Types.
Setting up different Appointment Types
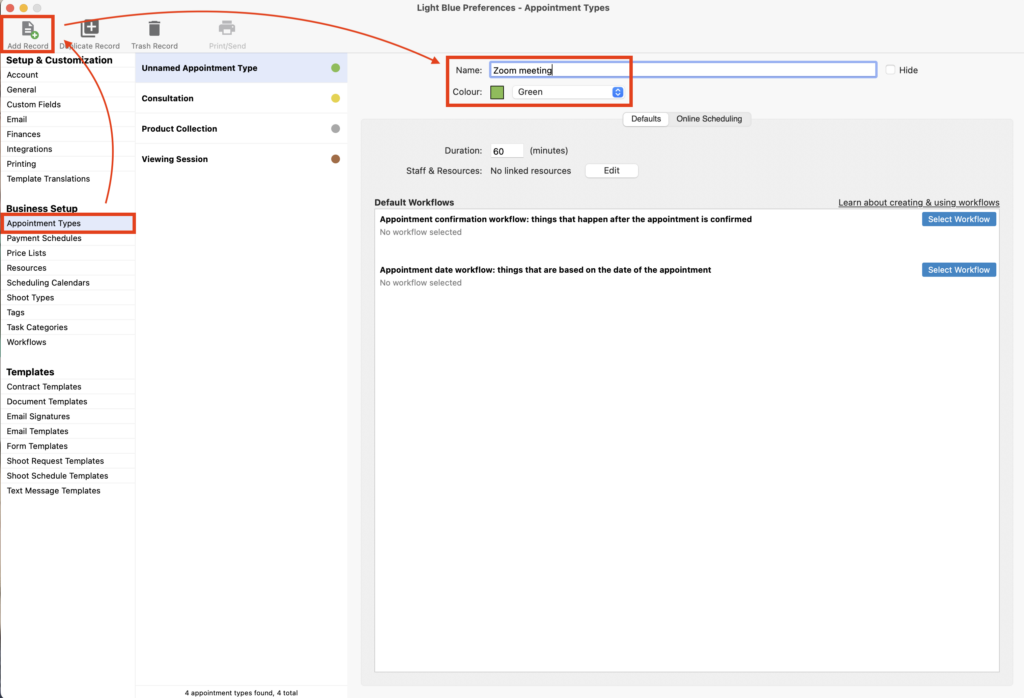
- In Preferences, click on the “Appointment Types” section.
- Light Blue has already created a few for you, but if you need to add any more, click on the “Add Record” in the menu bar.
- Name the new Appointment Type.
- And if needed, change the Colour; a handy feature so you can see at a glance in your Calendar what type of appointment you have on and when. NB. At this stage, we’re only building our foundation so no need to add any other details.
Adding an Appointment to your diary
As with shoot dates, there are two ways you can add these in; directly to the Shoot record or through the Calendar view.
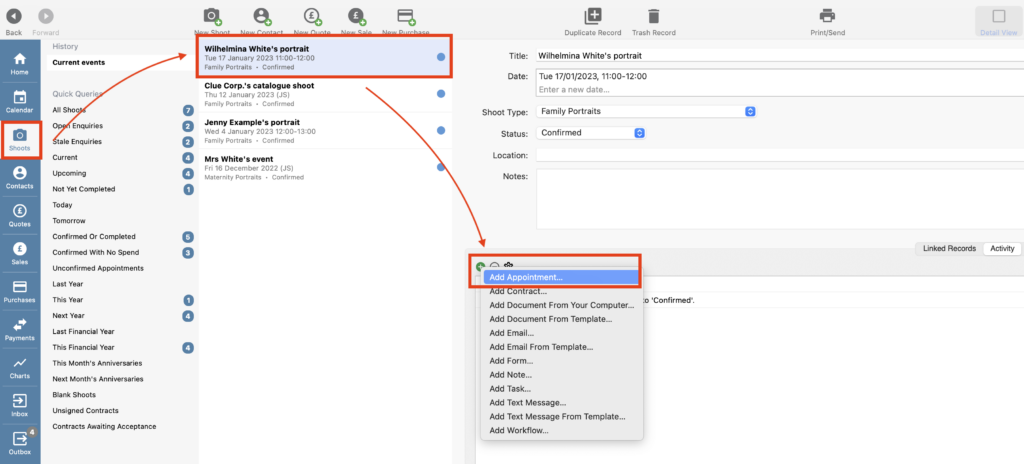
Directly to the Shoot record
- Find the relevant shoot in the “Shoots” section of Light Blue.
- Click on green “+” in the “Activity” tab.
- Choose “Add Appointment” from the dropdown menu.
- Add the details making sure the correct Appointment Type is chosen.
Through the Calendar view
- Essentially this is the same as adding a shoot date, however when you right-click on the date and time, choose “Create Appointment” instead.
Linking Light Blue with other calendars
Whilst it’s great that all your Shoots and Appointments are now showing in your Light Blue Calendar you’re still likely to have an online calendar for other things you’re doing and you’ll want to continue to be able to see everything in one place.
The great news is that Light Blue can automatically publish all your Shoots and Appointments to your online calendar, so there’s no need to manually duplicate entries. And there’s a variety of options available too!
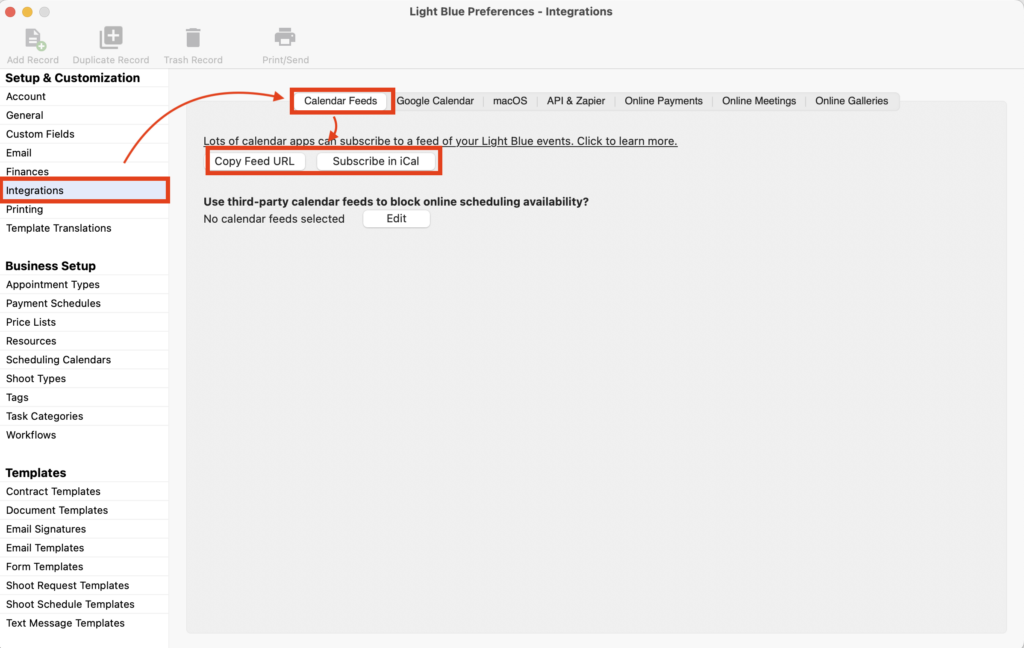
- In the “Integrations” section of Preferences go to the “Calendar Feeds” tab.
- To link to an Apple Calendar, click on “Subscribe in iCal”, complete the details and follow the prompts to confirm your subscription to the calendar feed.
- To link to an Outlook Calendar or if you want to share your Light Blue calendar feed URL with someone who doesn’t have access to your online calendar, click on “Copy Feed URL”, complete the details and add (ie paste) the calendar feed URL into the online calendar.
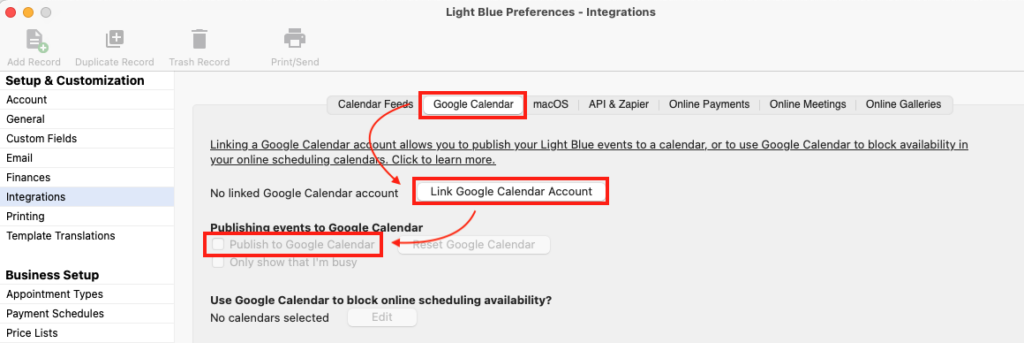
- To link to your Google calendar, click on the “Google Calendar” tab, then the “Link Google Calendar Account” and follow the authentication steps. Once your Google and Light Blue accounts are linked check the “Publish to Google Calendar” box.
Next steps
Keep on adding your Shoots and Appointments into Light Blue and once you’re doing this consistently you can start to build on the features you’re using in Light Blue.
Some of the first things you might want to consider are:
- Creating sales and invoices:
👉 This guide shows you how to create a sale.
👉 And this guide shows you how to turn that sale into an invoice. - Creating workflows:
👉 This guide gives you an introduction to workflows. - And of course our Getting Started guide gives you a few more things to look at such as contact forms, branding, adding other team members and expenditure!
👉 Here’s the guide to getting started with Light Blue.
Further help
We want you to experience as many of the fabulous benefits of Light Blue that suit you and your business, so if you’re needing a bit more help or are stuck on anything, we’re here to help!
Either take advantage of our email support; it’s free, fast and helpful.
👉 Simply send an email to [email protected].
Or perhaps some online one-to-one screen sharing would be more useful?
👉 Schedule an appointment with us.And finally, if you’re on Facebook, we have a private group where a lot of questions are asked (and answered!) by our community.
👉 Join our private Facebook group.