Search for answers or browse our knowledge base.
Can't find the answer you need here? Contact our support team and we'll gladly help you.
Resources: how to set up staff, rooms and equipment
This tutorial is going to show you how to set up Staff, Equipment, and Room Resources within Light Blue so that you can assign them to your Shoots, Appointments, and Tasks.
Why assign Resources to Shoot and Appointments?
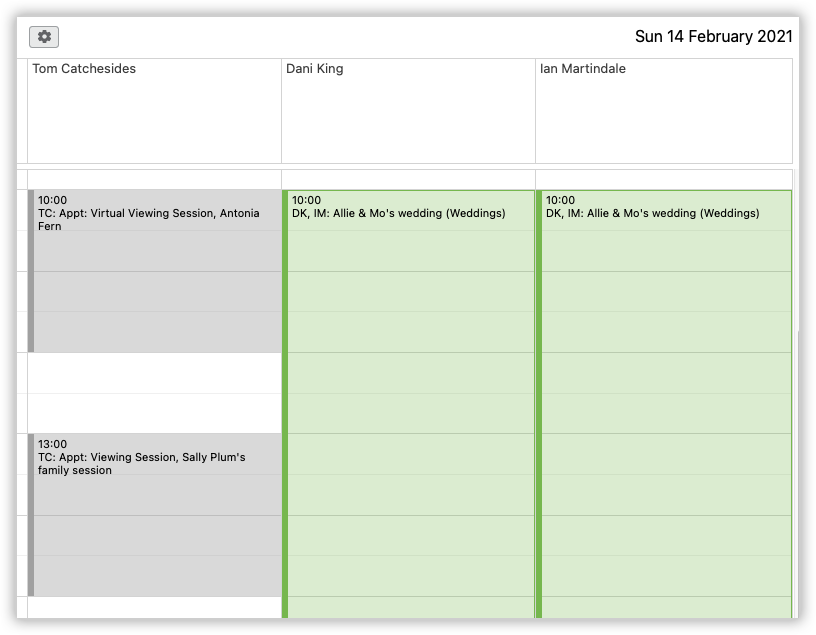
By assigning Resources to Shoots & Appointments, not only can you keep tabs on who’s doing the event and what equipment and room they’re using, but also check that the event doesn’t clash with another booking. This is because Light Blue not only takes the time and date into account when displaying clashing events, but also all the Resources linked to it; two events at the same time but with different staff, rooms or equipment won’t clash, but if they share any resource they will.
Setting up Resources
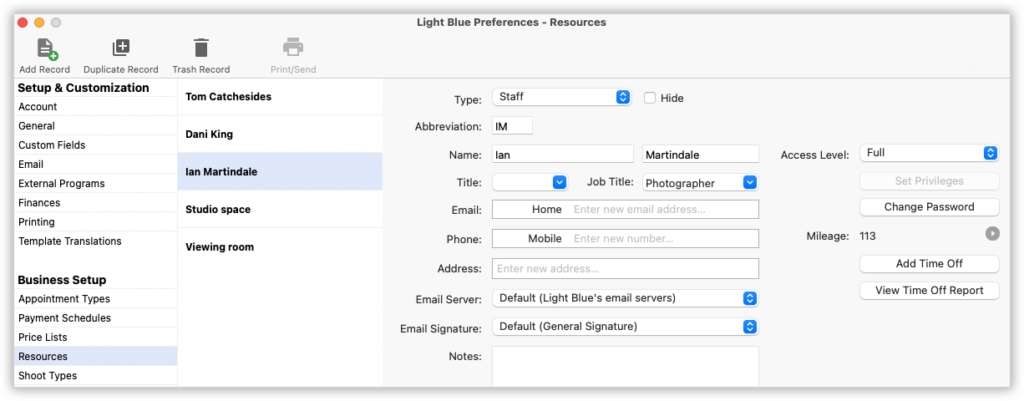
To add resources, go to the “Resources” section of the Preferences pane. There you can add Staff, Rooms, and Equipment. Having a look at each of these types, you’ll be able to see the different things you can enter. For Staff, you can add the name and contact details; for Rooms, the name and notes, and the same for Equipment.
Useful things to know about Staff Resources
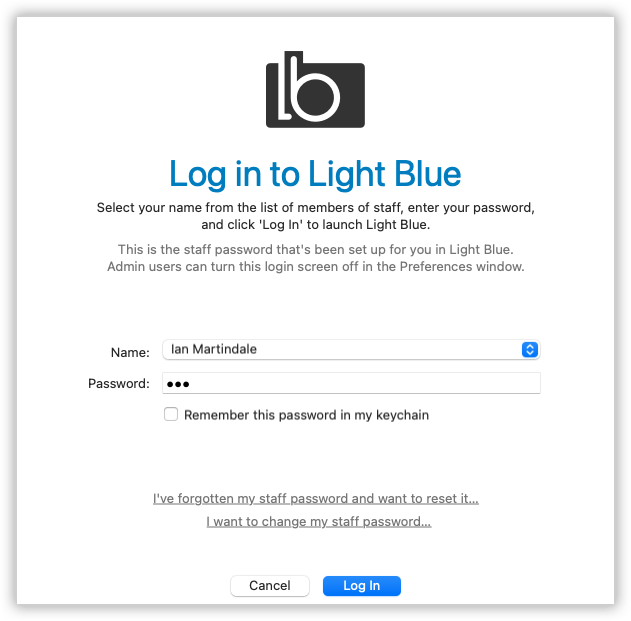
Setting each staff member up in Light Blue means you can to do various things. Each staff member can have their own login allowing you to secure the app and make sure that each member of staff only has access to the information that you want them to be able to see. You can also assign Tasks to individual staff members giving you an overview of their individual workloads and they can easily filter the Task Manager to view their own Tasks. They can also send emails from Light Blue using their own email address and signature.
👉 Learn more about using staff passwords and logins, here.
👉 Learn more about restricting access to Light Blue information, here.
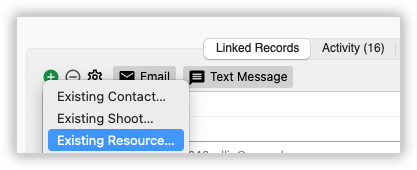
How to add a Resource to a Shoot Record
- Once you’ve set up your Resources, you can add them to a Shoot Record through the “Linked Records” panel.
- Once you’re there, click the plus button.
- Then “Existing Resource”, and choose which ones you want; you can link several Resources in one go.
How to add a Resource to an Appointment Record
- You can also add Resources to an Appointment Record; simply open the Appointment Record.
- Then click on the “Edit” button alongside “Staff & Resources” and choose the ones you want.

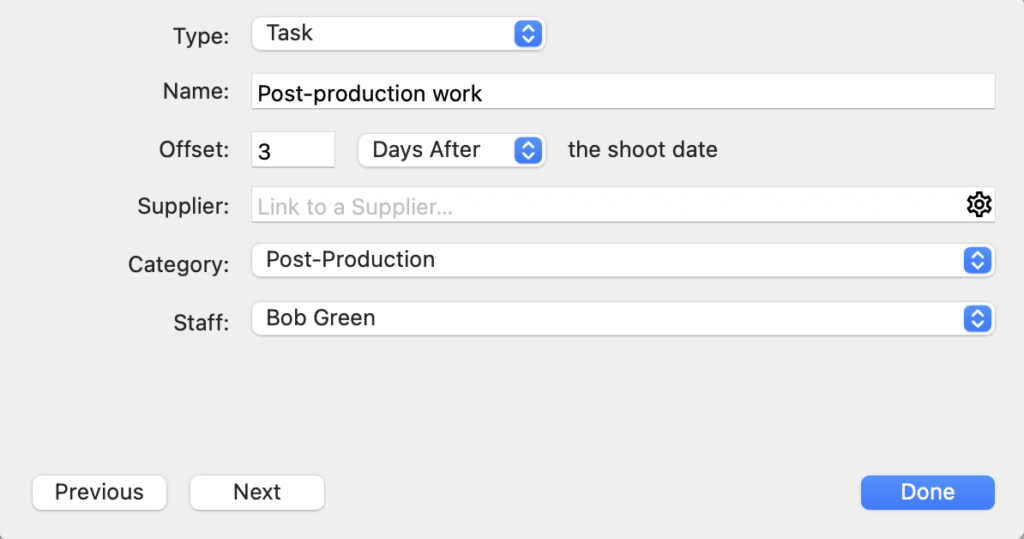
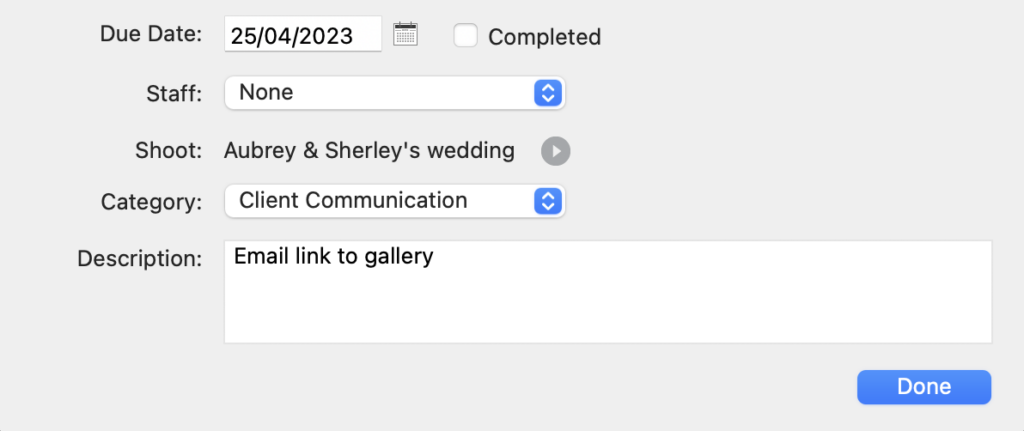
How to add a Staff Resource to a Task
- And finally you can Staff Resources to a Task; simply open the Task.
- Then from the drop-down menu alongside “Staff” choose the one you want.
Setting Default Resources
Whilst you can add Resources to Shoots, Appointments and Tasks individually if the same Resource is consistently used it makes sense to set them as the Default Resource; you may for example have a specific member of staff who specialises in a certain genre like newborns, perhaps there’s someone who does all the post-production work or even one particular person who does all your viewing sessions. There are a few places you can set Default Resources.
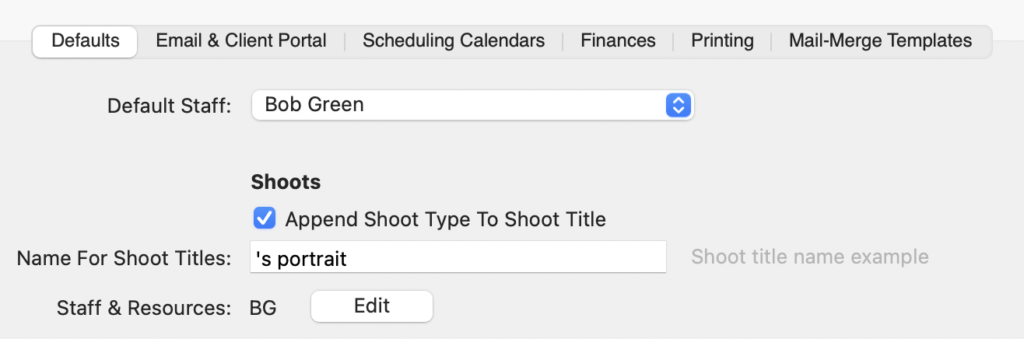
By Shoot Type
- Click on the applicable Shoot Type in the Preference Pane.
- In the “Default Staff” box choose the applicable Staff Resource from the drop-down menu; any new Tasks added to the Shoot Record will now default to them.
- Then in the “Staff & Resources” box choose all Resources that are linked to the Shoot Type; these are the Resources that Light Blue uses to see if there are any event clashes and which will be used by any Scheduling Calendar for this Shoot Type. NB. If needed, you can override these in an individual Scheduling Calendar in its Staff & Resources box.
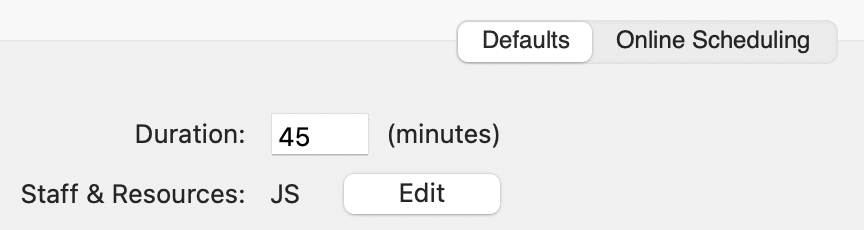
By Appointment Type
- Click on the applicable Shoot Type in the Preference Pane.
- In the “Staff & Resources” box choose all Resources that are linked to the Appointment Type; these are the Resources that Light Blue uses to see if there are any event clashes and which will be used by any Scheduling Calendar for this Appointment Type. NB. If needed, you can override these in an individual Scheduling Calendar in its Staff & Resources box.
By Task Steps in Workflows
- Click on the applicate Workflow in the Preference Pane.
- In the Task detail window choose the default staff member from the “Staff” drop-down menu.