Search for answers or browse our knowledge base.
Can't find the answer you need here? Contact our support team and we'll gladly help you.
Emails: how to make your emails stand out

When you’ve invested time and effort (and no doubt money!) in creating an appealing and recognisable brand for your photography business it’s important that it’s used in all aspects of your client communication; and correctly!
Your website and social media feeds are perhaps the more obvious areas. However, just as much attention needs to be given to the emails that you’re sending to maximise your brand’s impact.
There are various features you can use within Light Blue to make this aspect of your client communication stand out and create a great impression. In this help article we’ll cover a few different areas to give you some ideas; they can be used individually however if you really want to wow your clients combine a few together in your emails!
Overall branding
The first step in creating a great-looking, on-brand email is to add your brand to the Client Portal in Light Blue.
- Log into your online account through the “My Account” tab you can see top right on our website and head to the “Branding” section within “Client Portal settings”. 👉 Follow this link to take you to the login page and then directly to the “Branding” section.
- You can then customise the “Standard branding” option showing in the dropdown menu; as you scroll down the page you’ll see there are lots of different options however the main areas to focus on for email design are:
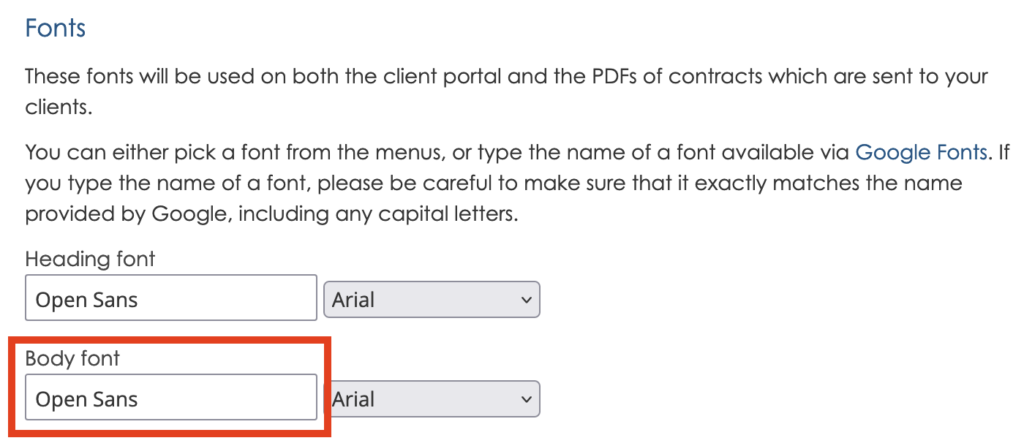
- Fonts; Body font
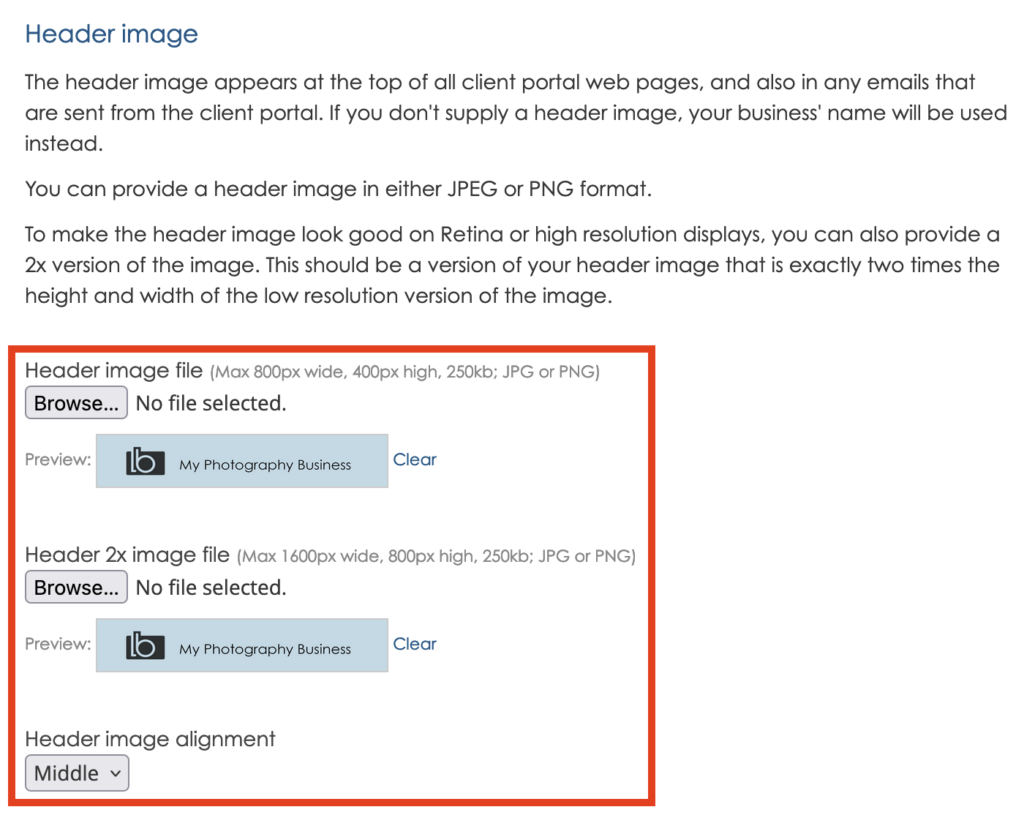
- Header images and alignment
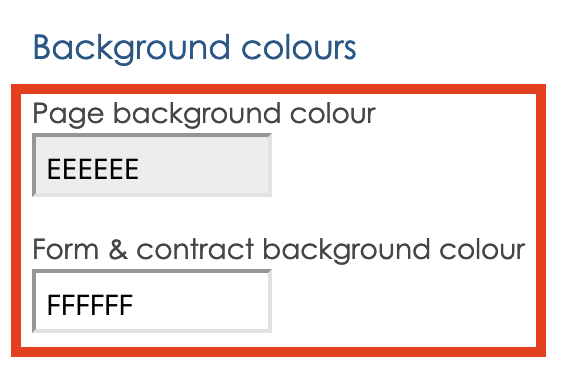
- Background colours
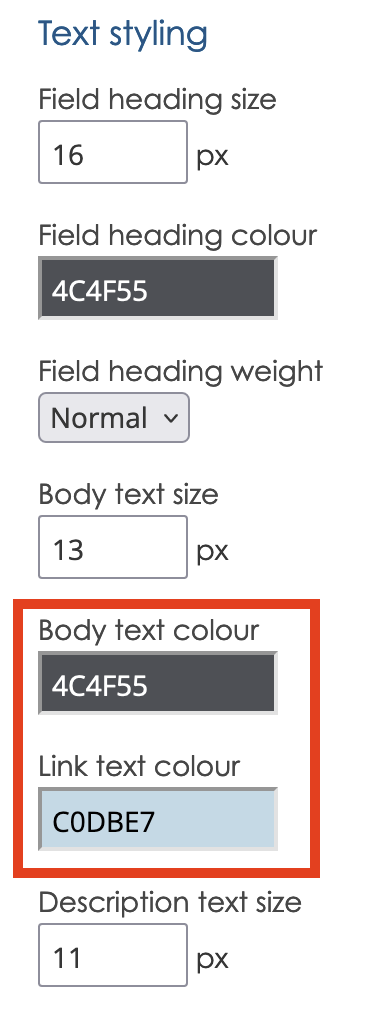
- Text styling; Body text colour and Link text colour.
The screenshot below shows how each of these elements come together in the overall design of your email.
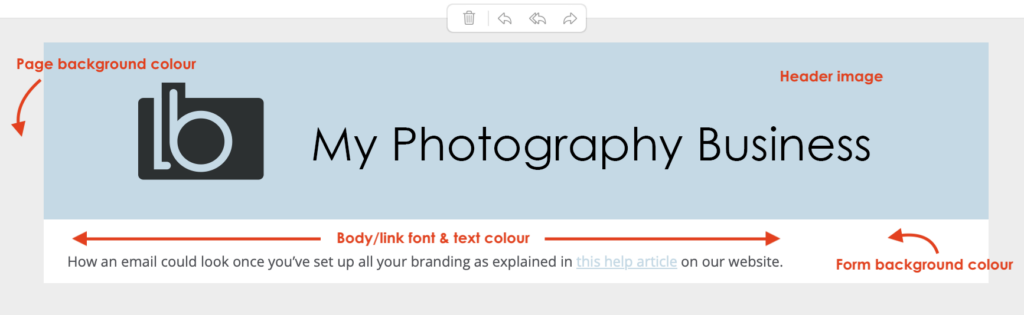
⭐️ Top tip: Think carefully about the aspect ratio of the Header image you use; simply adding your logo can sometimes create unexpected results the closer it is to a square. In our example we’ve used a narrow letterbox, 16:3.
Email content
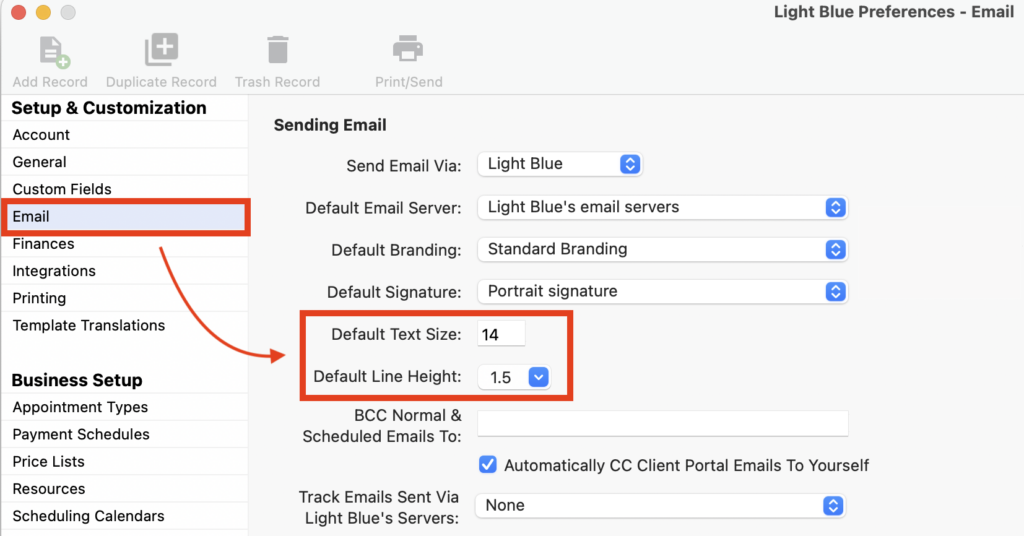
Default settings
- Head to the “Email” section of Preferences.
- Enter your “Default Text Size” and choose your “Default Line Height” from the drop-down choices. NB. If required these can be overridden in individual emails or Email Templates.
Formatting
As you’d expect the usual formatting options, such as bold text, bullet points, alignment etc, are also available within Light Blue if you want to emphasise certain points of your email.

Images
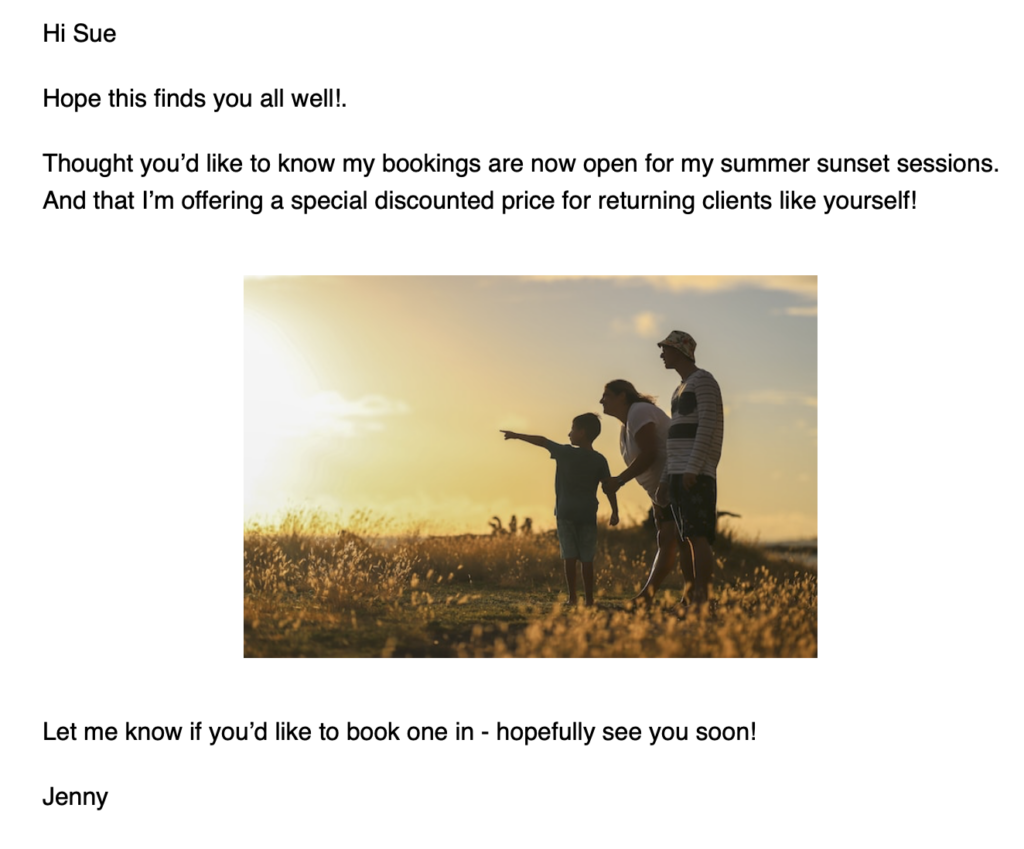
It almost goes without saying that adding images to your email will make them stand out more; relevant images will add extra appeal to your email and help build a stronger connection with your client. These could be an image from the wedding venue that your potential client has mentioned in their enquiry, a seasonal family portrait image to tie in with your mini session offer or perhaps a personal brand image showing you at work with your client.
- Simply click on the image icon in the email to add your images in.
- Resize as needed; make sure it’s neither too big nor too small! 👉 This guide gives you more details about adding images to your emails.

Hyperlinks
Adding hyperlinks linking to extra information for clients is another way to include more value in the email without running the risk of the email becoming too long and not being read! They could be links to online galleries, FAQs or perhaps a blog post which answers some of their specific questions.
- Simply highlight the link text in the email.
- Then click on the link icon in the email to add the URL.

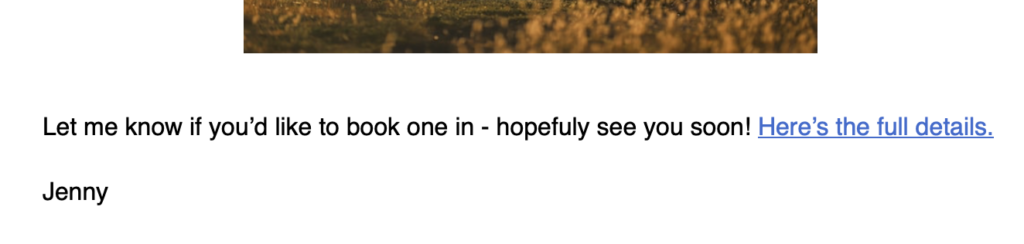
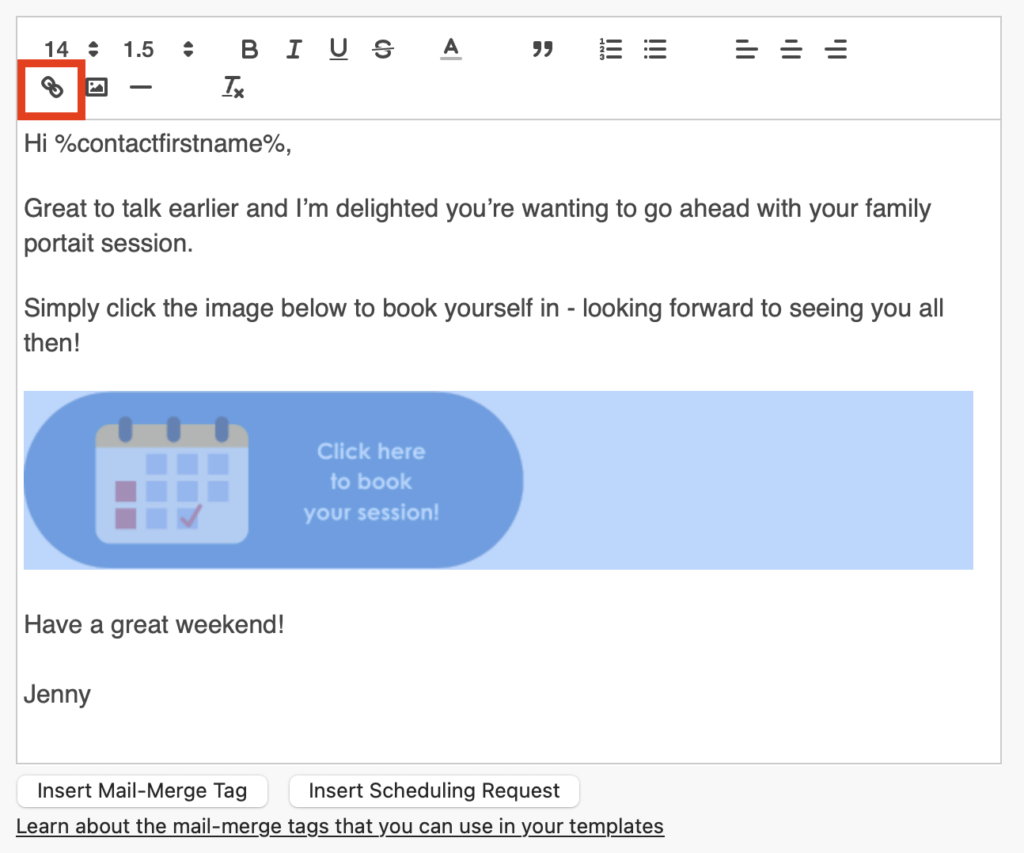
Clickable buttons
Using a clickable button adds another degree of professionalism to your hyperlinks; they’re easily created by adding a hyperlink to an image. You could use these for social media links, perhaps to your online booking calendar or simply if you want to draw attention to a hyperlink.
- Simply highlight the image in the email.
- Then click on the link icon in the email to add the URL.
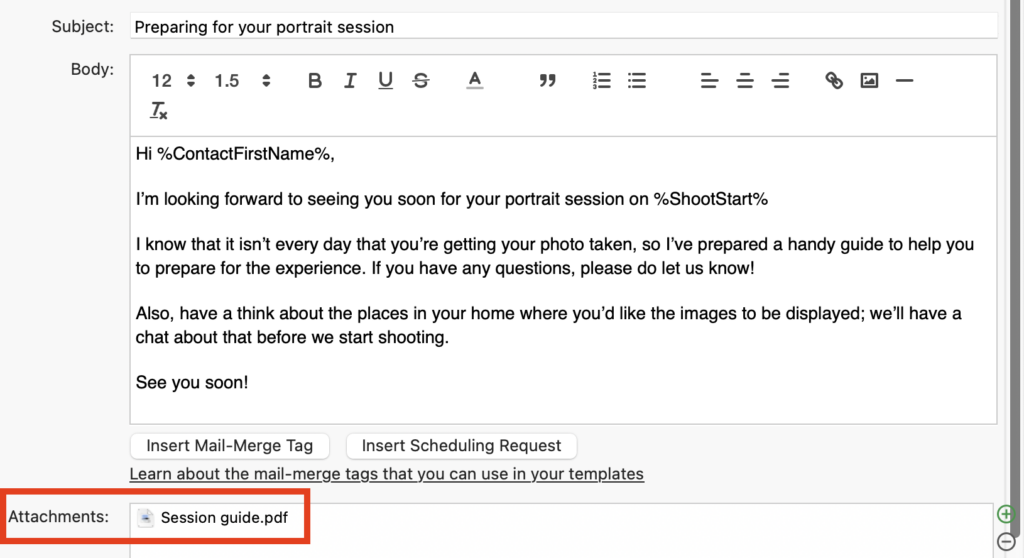
Attachments
Similar to hyperlinks, adding attachments to your emails is great if adding all the detail to the email will simply make it too long! These could be documents such as a “How to prepare for your portrait session” guide or information on how to view their gallery and place their order.
- Simply click on the “Add attachment…” link at the bottom of the email.
- Locate your document and attach it to the email. 👉 This guide gives you more details about email attachments.

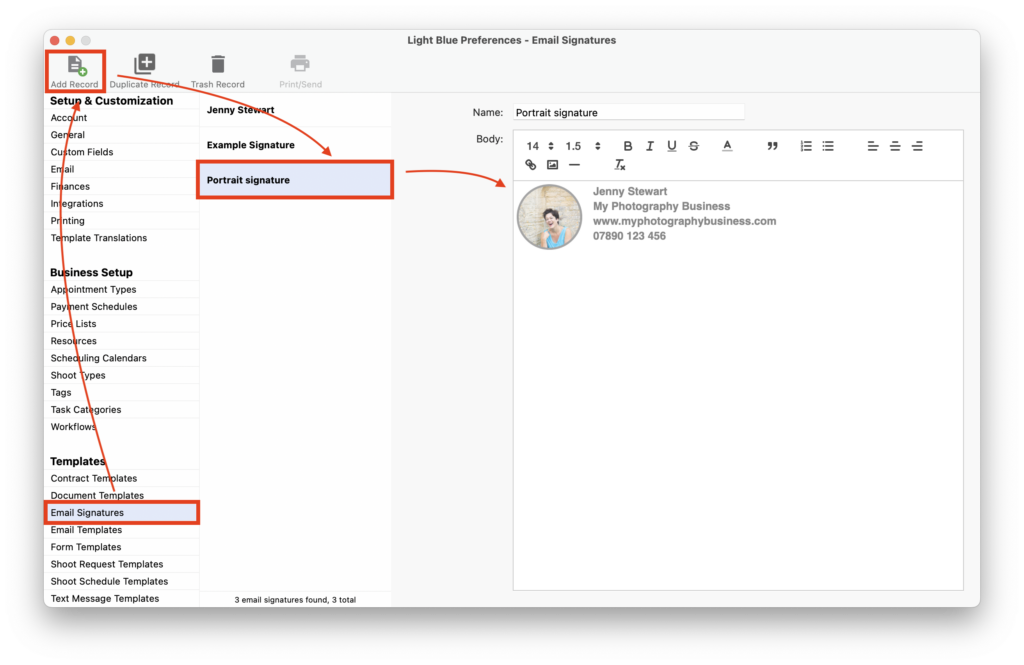
Email Signature
Adding a signature to your email allows you to include extra contact information, your website or indeed a headshot of yourself; be creative as you like!
- In the “Email Signatures” section of Preferences, click on “Add Record”.
- Create your signature. 👉 This guide takes you through all the steps to create your Email Signature in Light Blue.
⭐️ Top tip: If you’re using Light Blue’s built-in email system to send emails rather than your own server do make sure you’re happy with the ‘From’ name that appears in your emails. 👉 This help article shows how you can customise your @lightbluecustomermail.com email address.
Adding other Light Blue features
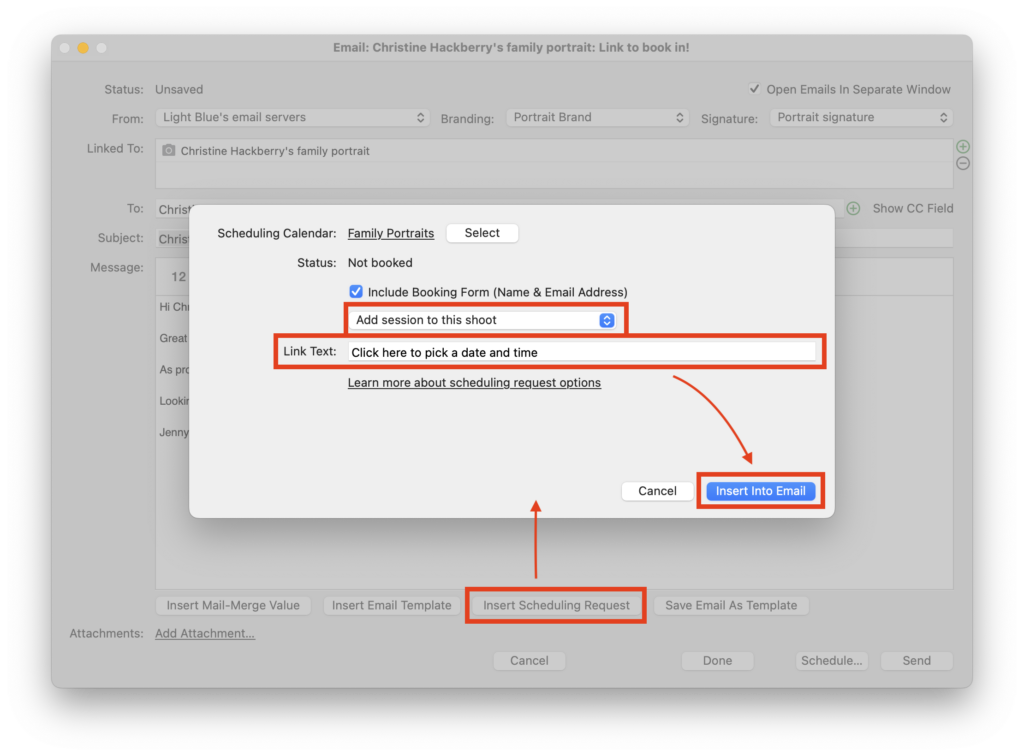
Scheduling Request
If the ‘Call To Action’ in your email is for your client to book a shoot, perhaps schedule a consultation call or even arrange a time to collect their order it’s an ideal opportunity to include a Scheduling Request in your email. Not only does this create a great impression with your client; the booking process is very straightforward and the booking form is pre-filled with all their information, but it simplifies the process enormously for you!
👉 This help article explains more about Scheduling Requests and how to use them.
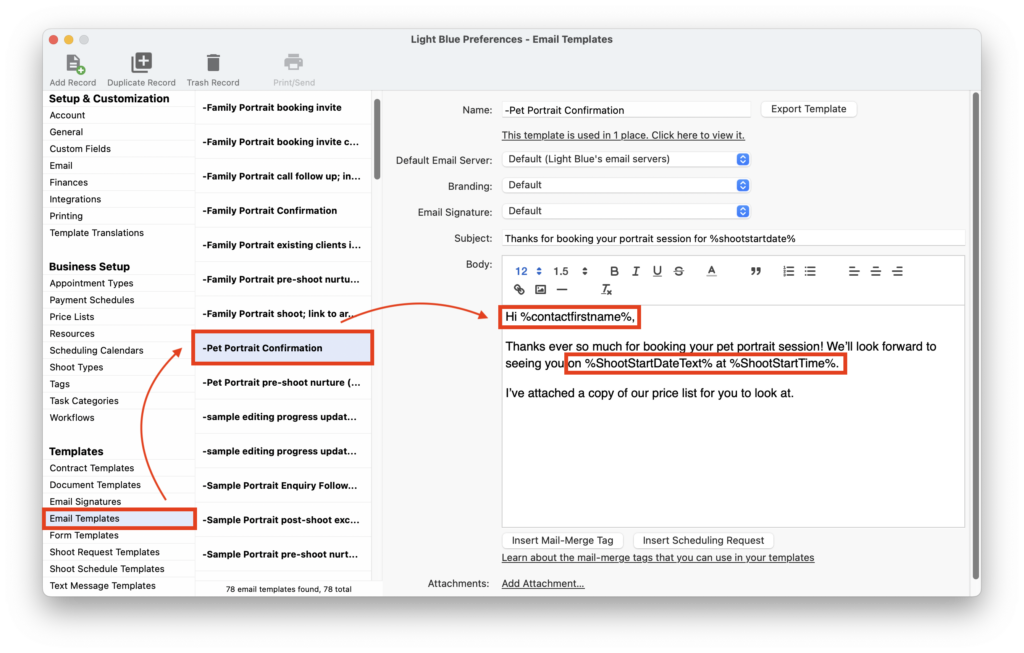
Email Templates & Mail Merge Tags
If you find you’re regularly sending a particular email it makes sense to create an Email Template for it. These can then either be used as a starting point tweaked as needed or added as a snippet to an ad-hoc email. They can even be added to Workflows so they’re sent automatically. Adding Mail Merge Tags to your Email Template also allows you to personalise the email; perhaps with the clients’ names or the date of their session.
👉 This help article explains how to create Email Templates and insert Mail Merge Tags.
👉 This one covers how to use Workflows to automatically send emails.
👉 And if you’re lacking inspiration for which Email Templates you could create do read this blog post.
⭐️ Top tip: Light Blue’s “Duplicate Record” is a powerful way to create several variants of a base email; just remember to name them with a description that makes sense to you so you can easily find the one you want when you need to!
Putting it all together
As you’ll have now discovered there are quite a few things you can do within Light Blue to create stand-out emails!
If you’re wanting to use all our suggestions, here’s our recommendation for how to put it all together.
- Set up your branding in the Light Blue Client Portal.
- Decide which Email Template/s you want to create.
- Write the contents concentrating on just the words at this stage.
- Personalise the email using Mail Merge Tags.
- Style the email by formatting, adding images, hyperlinks, attachments etc.
- Send a test email to yourself to check how it looks.
- Refine as required.
- Repeat for each Email Template.
And there you have it! Fabulous stand-out emails being sent to your client that are guaranteed to attract attention!