Search for answers or browse our knowledge base.
Can't find the answer you need here? Contact our support team and we'll gladly help you.
Setting up Payment Schedules and terms in Light Blue
When you first launch Light Blue the default invoice setting is for one invoice with immediate terms however, there are lots of different ways you can configure this to suit your business and even different types of shoot within your business.
This article walks you through setting up a simple payment schedule of just the one invoice with terms fo 30 days, with links at the bottom to the more complex options possible within Light Blue.
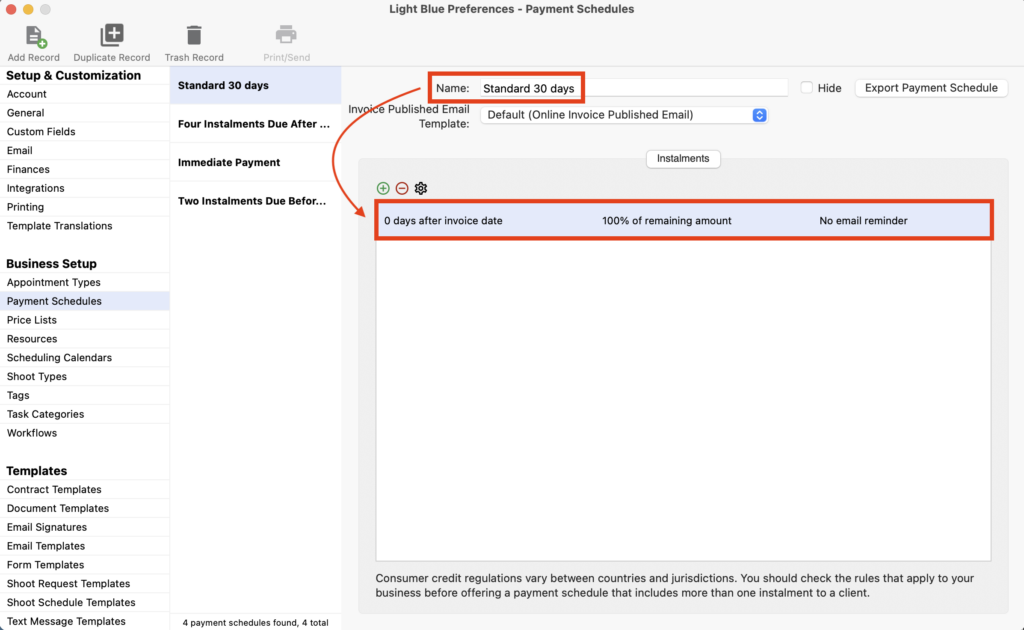
- Go to the “Preference” pane.
- Click on “Payment Schedules” in the “Business Setup” category.
- Choose the “Immediate Payment” schedule and then “Duplicate Record”.

- Rename the schedule.
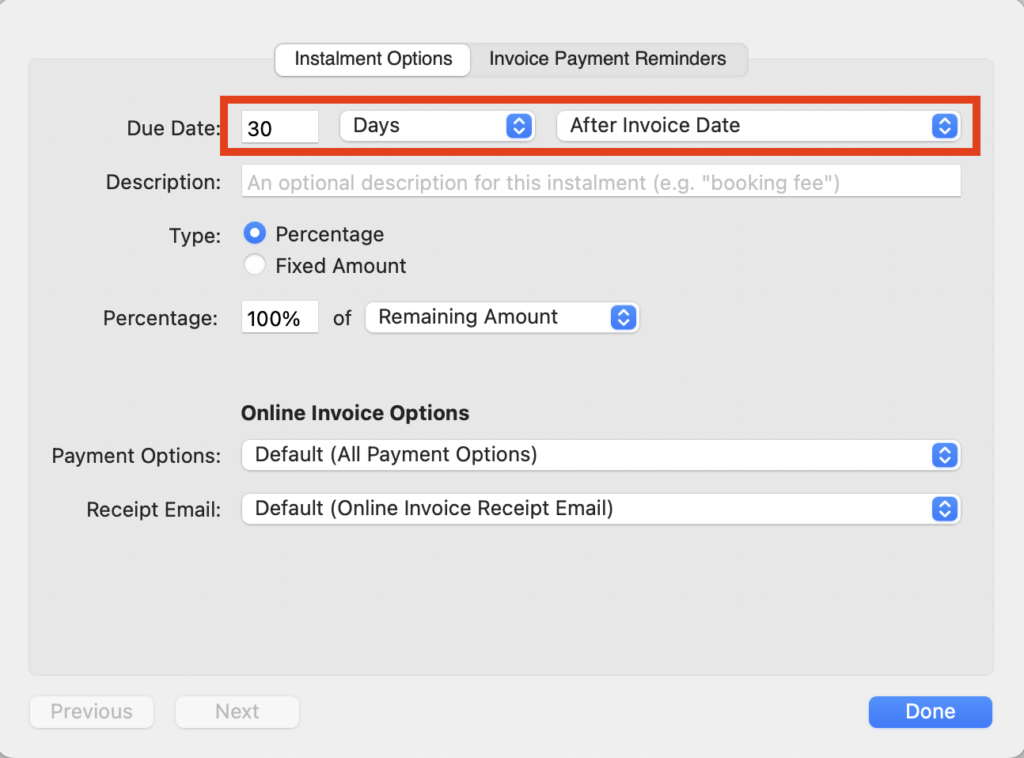
- Amend the number of days by clicking on the item showing in the schedule.
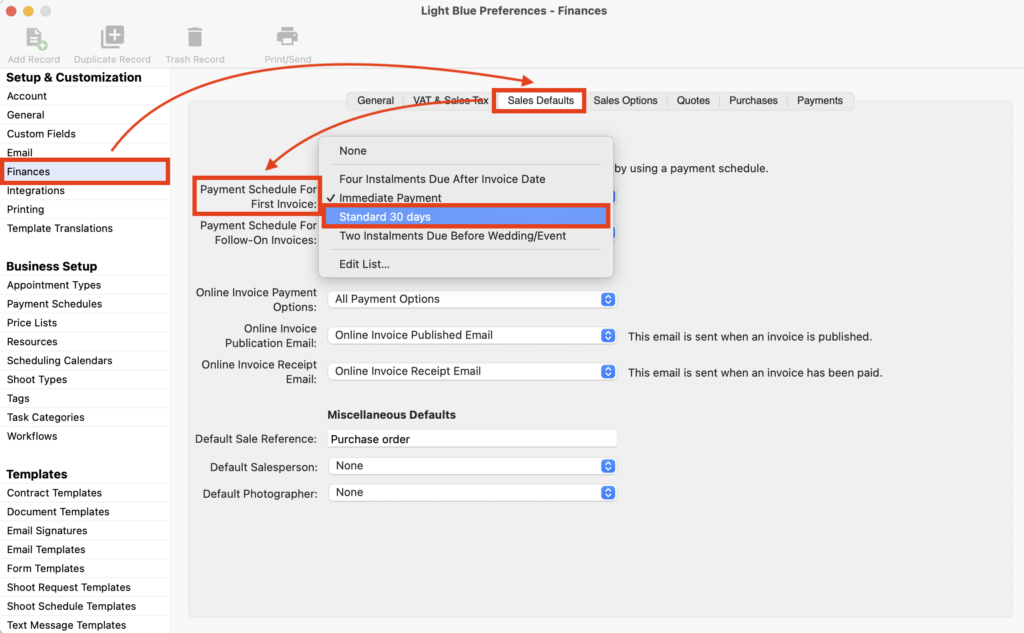
- Finally, click on “Finances” in the “Setup & Customisation” category.
- Choose the “Sales Defaults” tab and amend “Payment Schedule For First Invoice” to your newly created 30 days schedule from the drop-down menu.
As with many areas of Light Blue, there is a huge amount of customisation possible with how you set up payment schedules and there are several more detailed guides to help you with this.
👉 Read and watch this guide to understand more about payment schedules.
👉 This guide is a more in-depth look at payment templates.
👉 And finally, discover to how to send automated payment reminders in this guide.