Search for answers or browse our knowledge base.
Can't find the answer you need here? Contact our support team and we'll gladly help you.
🎥 Light Blue Payment Schedules: Creating Templates
Payment Schedules allow you to easily break an invoice down into smaller payments due at different points in time either before or after a session. Having the ability to offer a payment plan to your clients makes payments more manageable and affordable so they perhaps may book you more readily. They may also be inclined to place larger orders or indeed book a bigger package than they might have done if the invoice had to be paid all in one go.
Creating Payment Schedule Templates from your commonly used Payment Schedules is a great time saver as they can be easily applied to any sale. And you can save even more time if you set them as Defaults for any new Sales Record or particular Shoot Type.
Whilst Light Blue comes installed with a few Payment Schedule Templates you’ll likely want to create your own.
To learn more about how to create them watch the video below; though if you prefer to learn by words and pictures, have a read of the help article instead!
NB. Please do make sure you follow any applicable laws and regulations before offering payment plans to your clients; these will vary from country to country.
Payment Schedule Template Components
Instalments
A Payment Schedule Template can include as many instalments as you want. The due date for each instalment can be set to an automatic number of days, weeks or months after the invoice date, or before or after the shoot date, or you can manually set the date.
Each instalment can be for either a fixed amount or a percentage of the remaining amount or invoice total.
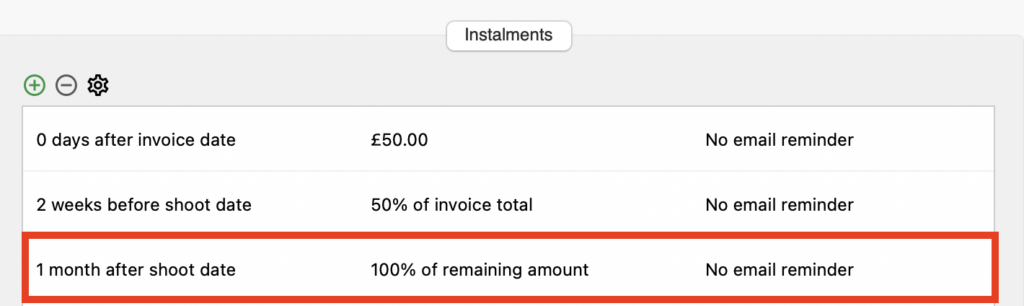
We always recommend the final instalment should be “100% of the remaining amount due” in case anything changes on the invoice or your client makes some unscheduled payments – Indeed Light Blue will warn you if you forget to include a “100% of the remaining amount” step!
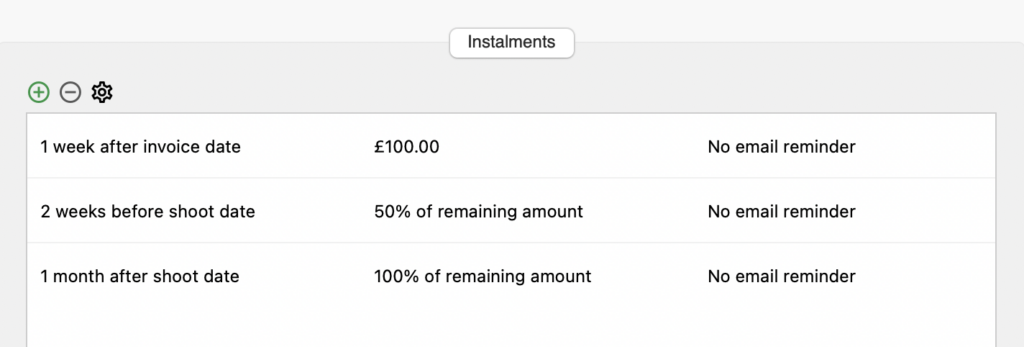
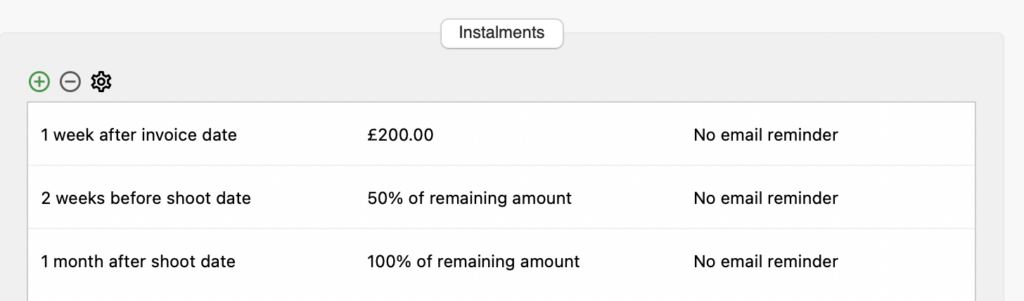
The example below shows three instalments; one a fixed amount due after the invoice date, and the remaining two as a percentage of the remaining amount due at different dates after the shoot date.
Payment and Receipt Email Options
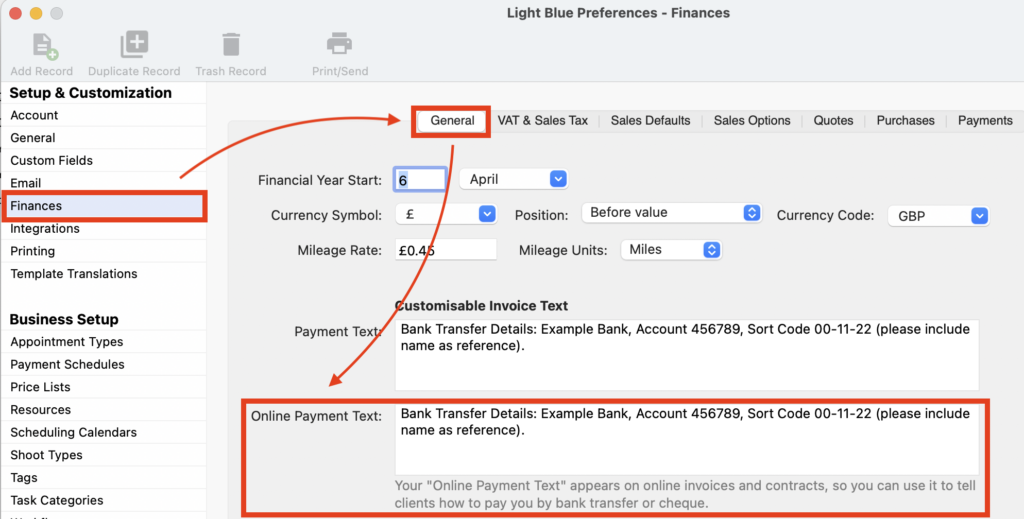
For each instalment, you can choose whether your client can pay online through your Client Portal or not including which Email Receipt Template will be automatically sent to them if they pay online. 👉 If you’re not sure how to set up Email Templates this article explains how to do so. NB. Do make sure you’ve completed the Online Payment Text field in the Preferences Finance section so that your offline payment options are shown on the online invoice.

Reminder emails
There is also the option to add Automatic Payment Reminders to your Payment Schedule Templates which are sent automatically once a sale has been invoiced. They can be set up to be sent before an invoice is due, when it is due and overdue; a great way to ensure you get paid on time as well as saving you valuable time! 👉 If you want to set them up this guide explains how to do so.
Creating a Payment Schedule Template
Creating an instalment
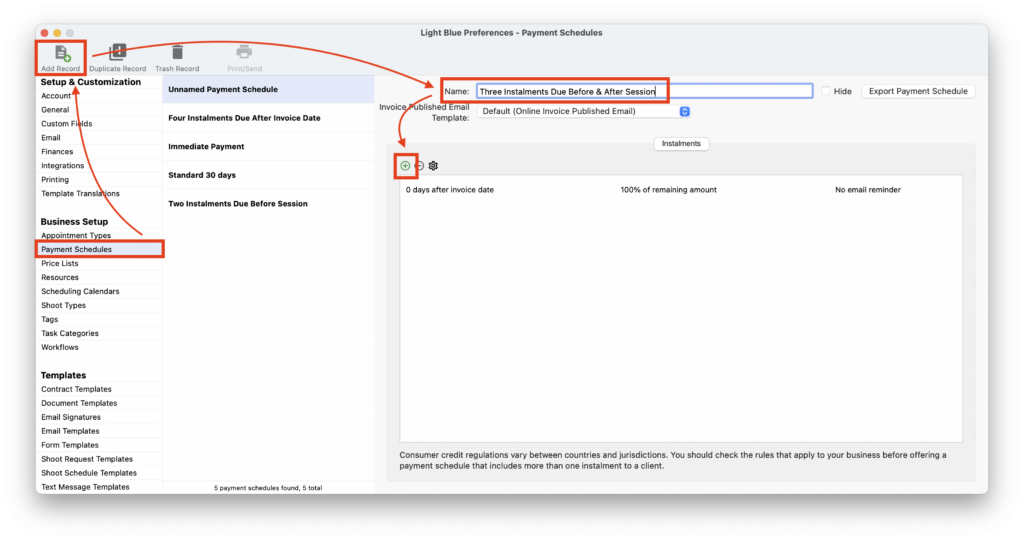
- In Preferences, go to “Payment Schedules” in the Business Setup category and click on the “Add Record” button; though if there’s an existing template that could be a good starting point click the “Duplicate Record” button instead!
- Name your new Template.
- To add an instalment click the green “+” button.
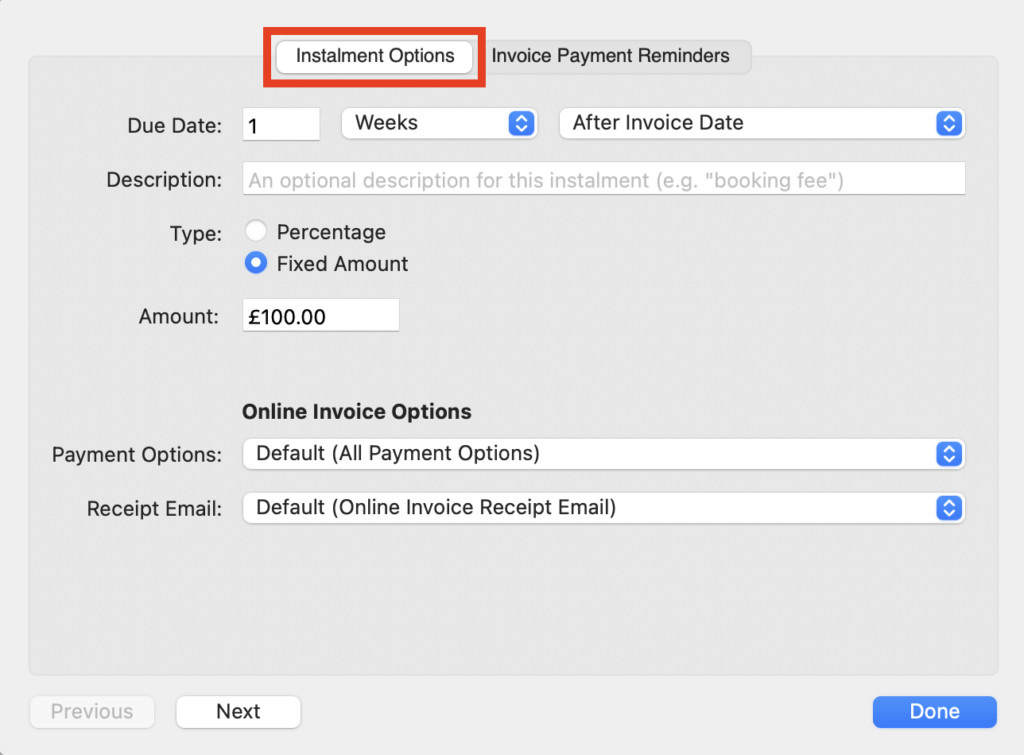
- Create the details of the instalment in the “Instalment Options” tab, setting the Due Date, the Type of instalment and the Online Payment options/Receipt email.
- Add in any payment reminders in the “Invoice Payment Reminders” tab.

Adding more instalments
Repeat as many times as needed; there are no limits to the number of instalments you can add to a Payment Schedule Template and you can have completely different variables in each instalment too!
The last instalment in a Payment Schedule
We always recommend the final instalment should be “100% of the remaining amount due” in case anything changes on the invoice or your client makes some unscheduled payments – Indeed Light Blue will warn you if you forget to include a “100% of the remaining amount” step!
Default Payment Schedules
Setting the Default Payment Schedule means that Payment Schedule Template is automatically added to any new Sale Record speeding up your invoicing process; ideal if the majority of your sales use the same Template.
Setting the Default Payment Schedule
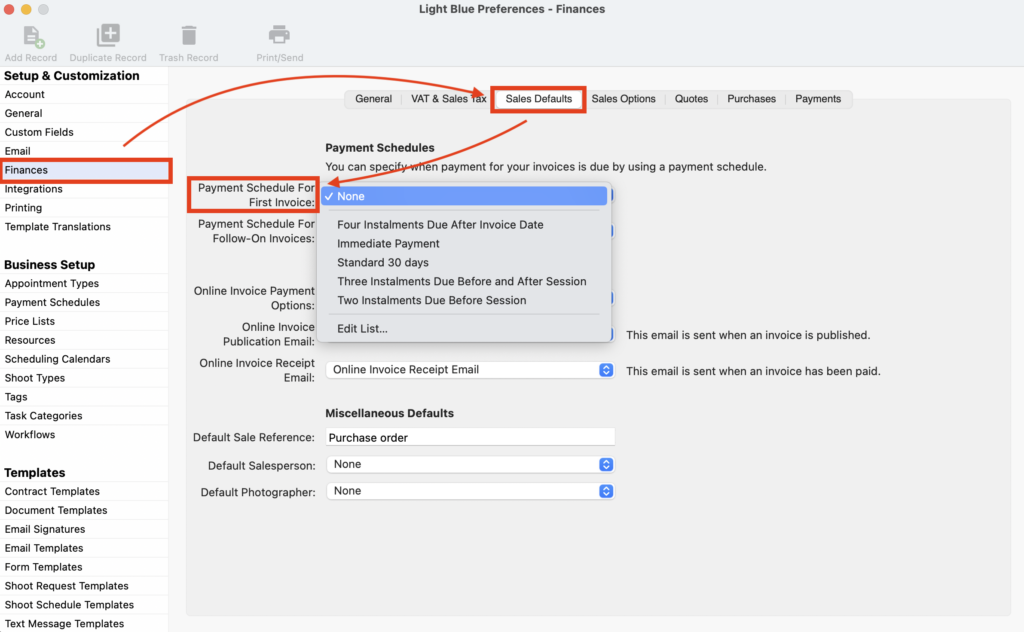
- In Preferences, go to the “Finances” section and select the “Sales Defaults” tab.
- From the “Payment Schedule for First Invoice” drop-down menu choose the Payment Schedule Template you want to apply. NB. This template will now be default for the “Payment Schedule for Follow-On invoices” though you can change that if required.
Different Default Payment Schedules for different types of work
If your business carries out a mix of different work you may well need different Payment Schedules for each type; for example with weddings you’d generally take advance payment whilst corporate work may work on 30-day terms. You can achieve this by overriding the Default set above by Shoot Type where required.
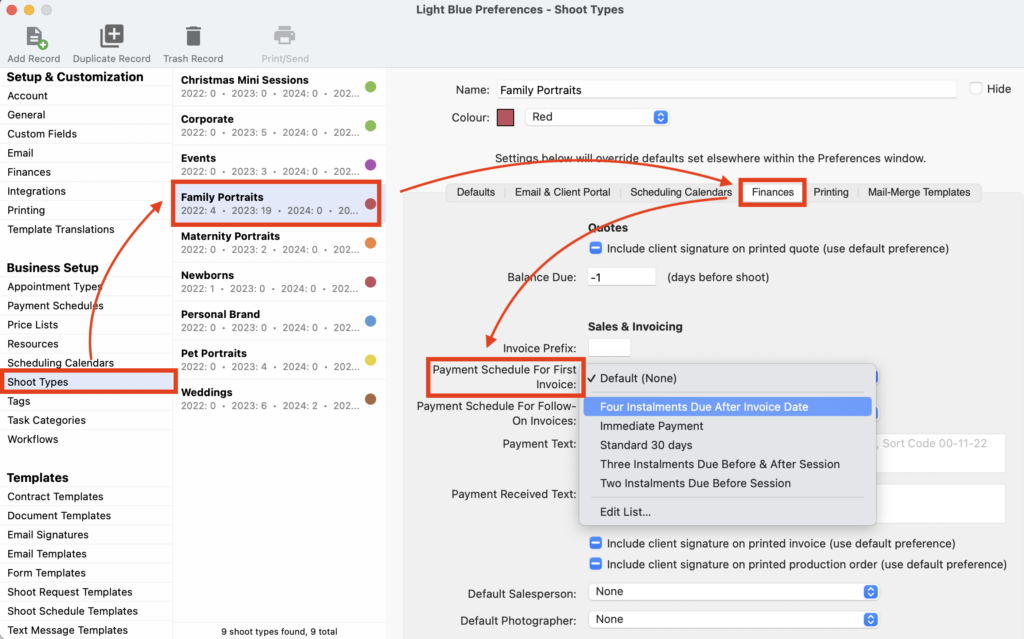
- In Preferences, go to “Shoot Types” in the Business category.
- Select the Shoot Type and go to the “Finance” tab and from the “Payment Schedule for First Invoice” drop-down menu choose the Payment Schedule Template you want to apply for this Shoot Type. NB. This template will now be default for the “Payment Schedule for Follow-On invoices” though you can change that if required.
Manually applying a Payment Schedule Template
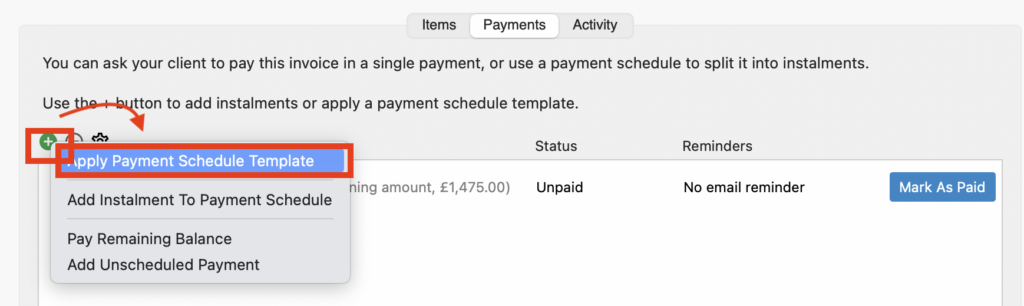
- If you’ve not already set up Default Payment Schedules as described above, a Payment Schedule Template can then be added to the Sales Record by clicking on the green “+” button and choosing “Apply Payment Schedule Template” from the dropdown menu.
- Once the Payment Schedule Template has been applied to the Sales Record you can of course make any amends to the instalments or indeed add extra ones if needed; either double-click on an existing instalment to change it or click on the green “+” to add a new one.