Search for answers or browse our knowledge base.
Can't find the answer you need here? Contact our support team and we'll gladly help you.
Zapier: integrating Calendly with Light Blue
Whilst Light Blue has its own powerful online Scheduling Calendars you may be using Calendly to take client bookings. However, if you’re to take advantage of all the other great features in Light Blue such as Contracts, Workflows and Forms these bookings do need to be added to Light Blue.
But the great news is that there is a way for these bookings to automatically integrate with Light Blue saving you time and effort and removing the risk of any errors if you were to manually add them yourself; this is done by linking your Light Blue and Calendly account using Zapier,
This help article will guide you through the steps to get this set up correctly.
Initial setup
Zapier
👉 If you’re not familiar with Zapier here’s an introduction to how it works.
👉 And if you’ve not already got a Zapier account, here’s their website where you can create one.
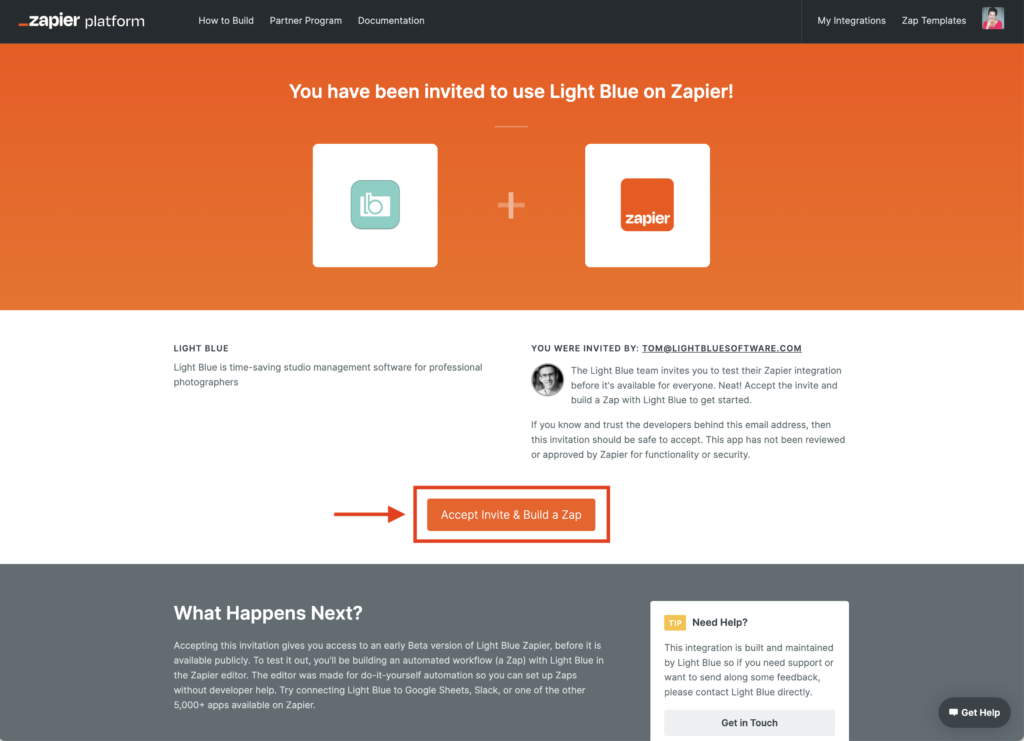
NB. The Light Blue integration for Zapier is currently a “private” action, so you need to click the following link to add it to your Zapier account (instead of searching for Light Blue in Zapier); simply click the “Accept Invite & Build a Zap” button.
👉 Invite to use Light Blue on Zapier.
Calendly
Rather than manually setting your availability in Calendly it’s best to automate this by using one of the third-party calendars that Calendly can connect to. This will keep your availability up to date and ensure that any personal appointments and Light Blue events which haven’t been booked through Calendly are taken into account when deciding if you’re available (or not!).
If you haven’t already done so you need to publish your Light Blue events to either a Google, Apple or Outlook Calendar.
👉 To publish Light Blue events to a Google calendar follow the steps in this article.
👉 To an Apple calendar read this one.
👉 And this one covers Outlook.
Once you’ve done that, if you didn’t do so when you created your Calendly account, you need to connect your calendar to your Calendly account.
👉 This Calendly help article covers the steps to do that.
And do make sure that your Calendly Event Types match your Light Blue Shoot and Appointment Types so the bookings can be accurately added to Light Blue.
NB. Calendly will only allow integration with Zapier if you’re on their Professional Plan or above.
Creating the new booking Zap in Zapier
Once you’ve completed the initial setup steps the Zap needs to be created. There are two elements to the zap:
- Creating the trigger; a booking is made in Calendly.
- Creating the action; adding the booking to Light Blue.
Both elements need to be created for the Zap to work, however, we’ve broken down the steps into the two elements to make the process a bit easier to follow.
1. Creating the trigger: a booking is made in Calendly
- Click the “+ Create” button and choose “⚡️ New Zap” from the drop-down menu.
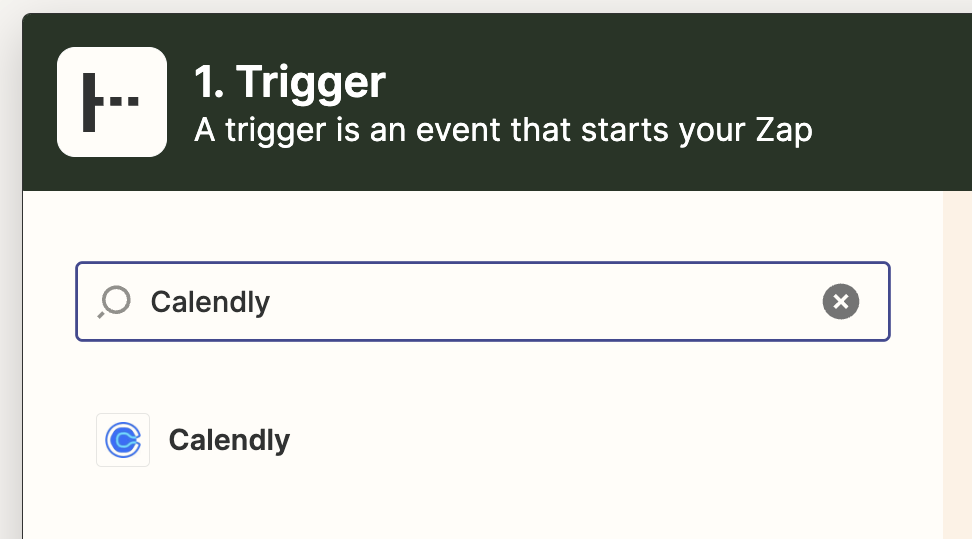
- Start to type “Calendly” in the search bar.
- Choose “Calendly”.
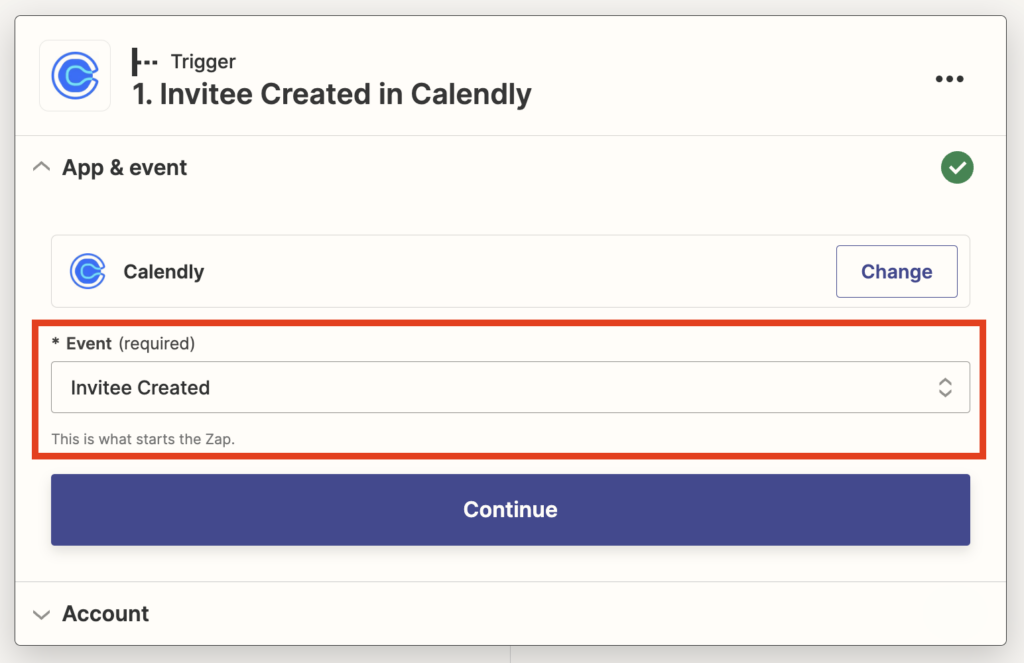
- We then choose the event that triggers the action, so from the drop-down menu choose “Invitee Created”.
- Click “Continue”.
- You’ll then be asked to sign in to your Calendly account. NB. If you’ve previously created an Calendly Zap, rather than signing in again you’ll be able to simply select the account that’s already connected.
- Click “Continue”.
- Click the “Test trigger” button; Zapier will then test the trigger and check it can find a new booking.
- Once It’s been successful, click “Continue”.
2. Creating the action: adding the booking to Light Blue
- Start to type “Light Blue” in the search bar.
- A few Light Blue options will be given so make sure you choose the one labelled ‘Latest’ with the most recent version number.
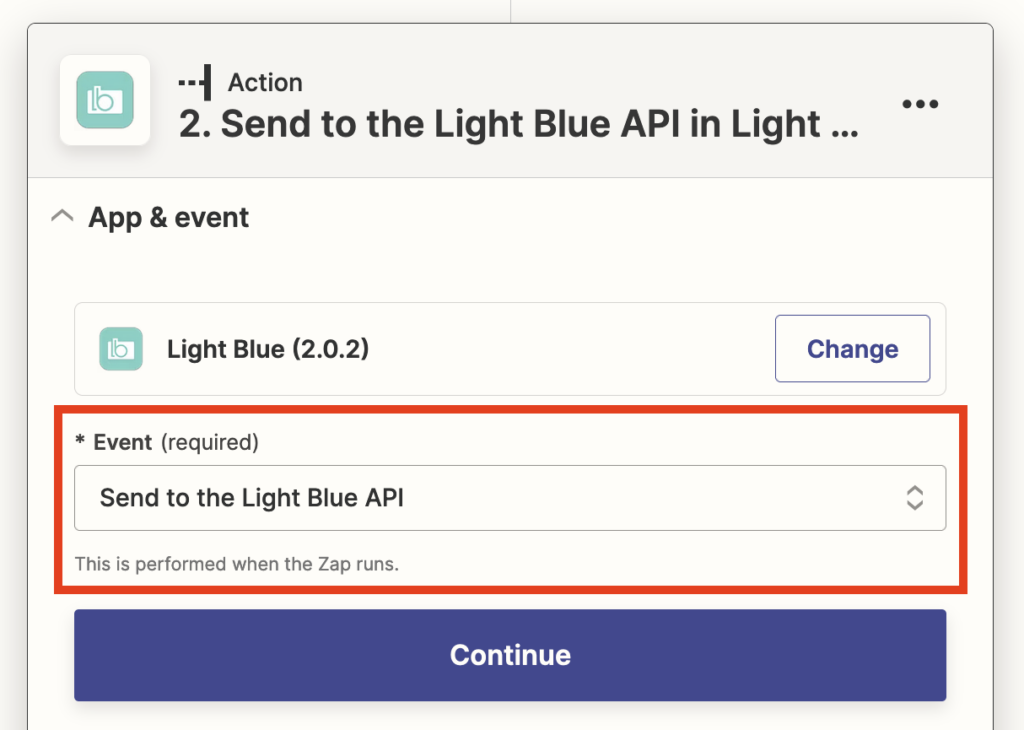
- Choose the Event “Send to the Light Blue API” from the drop-down menu.
- Click “Continue”.
- You’ll then be asked to sign in to Light Blue. NB. If you’ve previously created a Zap using Light Blue, you’ll be able to simply select the account that’s already connected rather than having to sign in again.
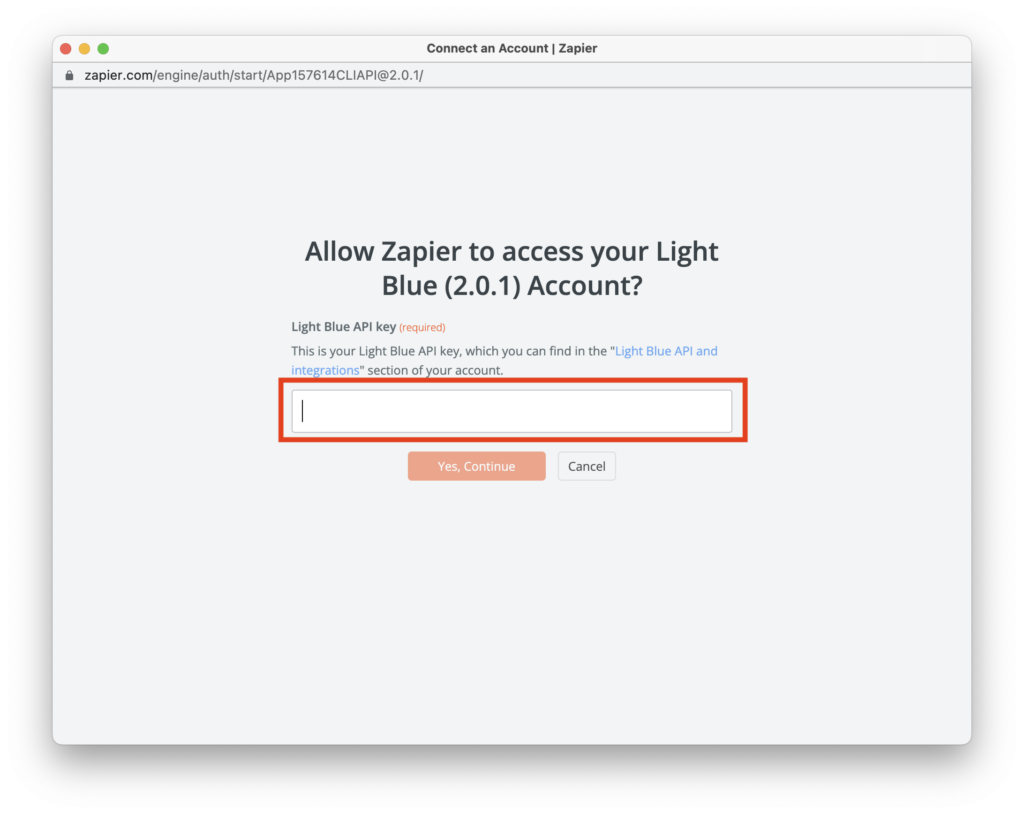
- A pop-up window will appear asking for your API key; this can be found in the “Light Blue API and integrations” area of your Light Blue account.
- Once you’ve clicked the “Yes, Continue” button your Light Blue and Zapier accounts will be connected.
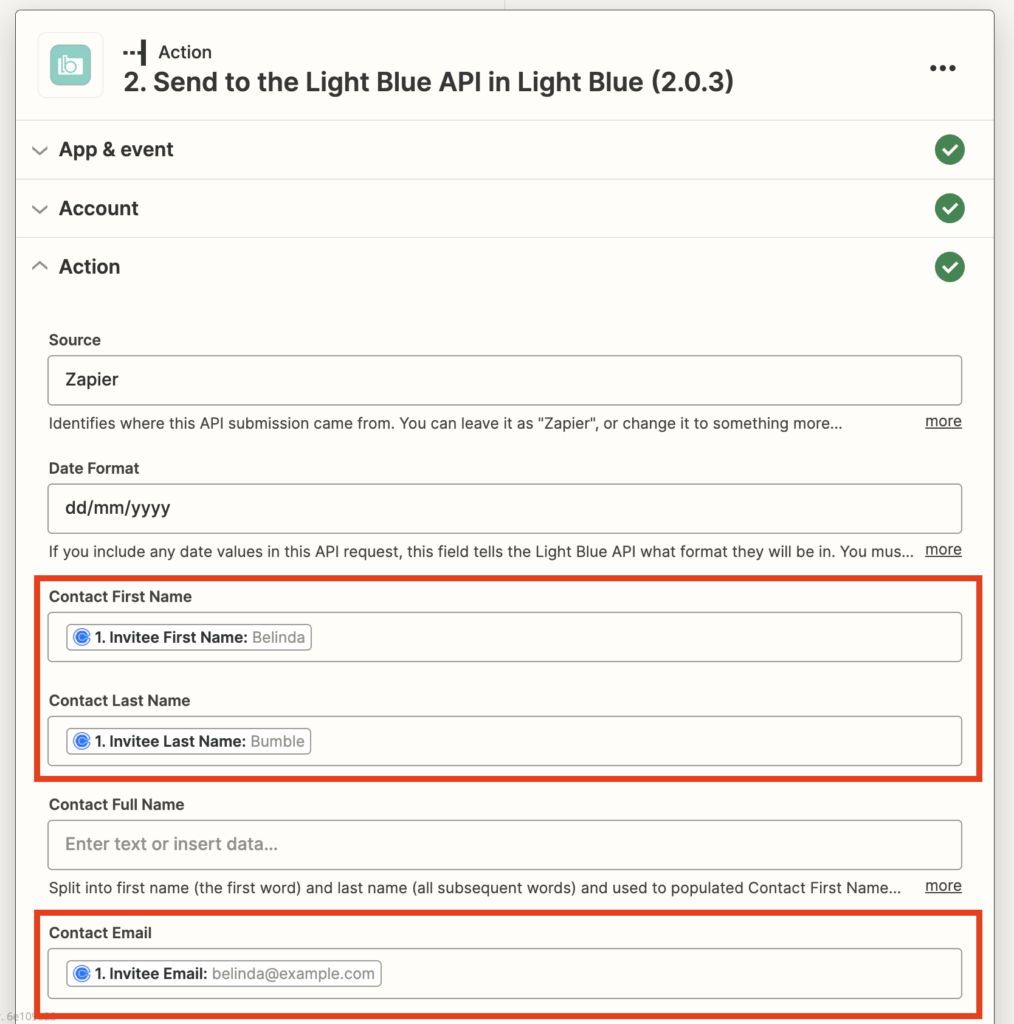
- Then we need to set up the details of the action; complete the Contact First Name, Last Name, and E-mail fields. NB. The greyed-out details are from the test trigger contact.
- Scroll down and in Additional Parameters field add in the Light Blue API parameters, “ShootStartTimestamp” and “ShootType” which will then ensure the booking date, time and Shoot Type are also added to Light Blue.
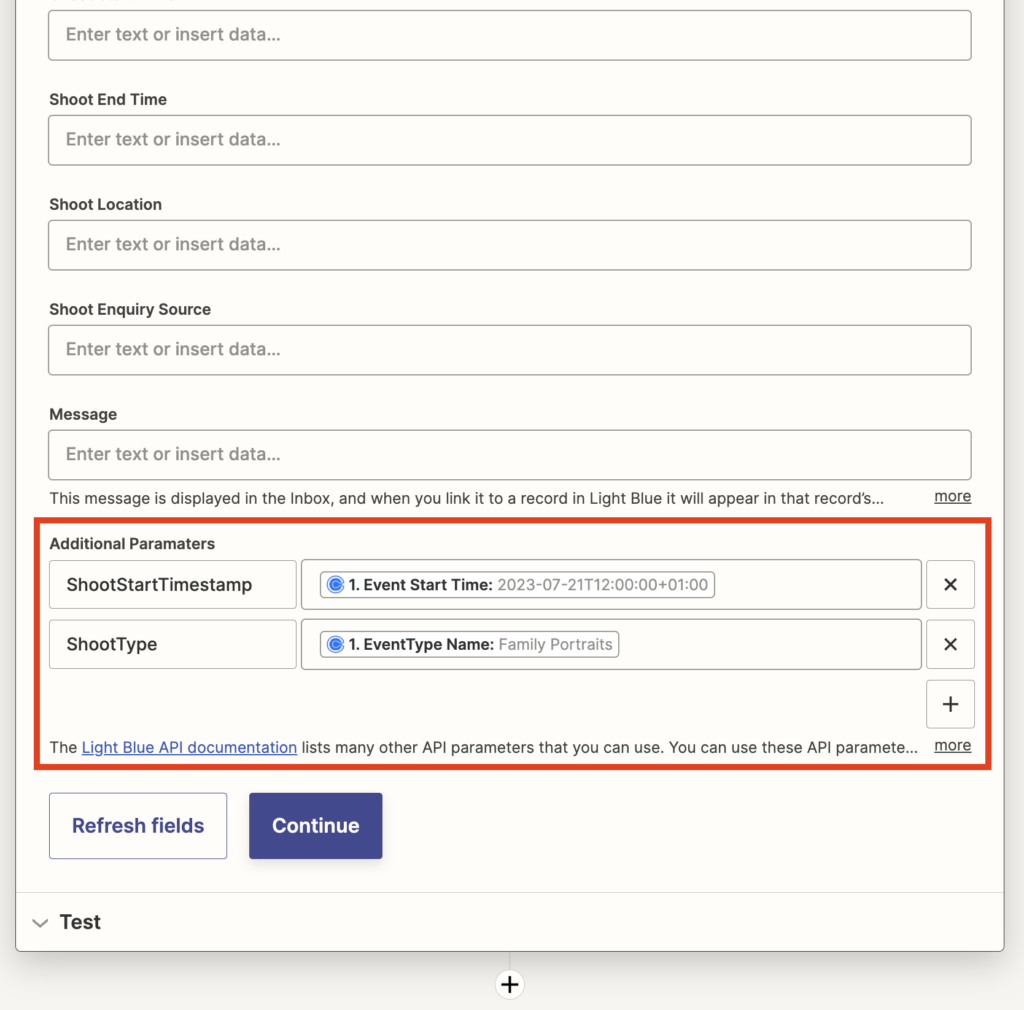
- 👉 If you have other data fields you’d like to add here’s the full list of supported API parameters.
- Click “Continue”.
- When prompted, click the “Test Action button; Zapier will then test the action.
- Once the test for the action has been successful we can give the Zap a name and publish it; Zapier will now automatically send any new bookings to Light Blue.
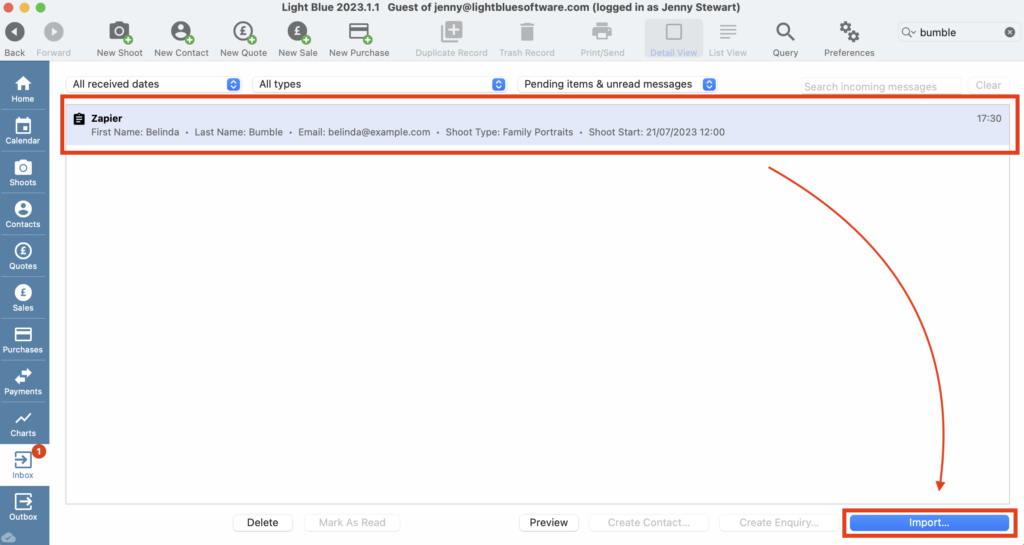
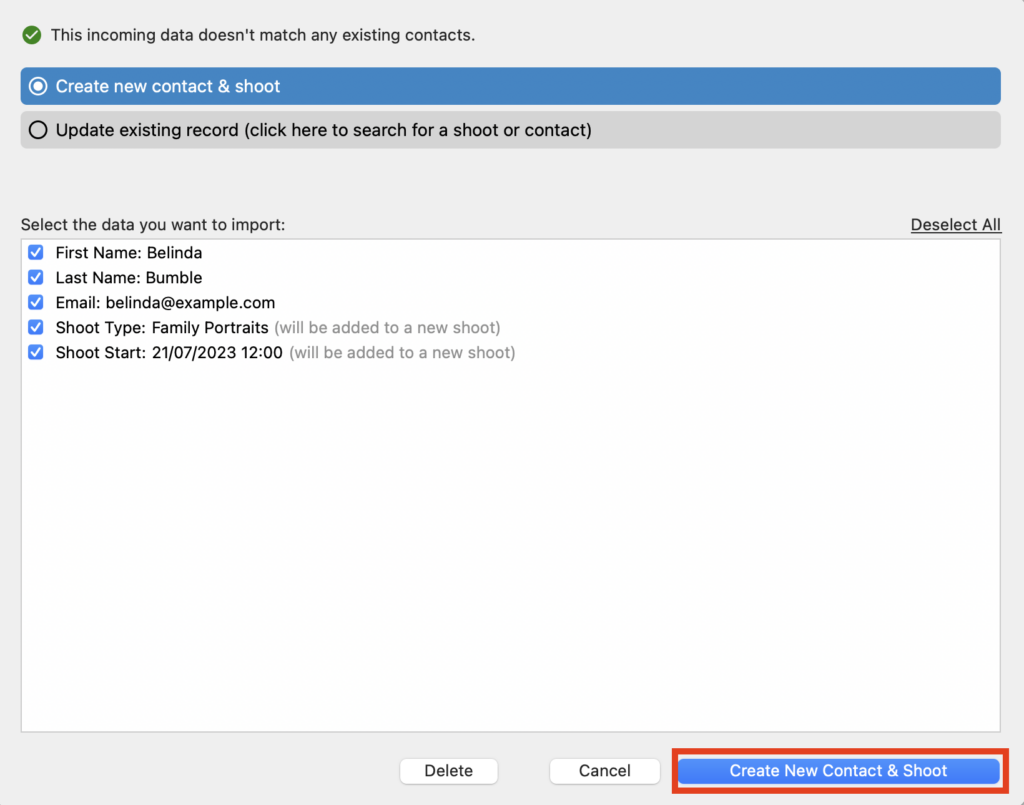
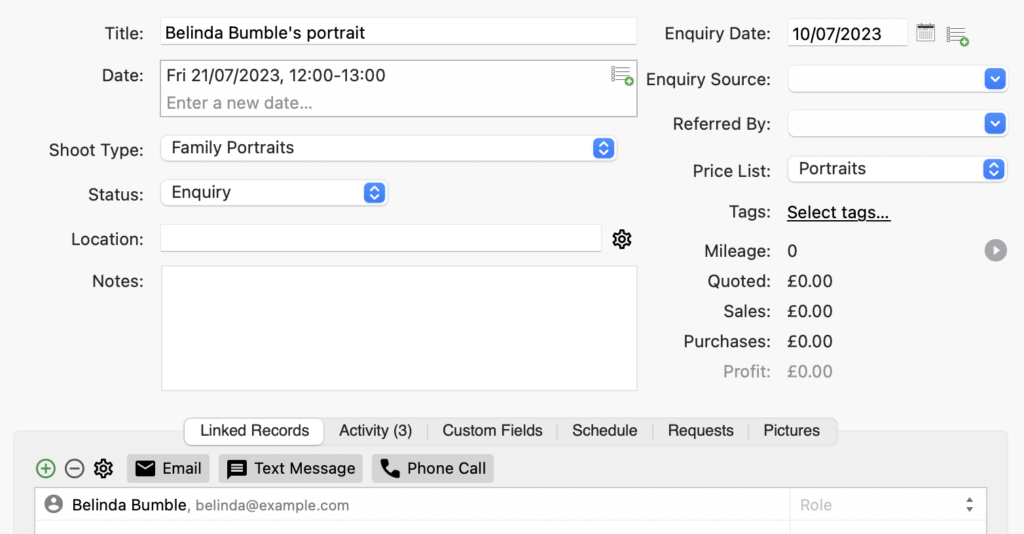
- They’ll appear in your Light Blue Inbox; simply click on “Import”, followed by “Create New Contact & Shoot”.