Search for answers or browse our knowledge base.
Can't find the answer you need here? Contact our support team and we'll gladly help you.
Zapier: creating zaps to update a contact’s mailing list preferences
If you use a third-party mailing list app in your business, it’s key that a contact’s opt-in status match in it and Light Blue. And whilst it’s possible to export CSV files from Light Blue and upload them to your third-party app or even make the individual changes yourself this is very much a manual process. To ensure complete synchronisation, creating a series of zaps within Zapier will automatically update a contact’s opt-in status across Light Blue and your mailing list app.
A lot of the time emails that you send. such as dealing with new enquiries, responding to questions from your clients, sending automated appointment reminders, and so on, are easily managed within Light Blue; those ‘everyday’ emails are exactly what it’s been designed to do.
However, for newsletters or other communications being sent to a larger group of contacts where the content is something that they may wish to opt out of receiving, you should be using a third-party mailing list app such as Mailchimp or Active Campaign. As well as giving them the ability to opt-out it also helps ensure your emails are received and protects your email account’s reputation.
This article will detail three different zaps you can use to automatically synchronise Light Blue and your mailing list app:
- Adding a contact to your mailing list app when you’ve checked the contact’s “Mailing List Opt-In” box in Light Blue or your contact has checked the “Mailing List Opt-In” box within a Light Blue form.
- Removing a contact from your mailing list app when they’ve said they no longer wish to hear from you and you’ve unchecked the “Mailing List Opt-In” box in Light Blue.
- Updating a contact’s “Mailing List Opt-In” box in Light Blue if they unsubscribe from your mailing list app.
You can of course perhaps only choose to set up the first zap, however creating all three will ensure Light Blue and your mailing list app are fully synchronised.
👉 Here’s an introduction to how Zapier works.
👉 And if you’ve not already got a Zapier account, here’s their website where you can create one.
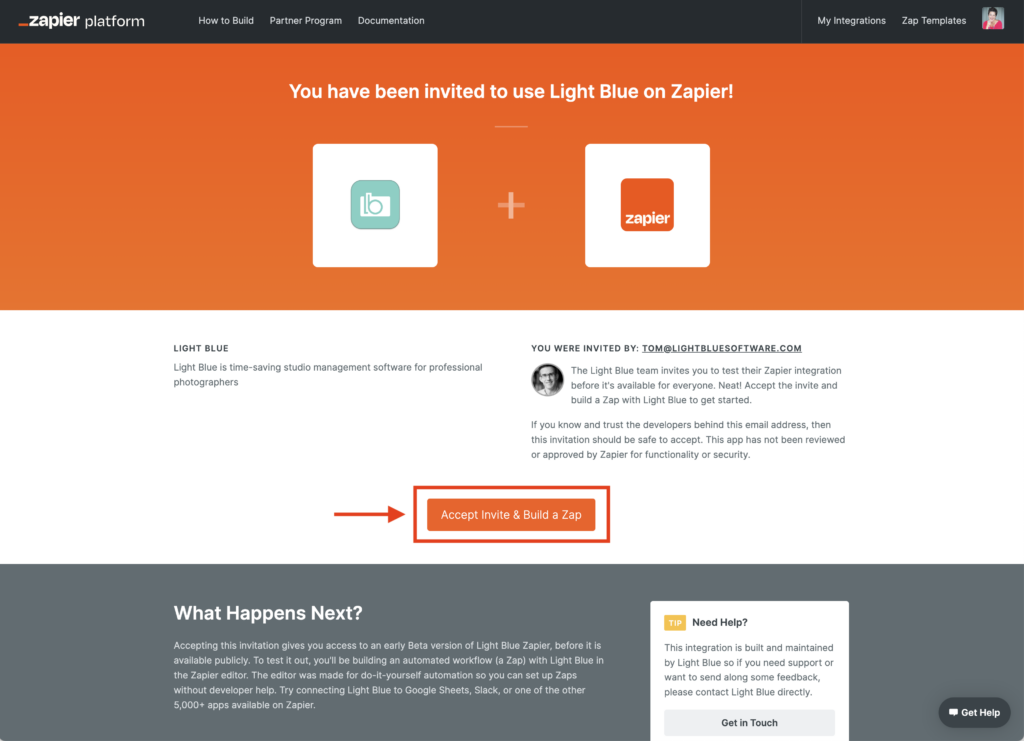
NB. The Light Blue integration for Zapier is currently a “private” action, so you need to click the following link to add it to your Zapier account (instead of searching for Light Blue in Zapier); simply click the “Accept Invite & Build a Zap” button.
👉 Invite to use Light Blue on Zapier.
Adding a Light Blue contact to your mailing list
This zap will add a contact to your mailing list app when you’ve checked the contact’s “Mailing List Opt-In” box in Light Blue or your contact has checked the “Mailing List Opt-In” box within a Light Blue form.
1. Creating the trigger
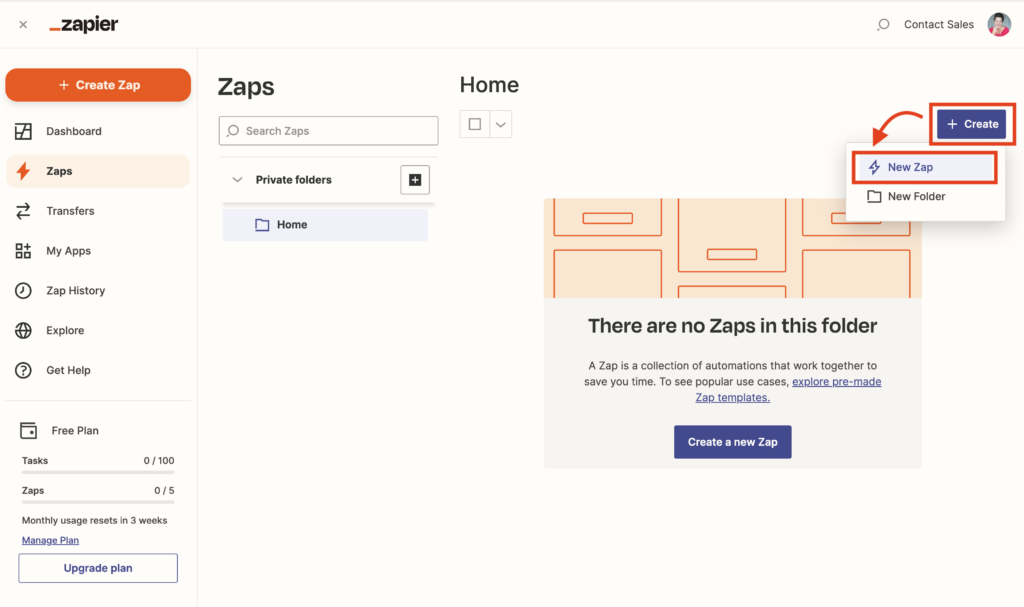
- In Zapier, click the “+ Create” button and choose “⚡️ New Zap” from the drop-down menu.
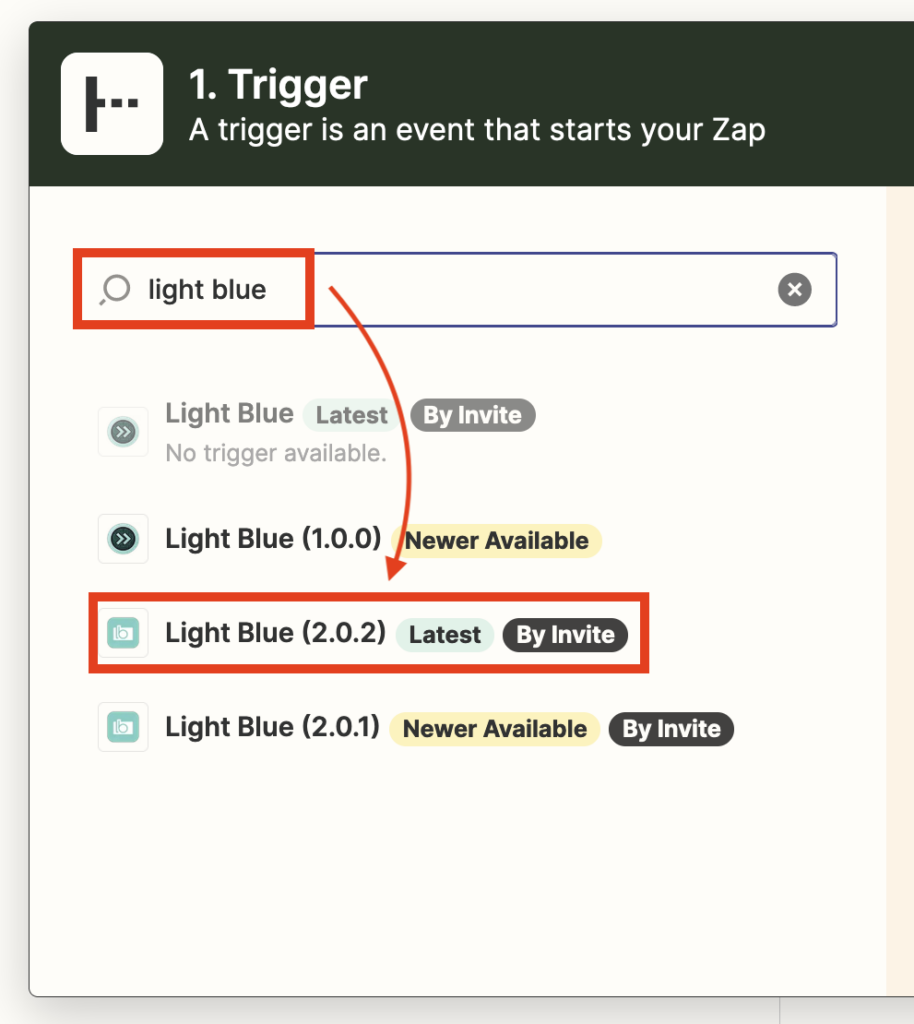
- Start to type “Light Blue” in the search bar.
- A few Light Blue options will be given so make sure you choose the one labelled ‘Latest’ with the most recent version number.
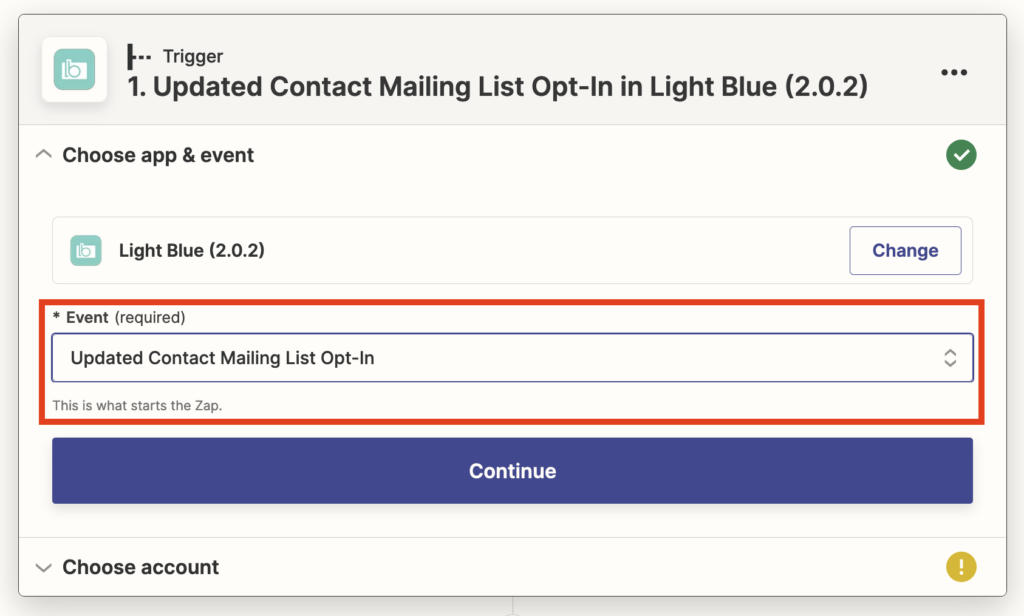
- We then need to choose the event that triggers the action; from the drop-down menu choose “Updated Contact Mailing List Opt-In”.
- Click “Continue”.
- You’ll then be asked to sign into Light Blue; click the “Sign in” button. NB. If you’ve previously created a Light Blue zap, rather than signing in again you’ll be able to simply select the account that’s already connected.
- A pop-up window will then appear asking for your API key; this can be found in the “Light Blue API and integrations” area of your Light Blue account.
- Once you’ve clicked the “Yes, Continue” button your Light Blue and Zapier accounts will be connected.
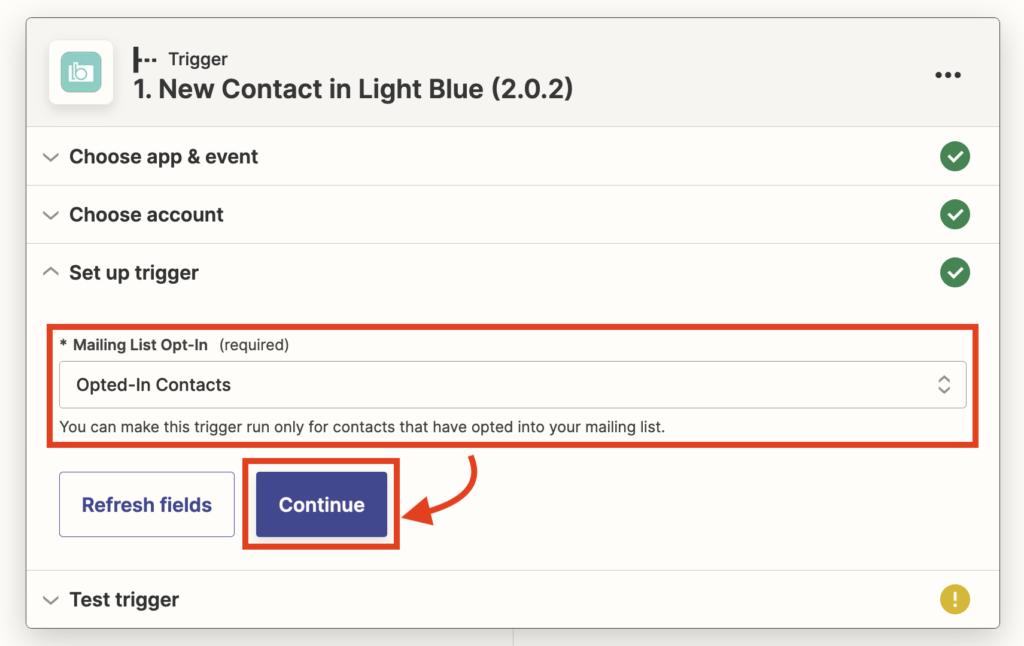
- To set up the details of the trigger, choose “Opted-In Contacts” from the drop-down menu.
- Click “Continue”.
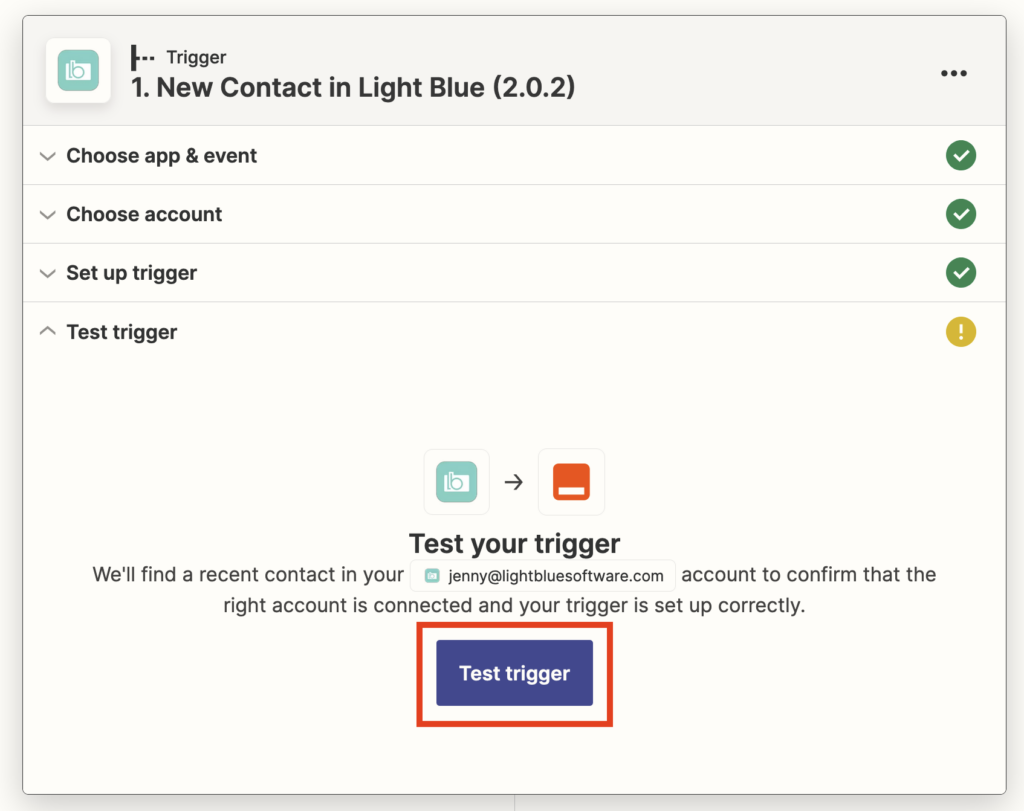
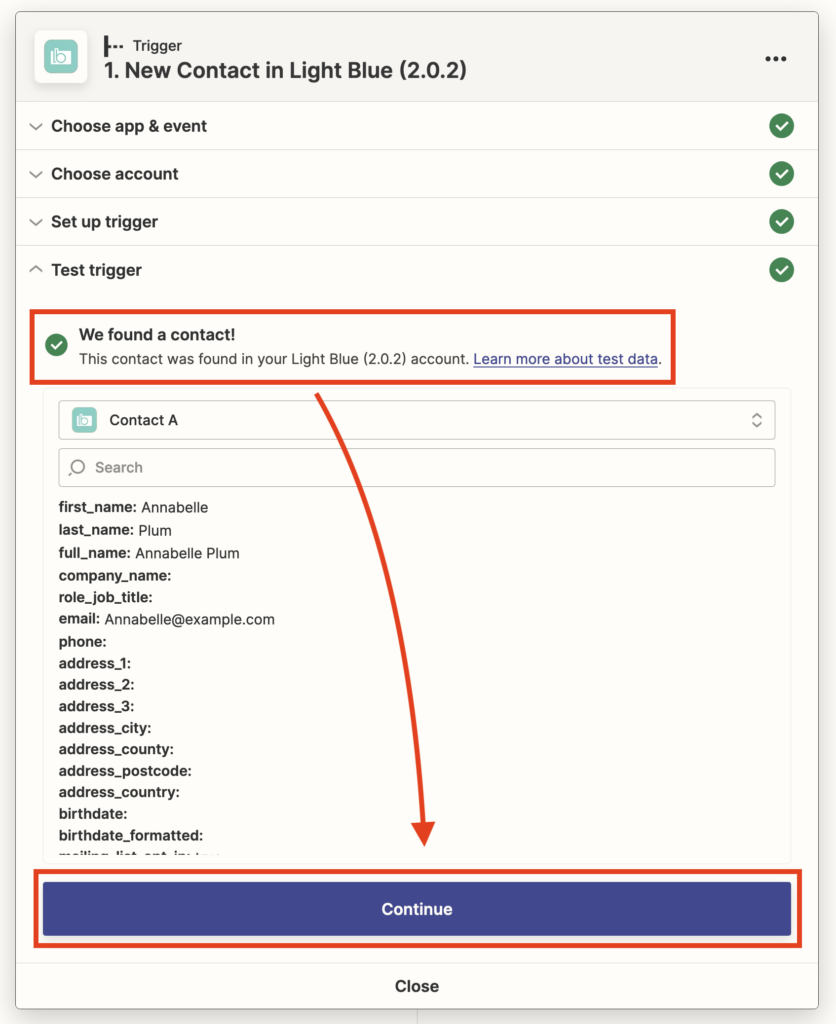
- Click the “Test trigger” button; Zapier will then test the trigger and check it can find a new contact with the “Mailing List Opt-In” box checked.
- Once It’s been successful, click “Continue”.
2. Creating the action
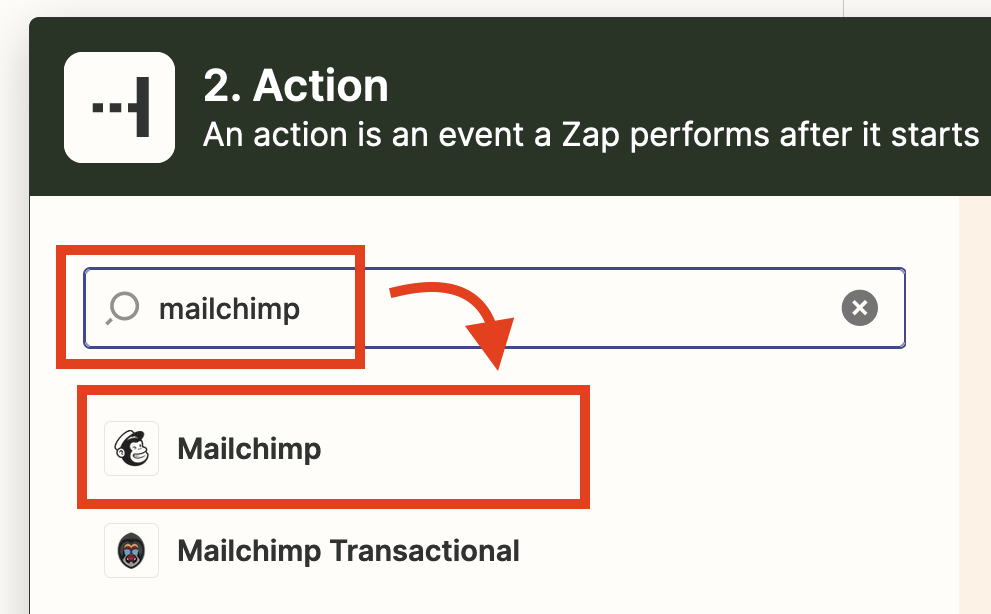
- The next step is to connect Zapier to your mailing list app.
- Start to type the name of it in the search bar and choose it from the options presented; in this article we’re using Mailchimp.
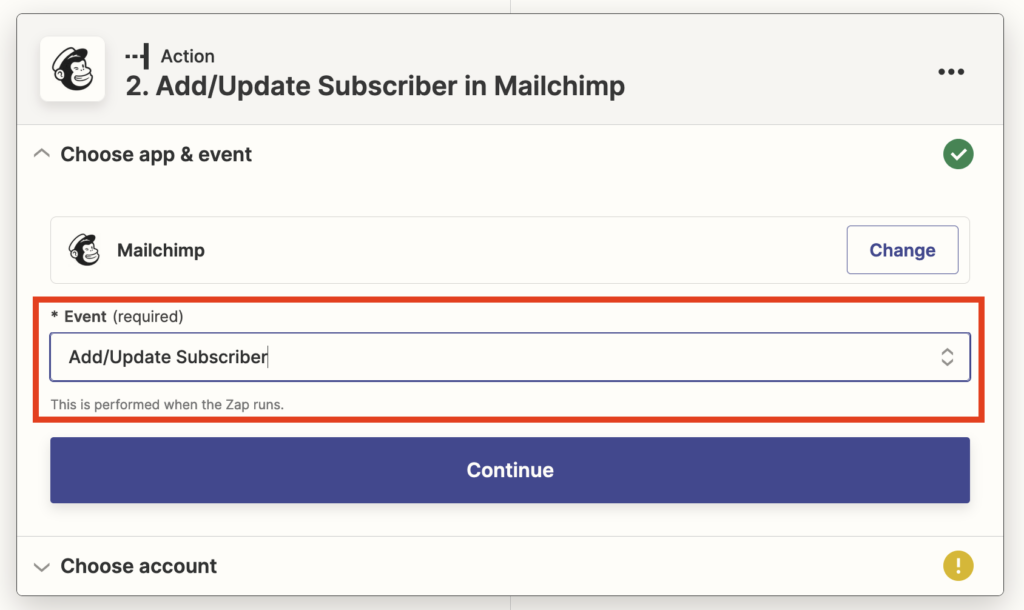
- Choose the Event “Add/Update Subscriber” from the drop-down menu.
- Click “Continue”.
- You’ll then be asked to sign in to your mailing list app; in this case Mailchimp.
- Click the “Sign in” button and follow the prompts to connect your account.
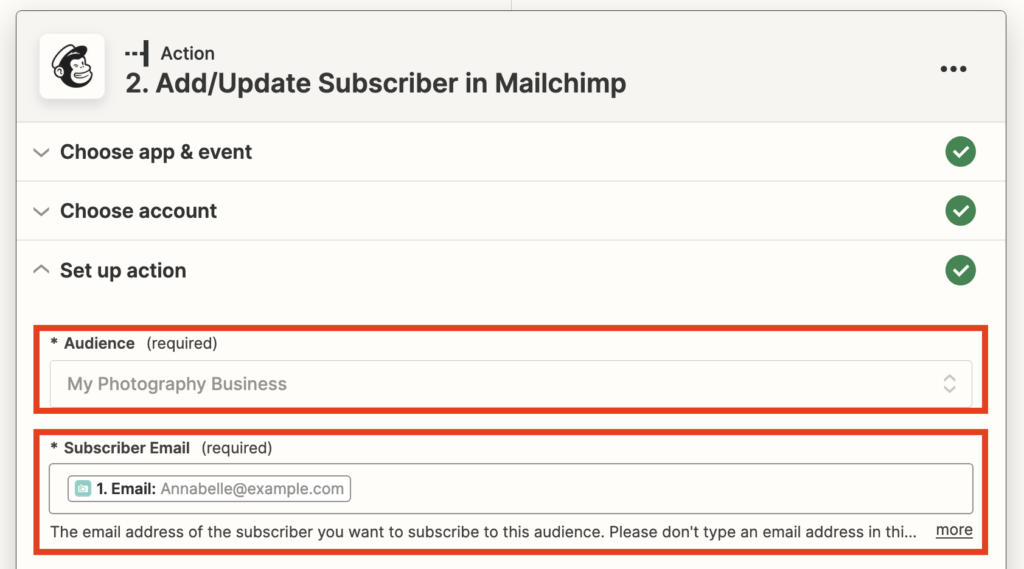
- Once Zapier and your mailing list app account are connected, we need to set up the details of the action; start by choosing the mailing list you want to update in the Audience field.
- Complete the Subscriber Email field. NB. The greyed-out details are from the test trigger contact.
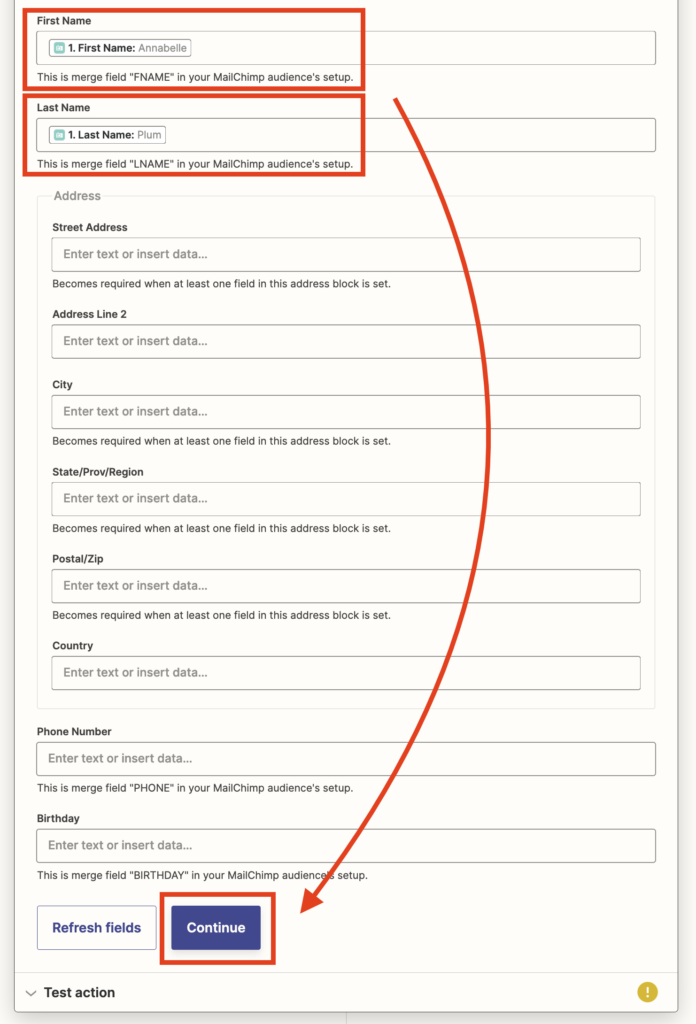
- Scroll down and complete the First Name and Last Name fields.
- Click “Continue”.
- When prompted, click the “Test Action button; Zapier will then test the action.
- Once the test for the action has been successful we can give the zap a name and publish it; Zapier will now automatically add new Light Blue contacts with a checked “Mailing List Opt-In” box to your mailing list app.
Removing a Light Blue contact from your mailing list
This zap will remove a contact from your mailing list app when they’ve said they no longer wish to hear from you and you’ve unchecked the “Mailing List Opt-In” box in Light Blue.
1. Creating the trigger
- Click the “+ Create” button and choose “⚡️ New Zap” from the drop-down menu.
- Start to type “light blue” in the search bar and choose the one labelled ‘Latest’ with the most recent version number.
- From the drop-down menu choose the event that triggers the action; “Updated Contact Mailing List Opt-In”.
- From the drop-down menu, choose the Light Blue account you linked to Zapier in the first zap.
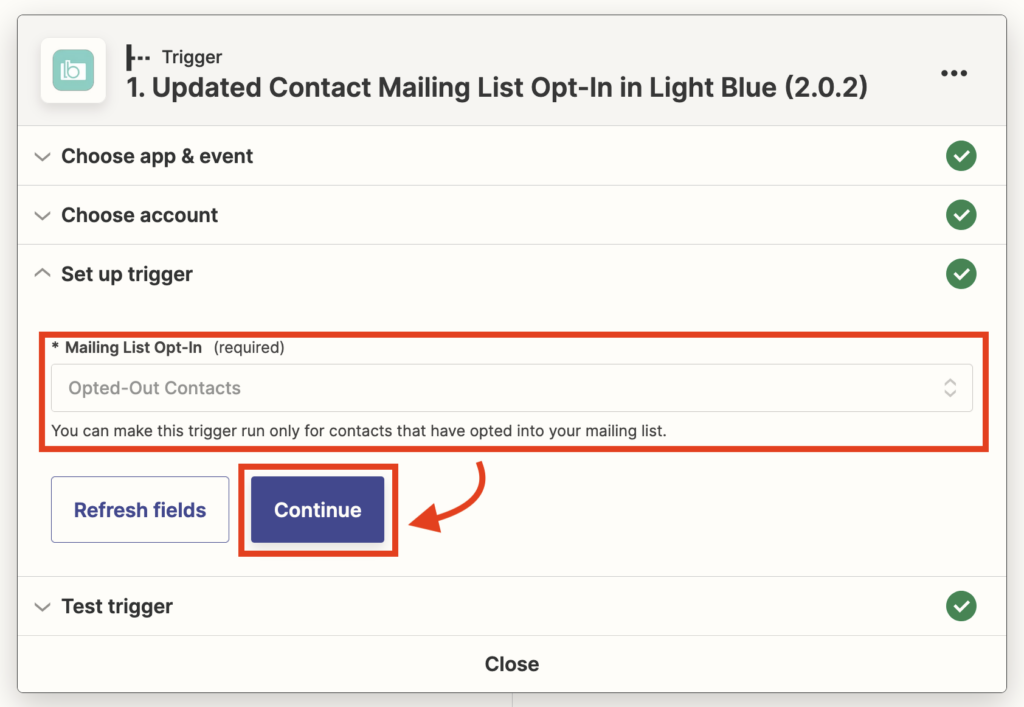
- Then to set up the details of the trigger, choose “Opted-Out Contacts” from the drop-down menu.
- Click “Continue”.
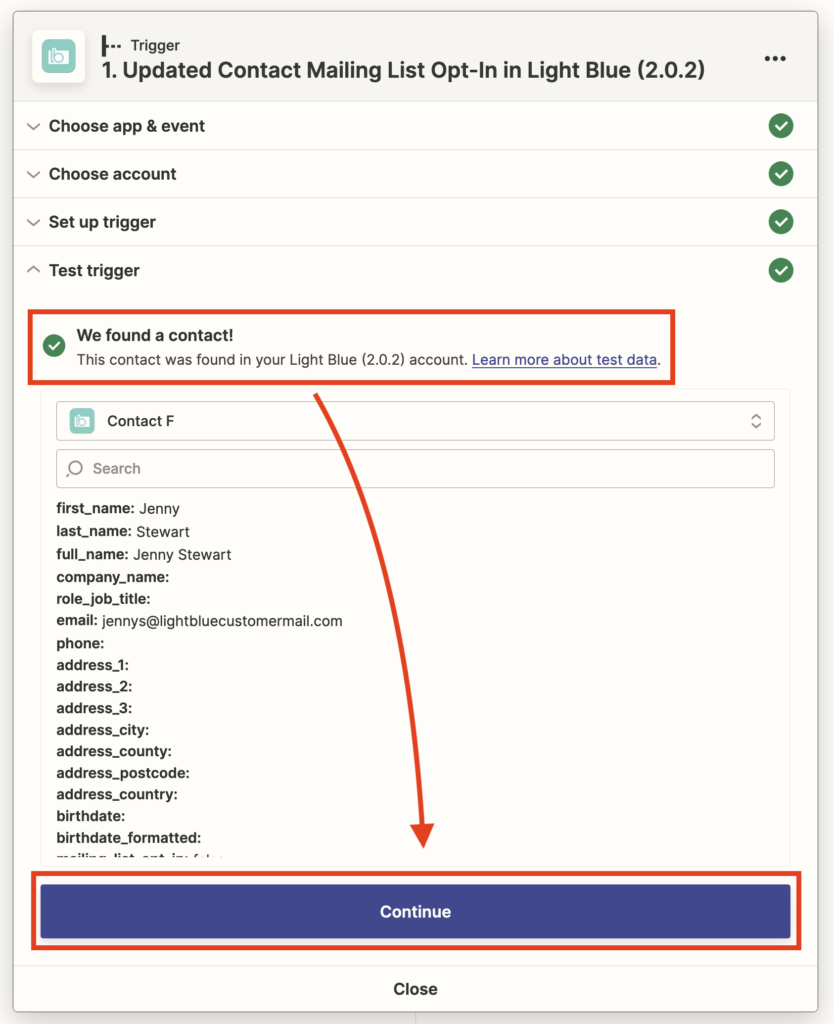
- Click the “Test trigger” button; Zapier will then test the trigger and check it can find a contact with the “Mailing List Opt-In” box unchecked.
- Once It’s been successful, click “Continue”.
2. Creating the action
- The next step is to connect Zapier to your mailing list app; start to type the name of it in the search bar and choose it from the options presented; in this article we’re using Mailchimp.
- Choose the Event “Unsubscribe Email” from the drop-down menu.
- Click “Continue”.

- From the drop-down menu, choose the mailing list app account you linked to Zapier in the first zap.
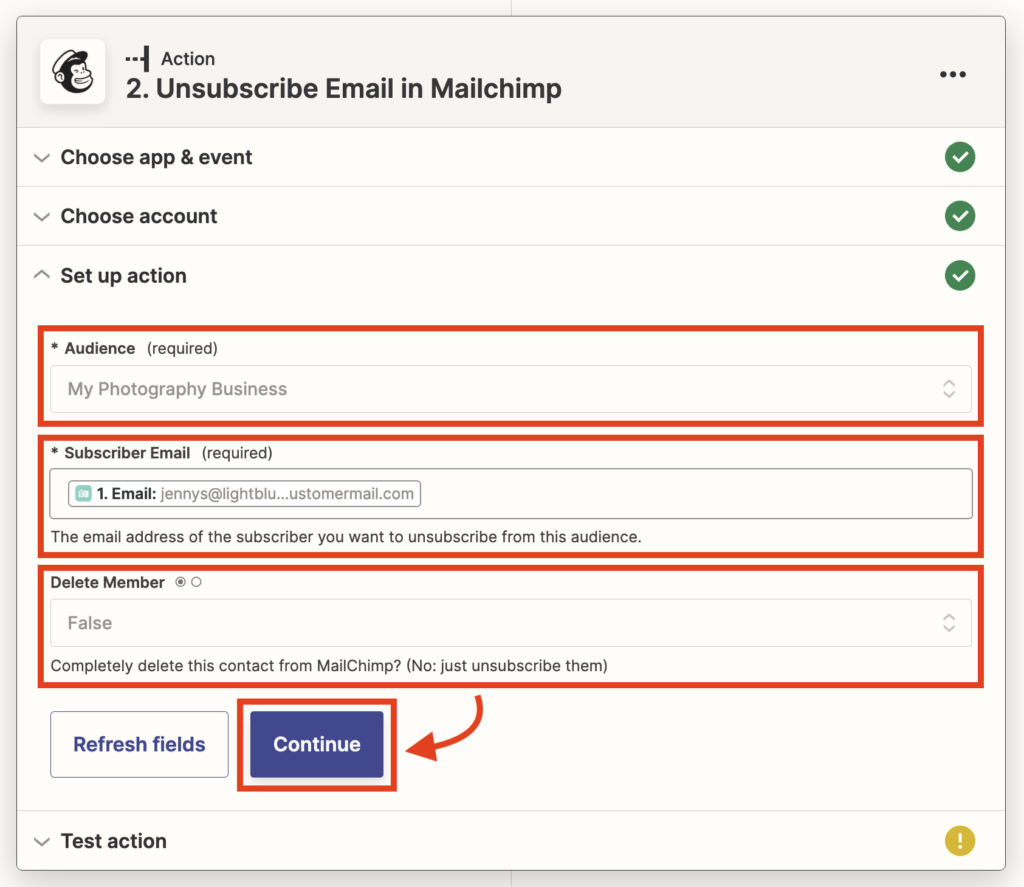
- To set up the details of the action, start by choosing the mailing list you want to update in the Audience field; this should be the same as the one used in the first zap.
- Complete the Subscriber Email field. NB. The greyed-out details are from the test trigger contact.
- Set the Delete Member field to “False” if you want to unsubscribe rather than fully delete the contact from your mailing list app. If however, you want to delete them completely set it to “True”.
- Click “Continue”.
- When prompted, click the “Test Action button”; Zapier will then test the action.
- Once the test for the action has been successful we can give the zap a name and publish it; Zapier will now automatically unsubscribe/delete Light Blue contacts with an unchecked “Mailing List Opt-In” box from your mailing list app.

Updating Light Blue if a contact unsubcribes from your mailing list
This zap will update a contact’s “Mailing List Opt-In” box in Light Blue if they unsubscribe from your mailing list app.
1. Creating the trigger
- Click the “+ Create” button and choose “⚡️ New Zap” from the drop-down menu.
- Start to type the name of your mailing list app in the search bar and choose it from the options presented; in this article we’re using Mailchimp.
- From the drop-down menu choose the event that triggers the action; “New Unsubscriber”.

- From the drop-down menu, choose the mailing list account you linked to Zapier in the previous zaps.
- To set up the details of the trigger, choose the mailing list being used in the Audience field; this should be the same as the one used in the previous zaps.
- Click “Continue”.
- Click the “Test trigger” button; Zapier will then test the trigger and check it can find a recent contact on your mailing list who has unsubscribed.
- Once It’s been successful, click “Continue”.
2. Creating the action
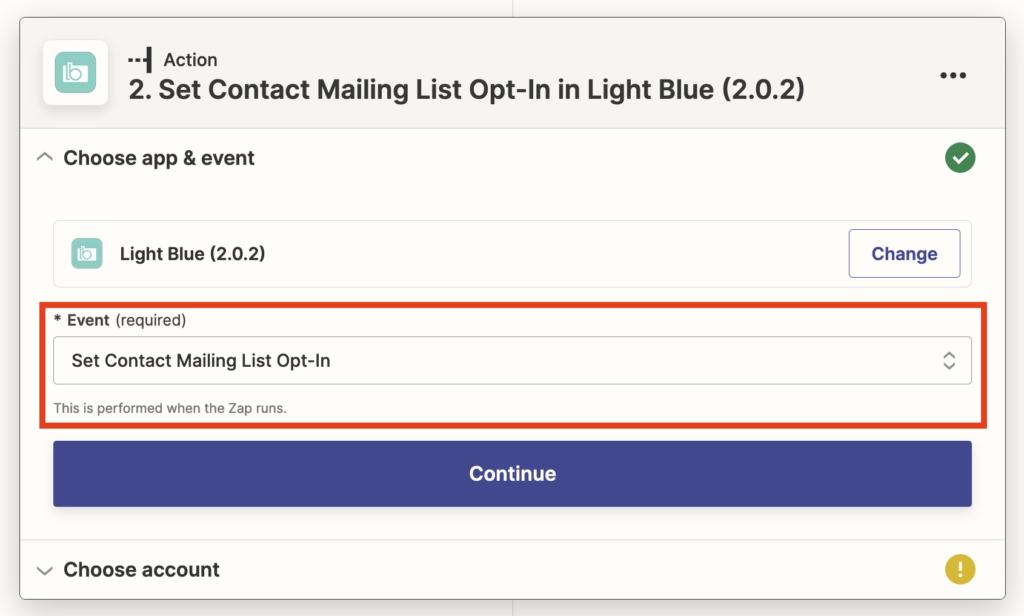
- The next step is to connect Zapier to Light Blue; start to type “light blue” in the search bar and choose the one labelled ‘Latest’ with the most recent version number.
- Choose the Event “Set Contact Mailing List Opt-In” from the drop-down menu.
- Click “Continue”.
- From the drop-down menu, choose the account you linked to Zapier in the previous zaps.
- To set up the details of the action, firstly complete the Email field. NB. The greyed-out details are from the test trigger contact.
- Then set the Opt-In Status field to “False” to uncheck the contact’s “Mailing List Opt-In” box in Light Blue.
- Click “Continue”.

- When prompted, click the “Test Action button; Zapier will then test the action.
- Once the test for the action has been successful we can give the zap a name and publish it; Zapier will now automatically uncheck the contact’s “Mailing List Opt-In” box in Light Blue when they unsubscribe from your mailing list.