Search for answers or browse our knowledge base.
Can't find the answer you need here? Contact our support team and we'll gladly help you.
Using Tags in Shoot and Contact Records
Light Blue Tags are a simple way to add Shoot or Contact Records to a particular subset of Records so you can easily find them again; similar to using a sticky label or highlighted comment if you were still using paper records!
Depending on how you run your business, adding Tags can be handy for a variety of reasons.
They can be;
👁️ A quick visual identifier, perhaps for your VIP clients, where you’ve received fabulous feedback or for sessions that have been postponed but not yet rebooked.
🗂️ Good for providing granular details, maybe for social media permissions or enquiry sources.
📋 Perfect for keeping track of promotional activity, possibly for a specific event you’ve attended or offered to a particular group of clients.
📈 Ideal to record potential future interest, either for something you currently offer or a genre that you may add to your portfolio at some point.
⚙️ Used to trigger automation 👉 such as linking with Zapier to add a contact to your mailing list app.
Whichever the reason though, using Tags allows you to group these Records together and easily refer back to them in the future.
Creating Tags
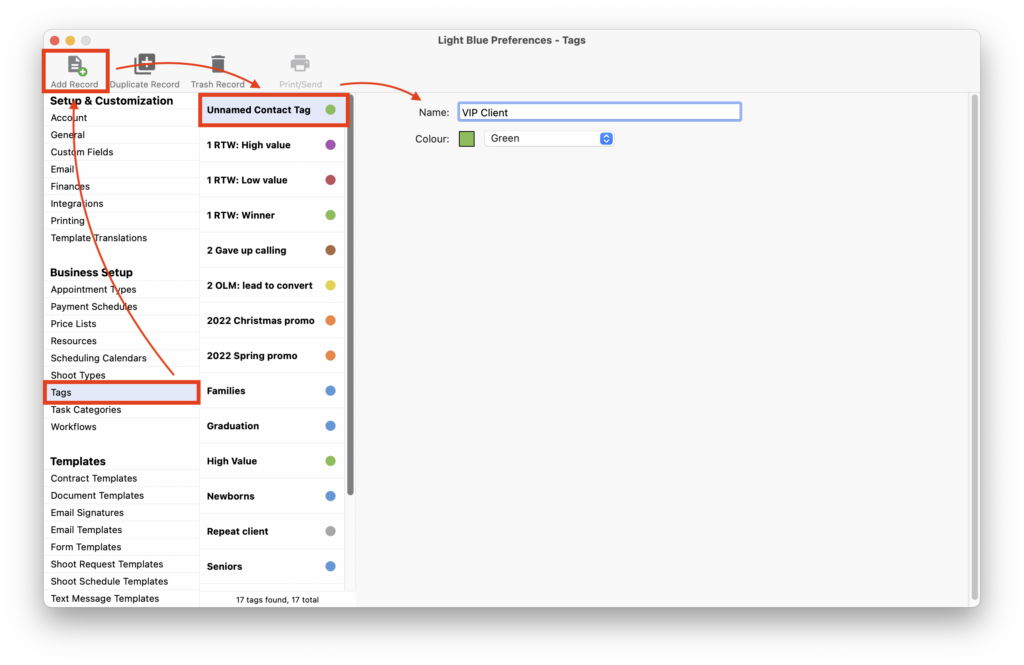
- In the Preference pane, click on “Tags” in the “Business Setup” category.
- Click “Add Record”.
- Name your Tag and assign it a Colour.
- Repeat as required; there is no limit to the number of Tags you can create!

Adding and removing Tags
Individually
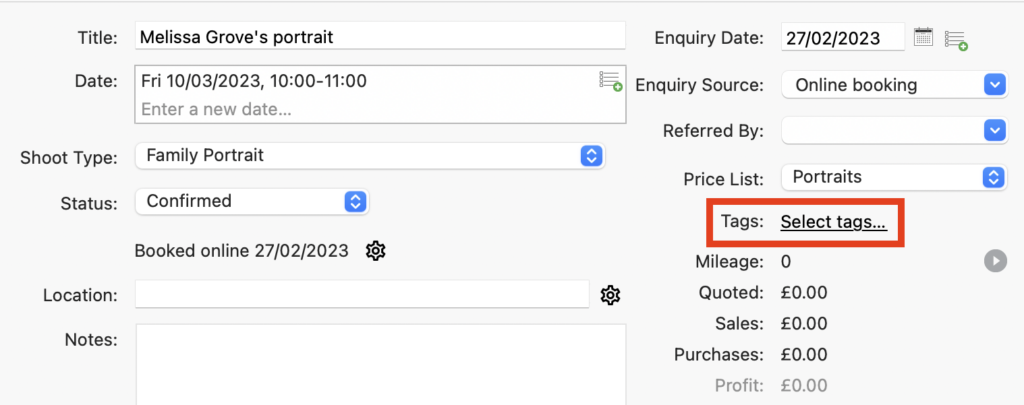
- In either the Shoot or Contact Record, click on “Select tags…”.
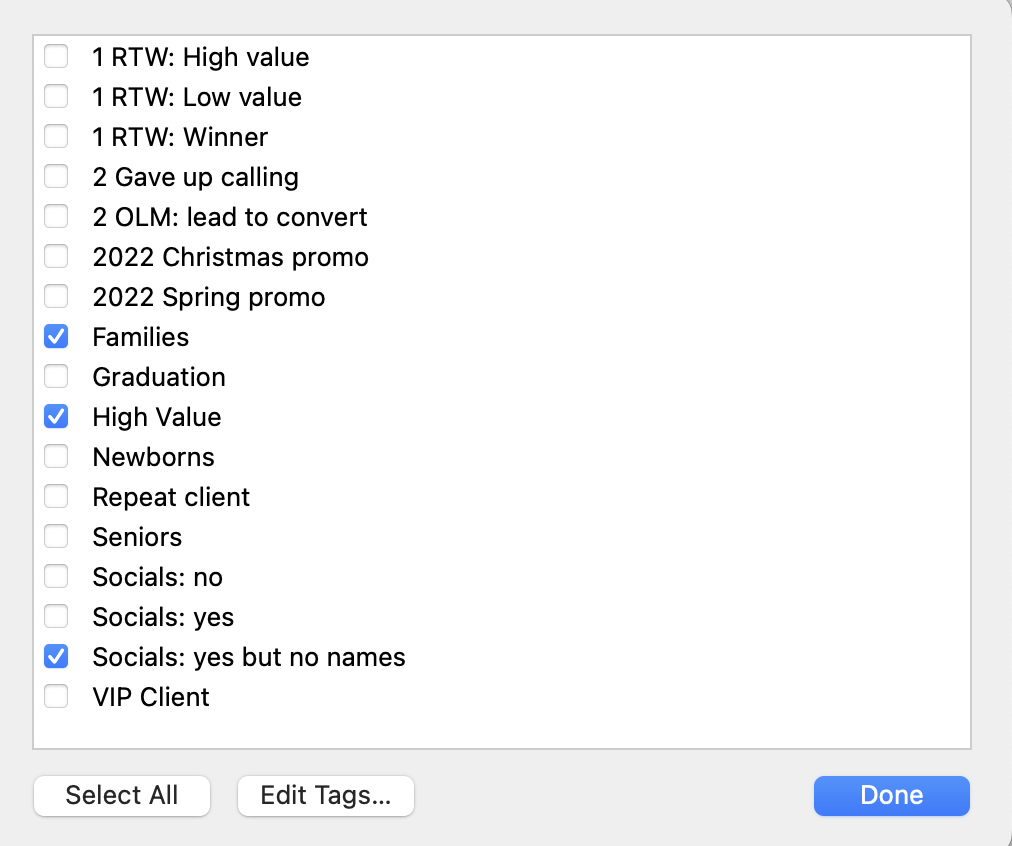
- Either check to add or uncheck the appropriate box to remove the Tag/s assigned to the Record; you can assign as many, or as few, Tags as you like to a Record.
- Click “Done”. NB. There is a direct link to amend your Tags in the Preference Pane in this dialog box; simply click “Edit Tags…”.


In bulk
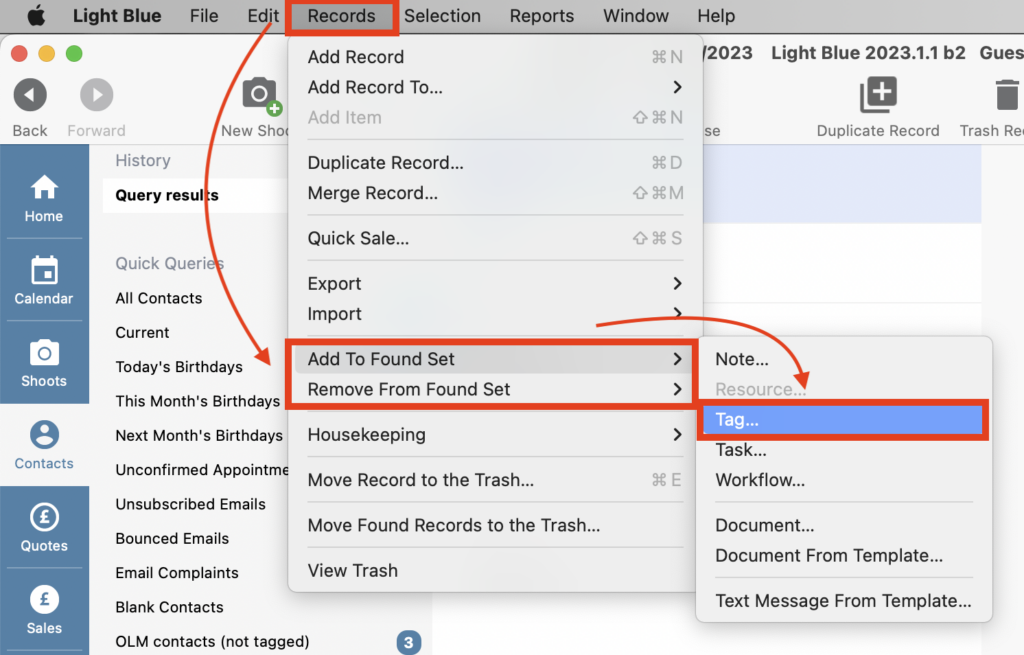
- Once you have the list of Records showing, click on “Records” in the main menu bar.
- Choose either “Add To Found Set” or “Remove From Found Set” followed by “Tag” from the drop-down menus.
- Choose the appropriate Tag and click “Link”. NB. If you need to add multiple Tags to the Records you will need to repeat this for each Tag.

Using Tags in the Query tool
You can use the Query tool to search for the use (or not!) of particular Tags in your Shoot or Contact Records.
Either base your Query around the Record Type amending the various parameters as required:

Or the Tag itself.
