Search for answers or browse our knowledge base.
Can't find the answer you need here? Contact our support team and we'll gladly help you.
🎥 Using Shoot Requests and Schedules
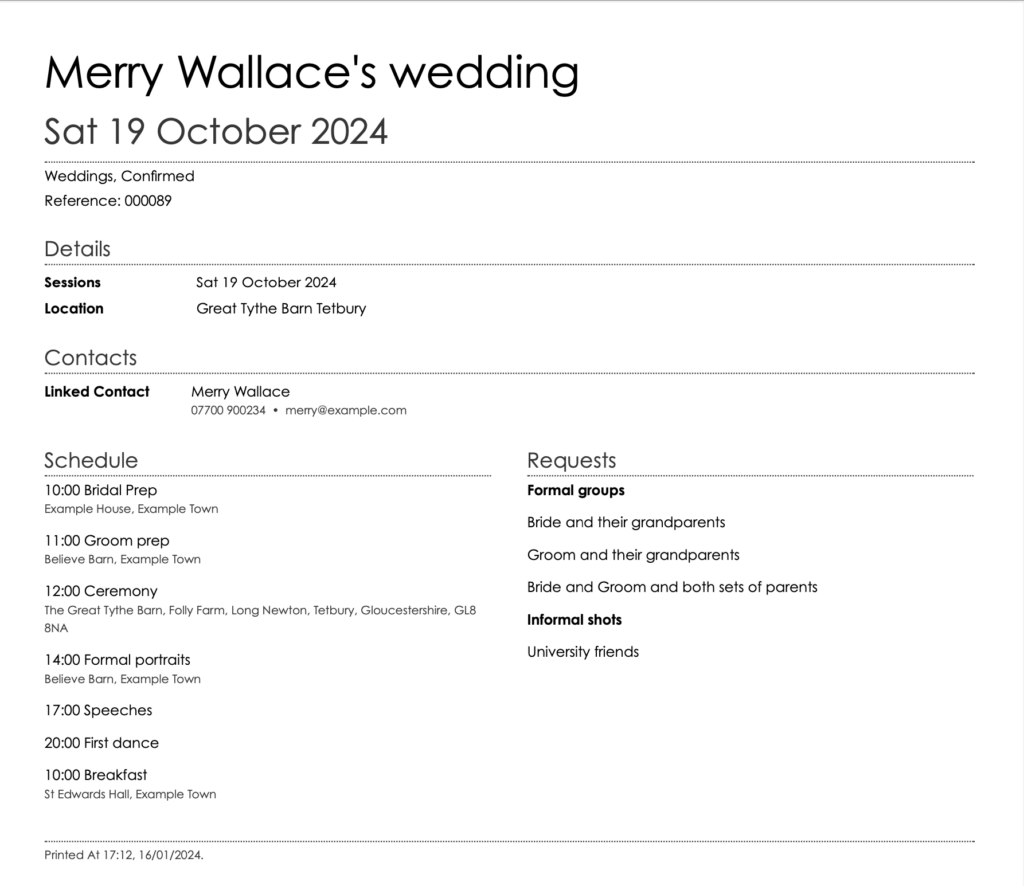
Light Blue Shoot Requests and Shoot Schedules are great tools to help keep you on track during your shoots. Shoot Requests record the ‘must get’ shots and Shoot Schedules tell you what you’re doing, when and where.
They’re both included in a Shoot Record print-out and also show in the notes field if you publish your Light Blue events to another calendar app allowing you to easily refer to them when you’re out and about. You can also add them as a Form field in your client questionnaires to make things even more streamlined!
To learn more about how to do this watch the video below; though if you prefer to learn by words and pictures, have a read of the help article instead!
Shoot Requests
Adding requests manually
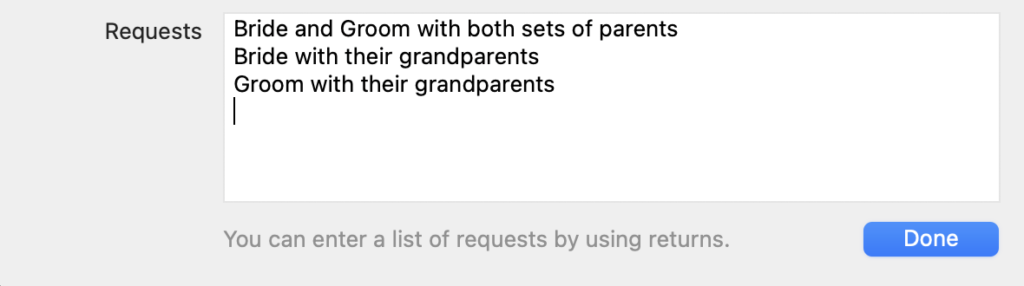
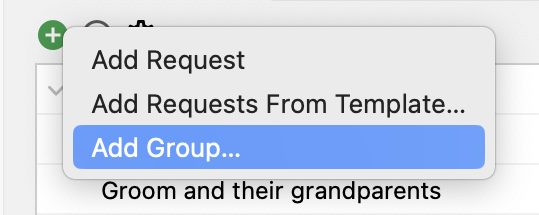
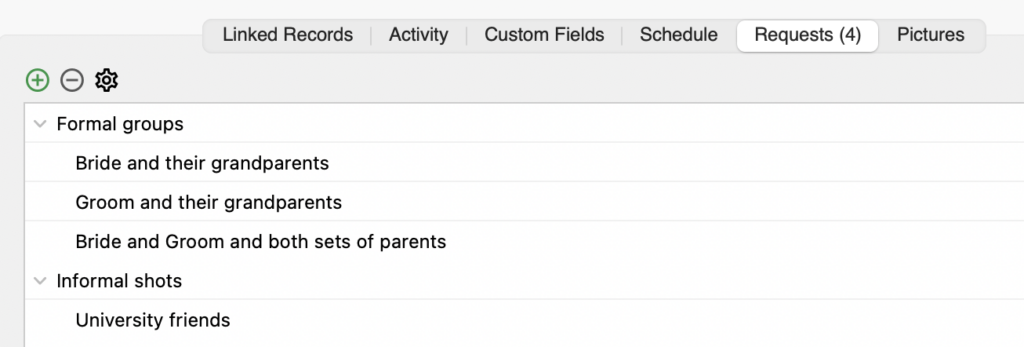
Shoot Requests are found in the “Requests” tab of the Shoot Record. To add one, click on the green “+” button and choose “Add Request” from the drop-down menu. Enter the request and if you’ve several simply press “enter” on your keyboard between each one to record them on separate lines and click “Done” when you’re finished.
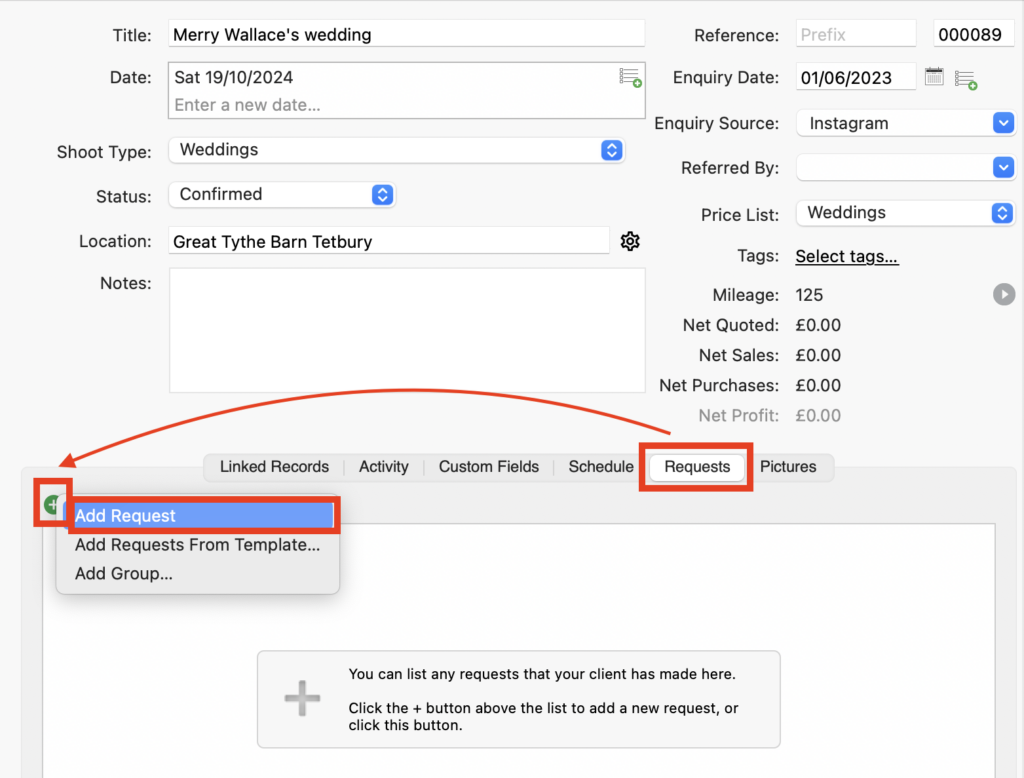
If needed, you can drag the Requests to reorder them. You can also group them, particularly useful if you say want to separate out the formal group shots from informal ones at a wedding; just use “Add Group..” from the drop-down menu.
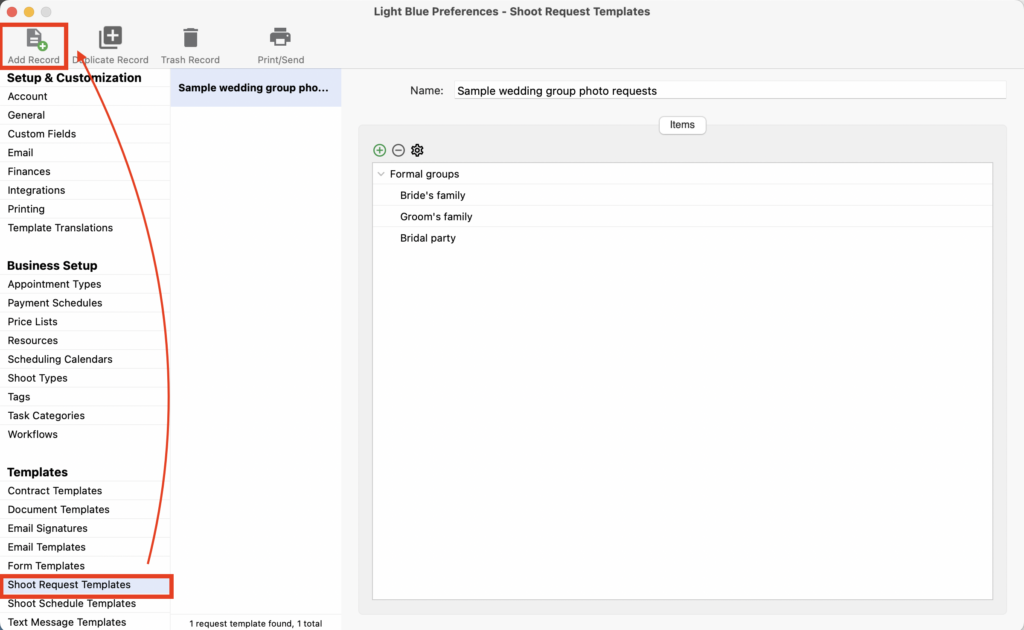
Adding requests from a Template
If you regularly have the same, or very similar lists of requests create a Shoot Request Template in Preferences so you can add them all in one go using the “Add Requests from Template..” from the drop-down menu amending where required.

Adding requests via a Form
You can also include requests in any Form which when completed by your client and imported into Light Blue will automatically appear in the Requests tab.
👉 If you’re not familiar with how you can use Light Blue Form’s for your client questionnaire have a read of this help article.
Shoot Schedules
Adding schedule steps manually
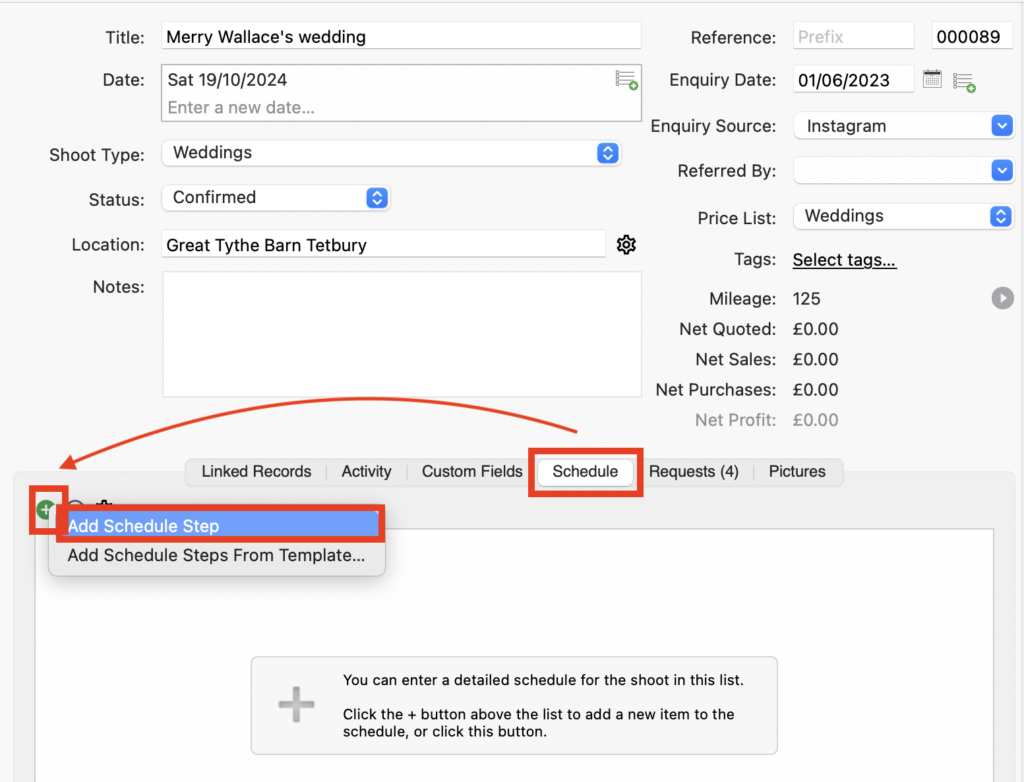
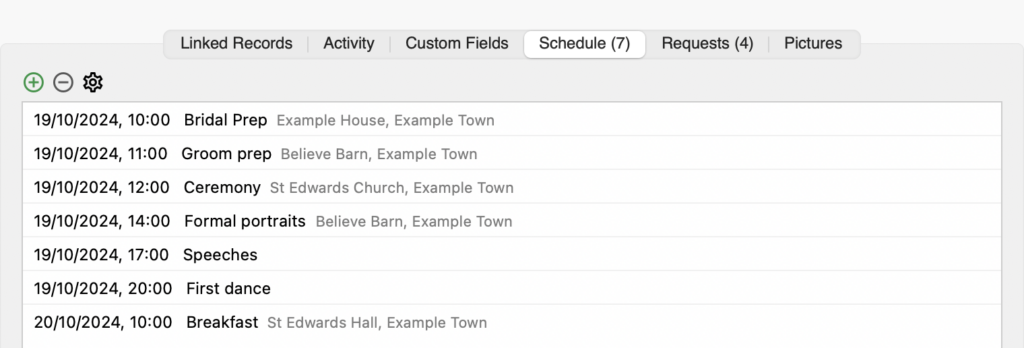
Shoot Schedules are found in the “Schedules” tab of the Shoot Record. To add one, click on the green “+” button and choose “Add Schedule Step” from the drop-down menu. Enter the details and if you’ve more than one to add, simply click “Save and add another”. And don’t worry about entering them all in the correct order; Light Blue displays the Schedule in date and time order.
Adding schedule steps from a Template
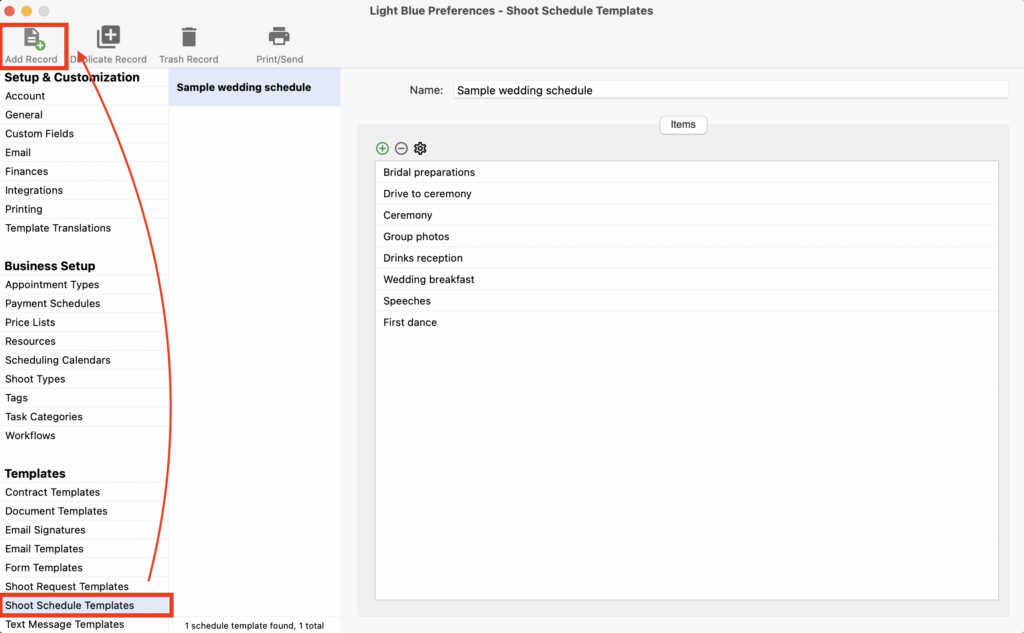
If you regularly have the same, or very similar Schedule Steps create a Shoot Schedule Template in Preferences (which just has the step description). You can then add them all in one go using the “Add Requests from Template…” from the drop-down menu adding in the time and address.
Adding schedule steps via a Form
You can also include schedules in any Form which when completed by your client and imported into Light Blue will automatically appear in the Schedule tab.
👉 If you’re not familiar with how you can use Light Blue Form’s for your client questionnaire have a read of this help article.
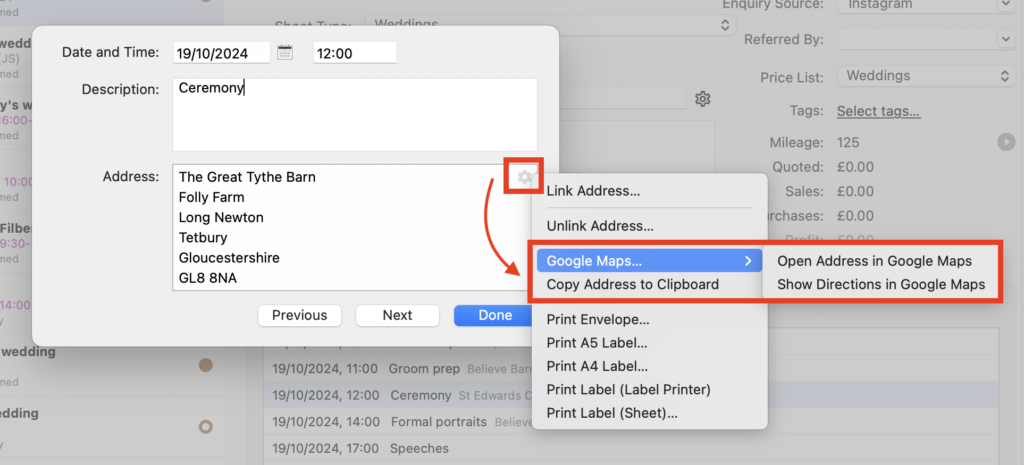
Using Google Maps with schedule steps
If a Schedule Step has an address there is the option to open it or show the directions in Google Maps, or copy it to your clipboard if you use another navigation app!
Viewing Requests and Schedules
As well as viewing Requests and Schedules in the relevant tab of the Shoot Record, you can also jump straight to the Schedule tab by double clicking on the event in Light Blue’s Calendar view.
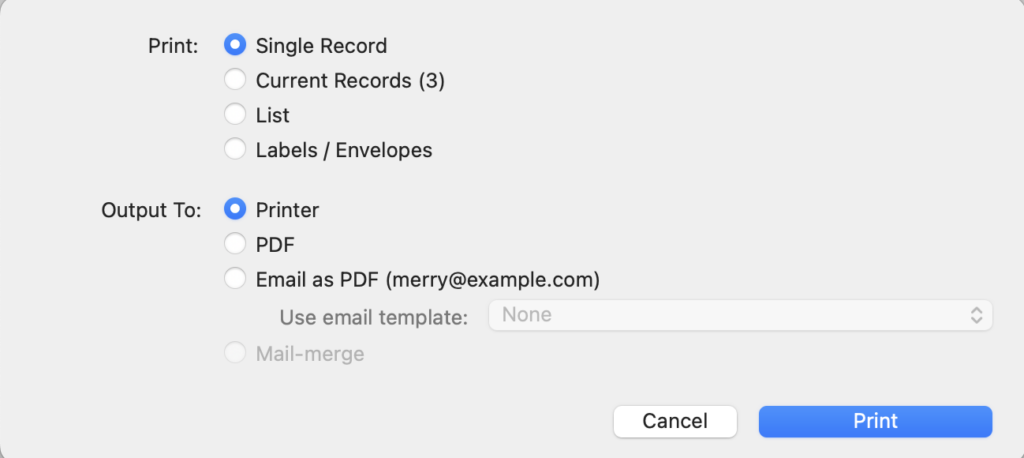
Requests and Schedules are also included in the Shoot Record when you print it out; simply click “Print/Send” in the main menu bar and choose your output method. You can either print it out, create a PDF or attach it as a PDF to an email to be sent to your client (using a template email if required).