Search for answers or browse our knowledge base.
Can't find the answer you need here? Contact our support team and we'll gladly help you.
Using templates for email and text messages
Keeping in touch with your clients is important, but it doesn’t have to take ages! Light Blue’s email and text message templates save you time and mean that you don’t forget to say the important things. There’s no need to type the same messages out again and again, and our powerful mail-merge tags automatically personalise your messages with the relevant details.
Email templates are useful because they can save you a lot of time sending out standard responses to your clients’ queries, help you to use consistent wording, and present yourself with a professional image. You can use email templates whenever you create an email to a client from Light Blue, and you can also use them in workflows to send automated messages to your clients: for example, to remind them about a booking. 👉 Find out more about automating messages in this help article.
This guide will help you to:
- Send an email from a template
- Create a new email template
- Format your emails to include styling, images & links
- Add attachments to your emails
- Include mail-merge tags to personalise your email and message templates
- Use example email templates that will give you a head start
We’ll also look at:
Need more help? Book a free 1:1 session.
Sending an email from a template
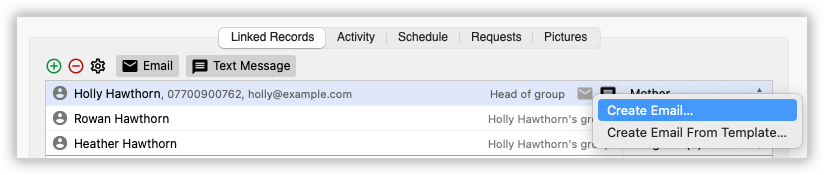
To send an email using a template from a shoot record, go to the “Linked Records” panel of the shoot, then click on the “Email” button and choose to create email from template, then choose the template that you wish to use.
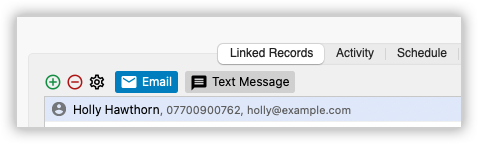
Alternatively, hover your mouse over the details of a particular contact in the “Linked Records” panel and then click on the small email icon.
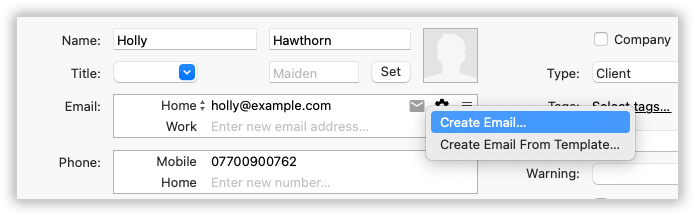
If you’d like to send an email from within a contact record, click on the email icon that appears when you hover your mouse over the contact’s email address.
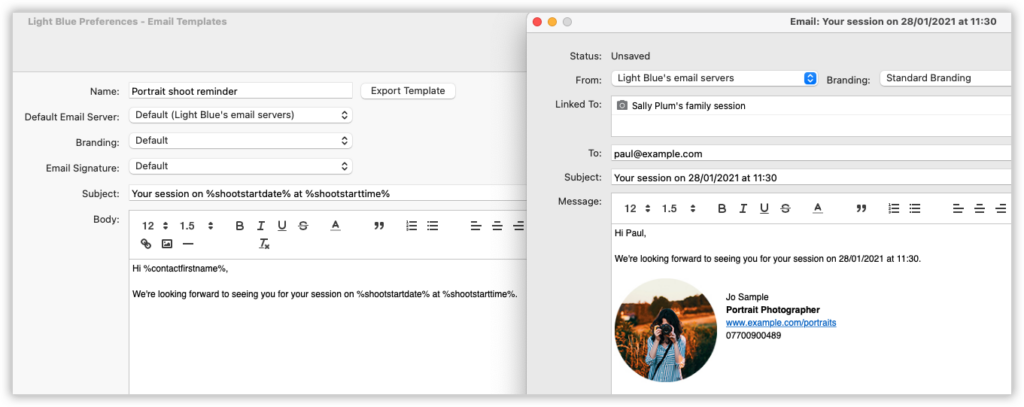
Creating a new email template
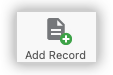
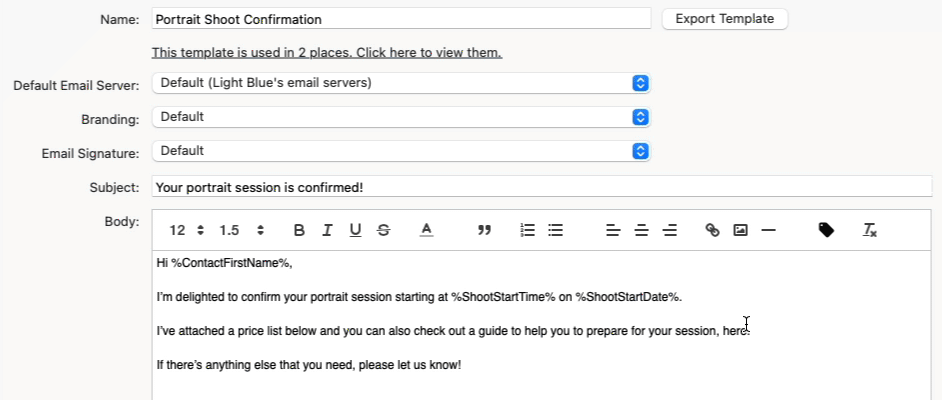
You set up your email templates in the “Email Templates” section of the Preferences window. You can add a new template by clicking the “Add Record” button, then give the template a name, a subject line, and typing the content of the message.
Formatting your emails
Our email templates include formatting options that allow you to control the look of your emails. The formatting bar at the top of the message body includes buttons for setting bold, italic, or underlined text, as well as fonts and text sizes. Do be careful about using fonts though, because if you choose a font that the recipient doesn’t have then your email might not appear quite like you’d expect.
⭐️ Top tip: And do make sure you add your branding to your Light Blue Client Portal to enhance the look of your emails even further. 👉 Details of how to do that can be found here.
Links
You can add links to your emails by selecting the text that you want to add a link to and clicking the link button, then typing in the URL that you want the link to go to, and clicking the “Save” button.
Images
Photography is obviously a visual product, and you can include images in your emails to show off your work or add more branded elements. To do that, select where you want the image to go and click the “Insert Image” button.
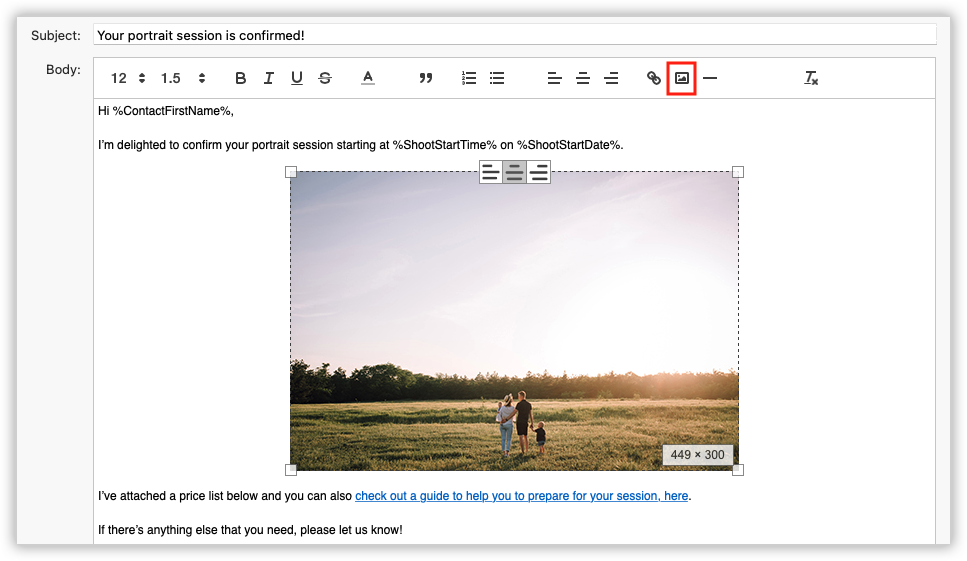
From there you can choose an image that will get uploaded to our servers and be included in your email. Make sure that the image is scaled to a sensible size.
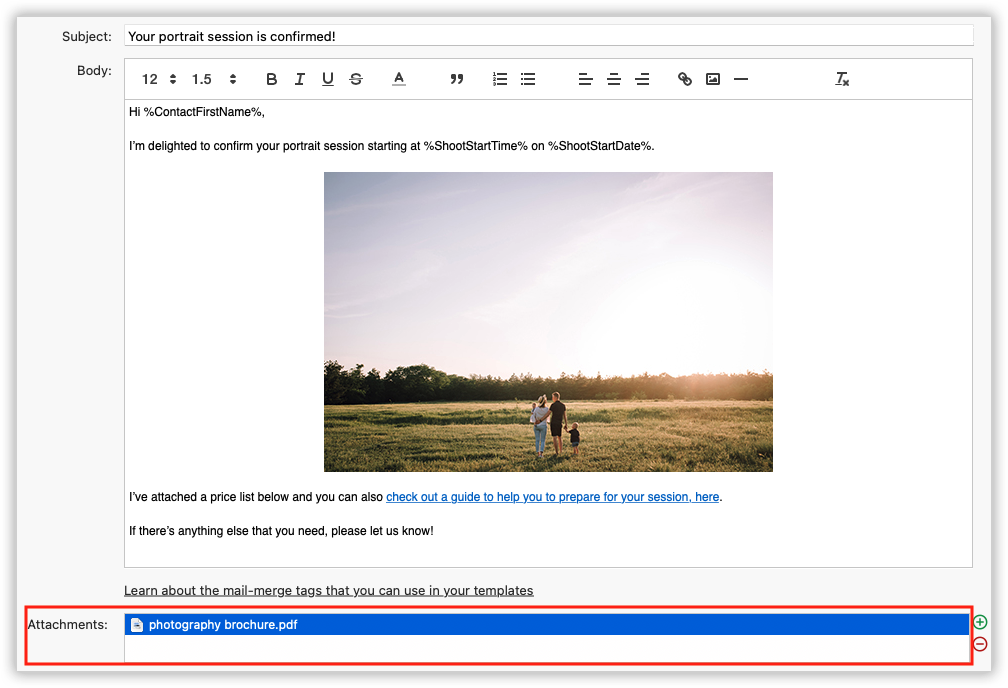
Adding attachments
The “Add Attachment” button at the bottom of the email window will allow you to choose any attachments that you wish to include with your email template.
Including mail-merge tags to personalise your messages
When you’re creating an email template, you can make use of Light Blue’s mail-merge tags to personalise the message and include relevant information about your clients and their shoots.
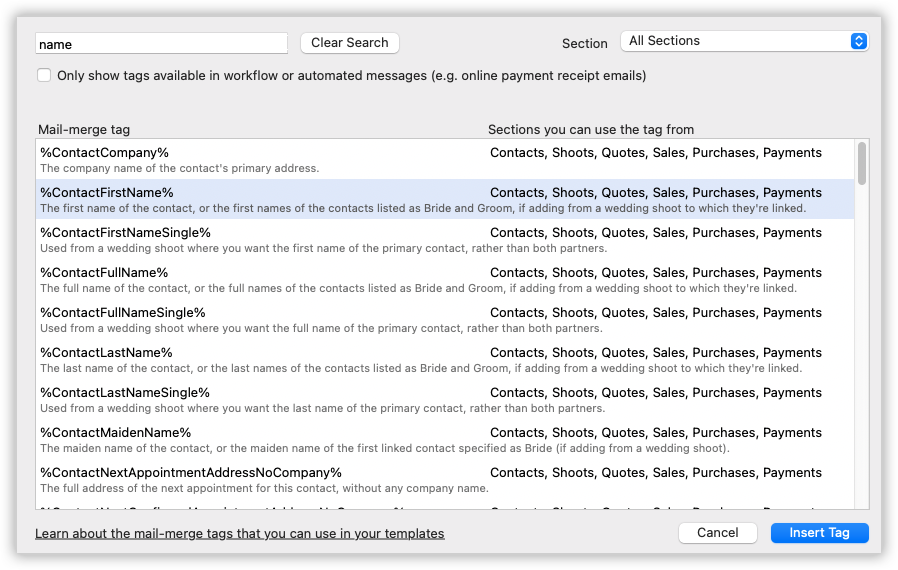
Light Blue’s mail-merge tags consist of special text that appears between a pair of % symbols. For example, to insert your client’s first name, you’d type a % symbol, then the tag, ContactFirstName and then the closing % symbol.
You’ll find a comprehensive list of Light Blue’s mail-merge tags in the knowledgebase on our website.

To add a mail-merge tag into your email template, click on the “Insert Mail-Merge Tag” button in the toolbar and then search for the tag that you’re interested in.
When you use the email template to create a message, the tag will be replaced with the relevant information (e.g. your client’s name or the date of the shoot).
Example email templates that will give you a head start
We’ve prepared a few example email templates that you can download and install into your own copy of Light Blue to save you some time. You can then personalise the templates to suit your own tone of voice. 👉 And here’s a blog post covering the ten essential email templates for photographers.
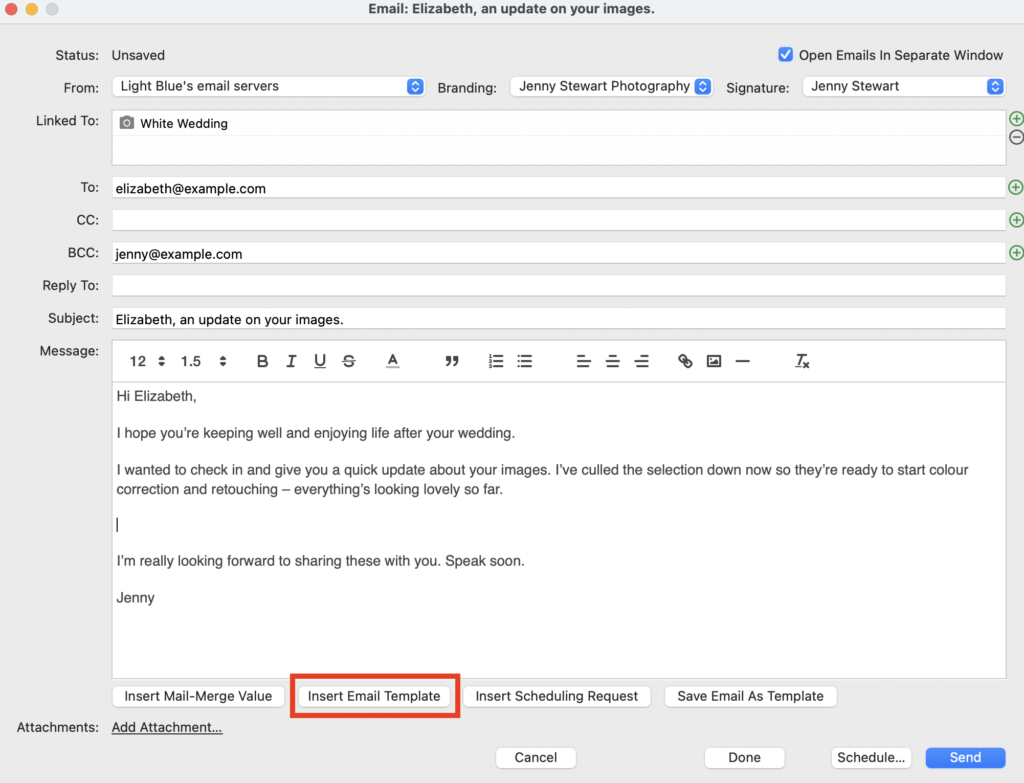
⭐️ Top tip: Email Templates don’t have to be a full email. You can create Templates for ‘snippets’ of text that you can add to any email; perhaps to give an update on your editing turnaround time or other bits of information that might be useful for certain clients. Simply click on the “Insert Email Template” button when composing your email.
Sending text messages from a template
Like sending emails, it’s also possible to send text messages using templates. They’re a really helpful way of sending quick reminders to your clients in plain text.
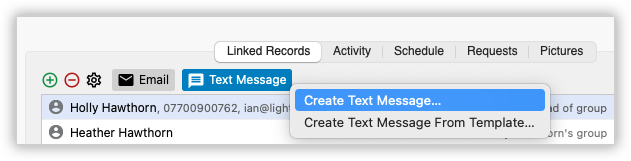
To send a single text message to someone, go to a Shoot record for someone who’s got a mobile number, click on the “Linked Records” panel, then click on the “Text Message” button.
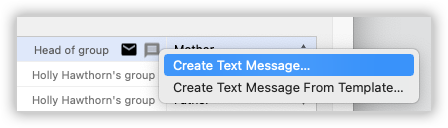
Alternatively click on the smaller text message icon which appears next to the contact’s details when your mouse hovers over them.
If you’re viewing the contact record, you can click on the text message icon which appears in the contact record when you hover your mouse over a phone number.
Creating new text message templates
You can create a new text message templates in the “Text Message Templates” section of the Preferences window. To create a new template, go to the “Text Message Templates” section, click on the “Add Record” button in the toolbar and then start writing your message. You can include mail-merge tags within text message template to automatically personalise the messages.
Webinar
An hour’s webinar running through the key email points in the article above and providing some specific template ideas for different photography genres:
00:00 – Introduction
01:05 – Email Templates: What are they and why use them
02:45 – Using Email Templates: Overview including use of ‘snippet’ Templates
06:15 – Using Workflows to automatically send emails
11:00 – Creating an Email Template
14:10 – Using Mail-Merge Tags to personalise emails
17:25 – Enhancing emails: Formatting and adding clickable links and images
20:00 – Email signatures including adding clickable links to images
23:55 – Adding your branding to emails through Light Blue’s Client Portal
27:15 – Creating variants of Email Templates
33:10 – Ideas for Portrait Photography Email Templates through all stages of the client journey
38:25 – Then for Wedding Photography
47:20 – Some extra ideas for Newborn Photography 👉 More details in this blog post.
48:50 – And finally for Corporate/Commercial Photography
50:50 – Tips for the Email Template creation process