Search for answers or browse our knowledge base.
Can't find the answer you need here? Contact our support team and we'll gladly help you.
🎥 Adding your branding to printed/PDF invoices, quotes, and receipts
It’s important to ensure that your photography brand is reflected across all areas of your business and any printed/PDF communication you have with your client is no exception to this. Whether it’s a quote, invoice or receipt you want their design to reflect and be consistent with your brand.
To learn more about how to do this watch the video below; though if you prefer to learn by words and pictures, have a read of the help article instead!
Setting up your printed branding in the Light Blue desktop app
Printed branding refers to the branding added to documents that are created within the Light Blue app that might be printed out, or which may simply be viewed as a PDF; like your quotes and invoices. The easiest way to imagine what this could look like is to think of a traditional business letterhead that includes branding, a company address, other contact details and perhaps some legal information.
- First of all you’ll need to create your letterhead as a PDF. The simplest way to do this is to use Word or Pages to design your letterhead and then use the ‘Export’ option to create your PDF. Alternatively, you could use an application like Adobe Acrobat or one of a number of free PDF creators available online. NB. Remember to create your PDF in the paper size you generally use; usually A4 or US letter.
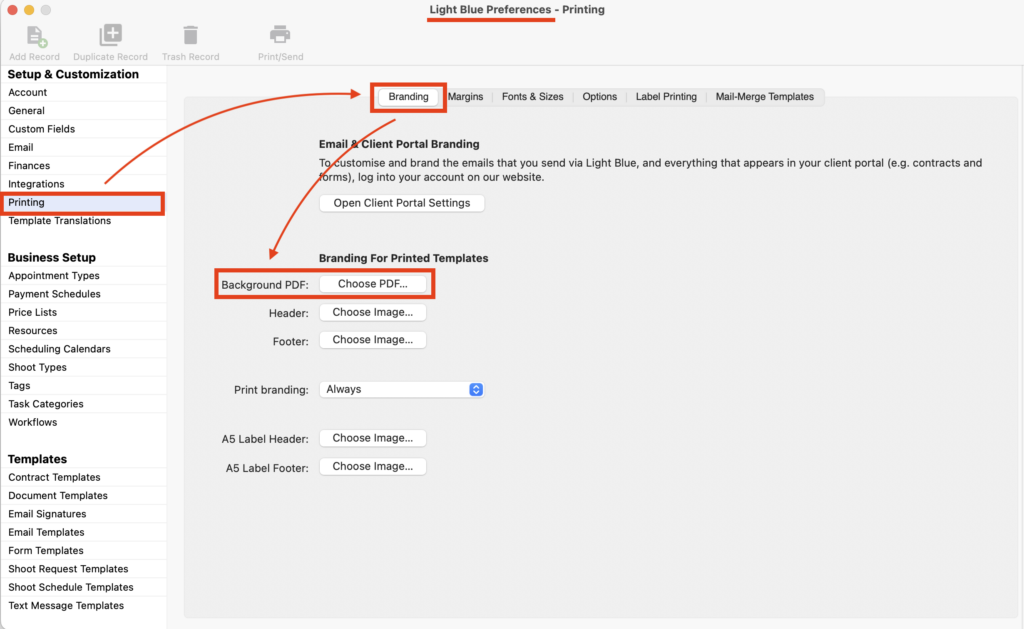
- This PDF can now be added to Light Blue in the Printing section of Preferences in the “Branding” tab.
- Click on “Choose PDF …” to upload your PDF. NB. Depending on the size of your header and footer within your PDF, you may need to adjust the different margin options available under the “Margins” tab so that your branding is not overlaid with the document contents. ⭐️ Top tip: Whilst there is the option to add an individual header and footer to create your printed branding, our recommendation is to use the “Background PDF” option. This creates a better quality file and allows you to be more creative with your letterhead, like adding elements such as a border around the page.
- You can also choose the type of font in your printed branding by going to the “Fonts & Sizes” tab. Though do make sure the font you choose is installed on all devices that you use Light Blue on.
Adding multiple brands
It’s very easy to add a second (or even a third or more!) brand to the Light Blue desktop app if you have different branding for different areas of your business. Though do make sure you have different Shoot Types set up for each of your brands before starting these steps. 👉 If not, head. on over to this help article to learn how to do so.
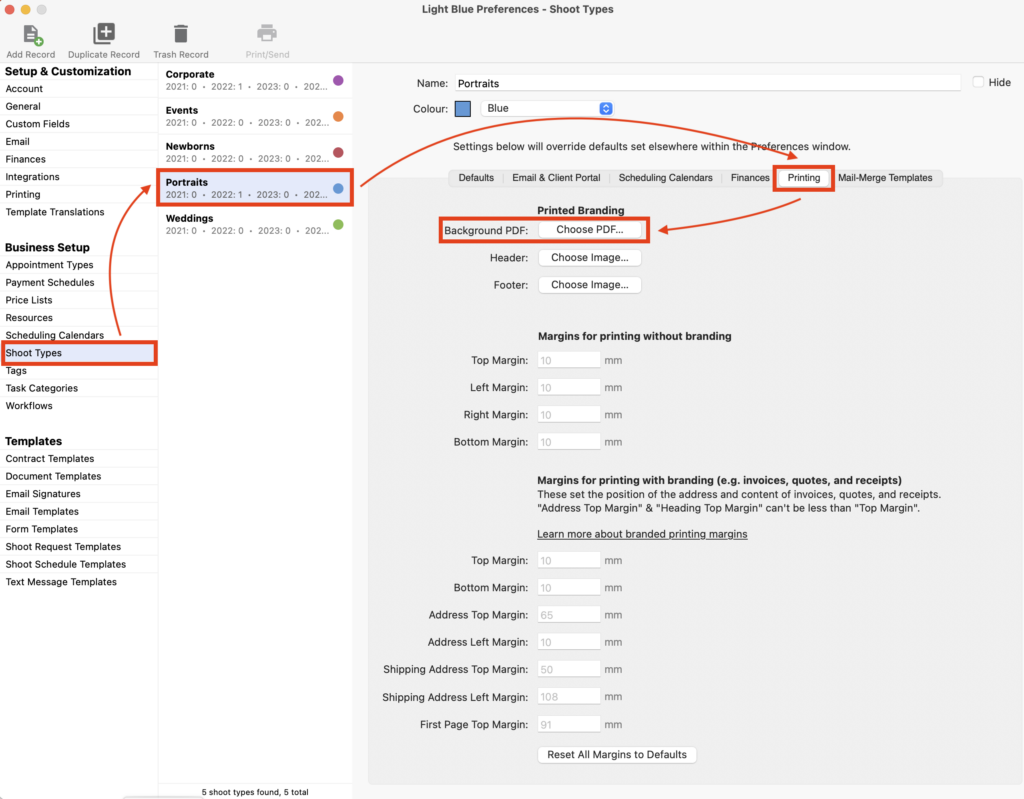
- In Preferences, click on “Shoot Types” in the “Business Setup” category.
- Choose the Shoot Type for the brand you’re working on and the “Printing” tab.
- Click on “Choose PDF …” and upload your PDF. NB. As before, depending on the size of your header and footer within your PDF, you may need to adjust the different margin options (lower down the tab) so that your branding is not overlaid with the document contents. And again we’d recommend using the “Background PDF” option.