Search for answers or browse our knowledge base.
Can't find the answer you need here? Contact our support team and we'll gladly help you.
Shoots: how to quickly book a shoot via the Calendar view
In Light Blue’s Calendar view you can see your availability at a glance so it’s ideal for finding the gaps in your diary where a shoot could be booked in.
And as it’s so straightforward to directly book a shoot in from there, it’s a perfect solution if you’re not using either our Scheduling Calendars or a third-party app (linked to Light Blue via Zapier) to book your shoots.
Booking a brand new shoot
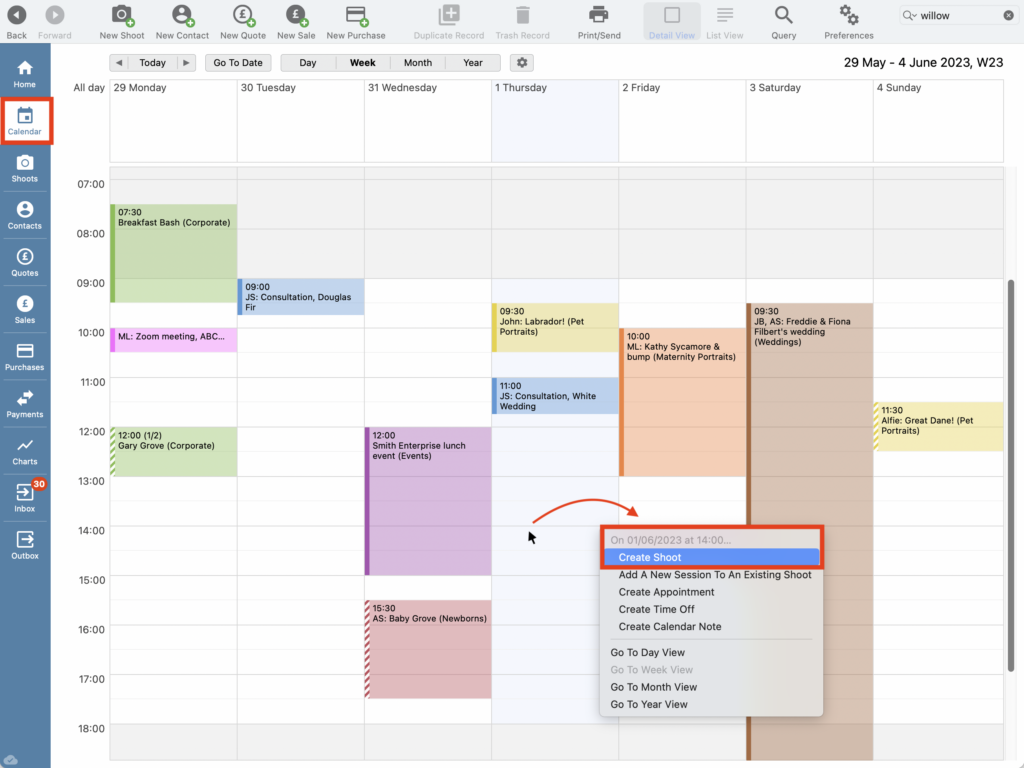
- Simply click on the “Calendar” section of Light Blue to view what you’ve got on. NB. If you’ve set up your Shoot and Appointment Types with different colours it’s super easy to see at a glance what type of activity is in your diary.
- Find a date and time that suits you and your client and, whilst holding your mouse there, right-click.
- From the drop-down menu, choose “Create Shoot”; in the example below we’ve gone for Thursday 1st June at 2 pm.
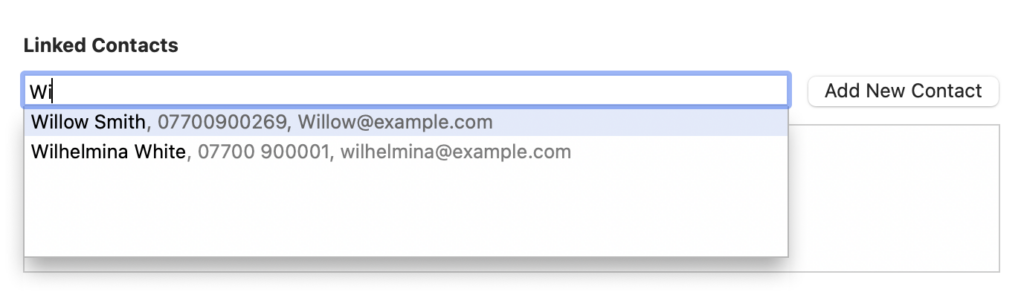
- Start to type the name of your client in the “Linked Contacts” field.
- If you already have a Contact Record for them, their full details will appear and you can select their details by clicking on them.
- If they’re a new client, you can click the “Add New Contact” button to create a Contact Record for them.
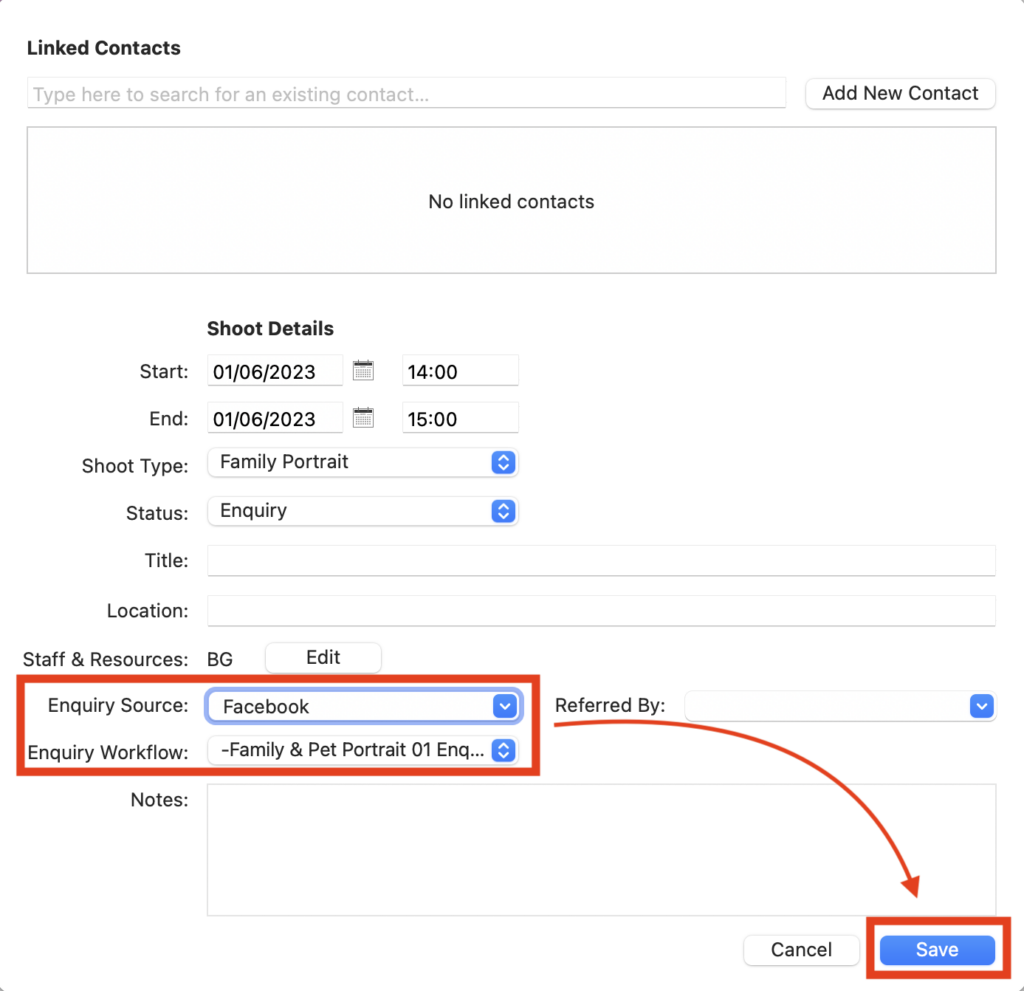
- Complete the rest of the details in the Shoot Record.
- If you know how your client found you, it’s great to fill in the “Enquiry Source” field so you can track the performance of your marketing activity. And if you’ve set up Default Workflows for different Shoot Types these will automatically be populated.
- Click “Save”.
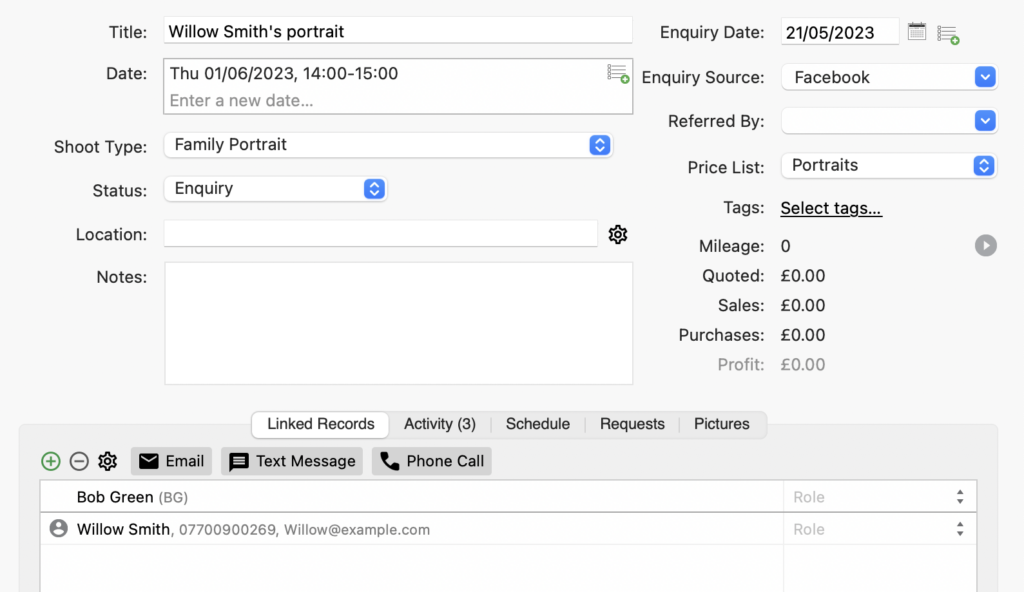
- And you can now see the new Shoot Record.
Adding a session to an existing shoot
- Simply click on the “Calendar” section of Light Blue to view what you’ve got on. NB. If you’ve set up your Shoot and Appointment Types with different colours it’s super easy to see at a glance what type of activity is in your diary.
- Find a date and time that suits you and your client and, whilst holding your mouse there, right-click.
- From the drop-down menu, choose “Add a New Session to An Existing Shoot”; in the example below we’ve gone for Tuesday 30th May at 1 pm..
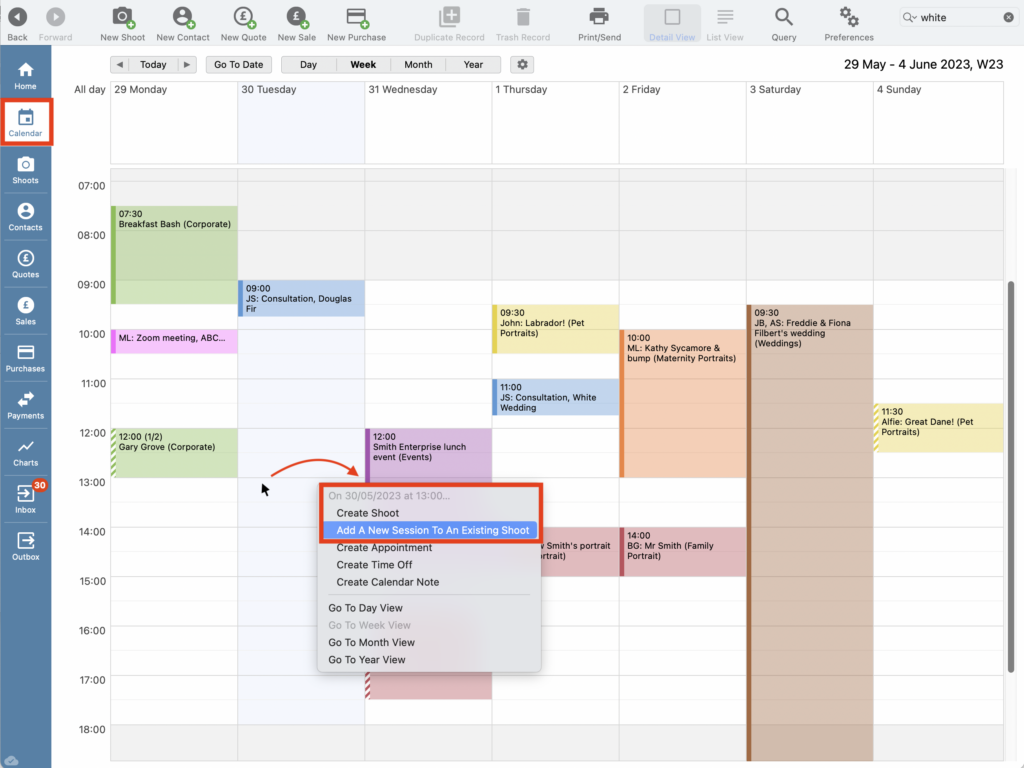
- Start to type the name of the shoot and pick the relevant Shoot Record from the Records shown.
- Click “Link”.
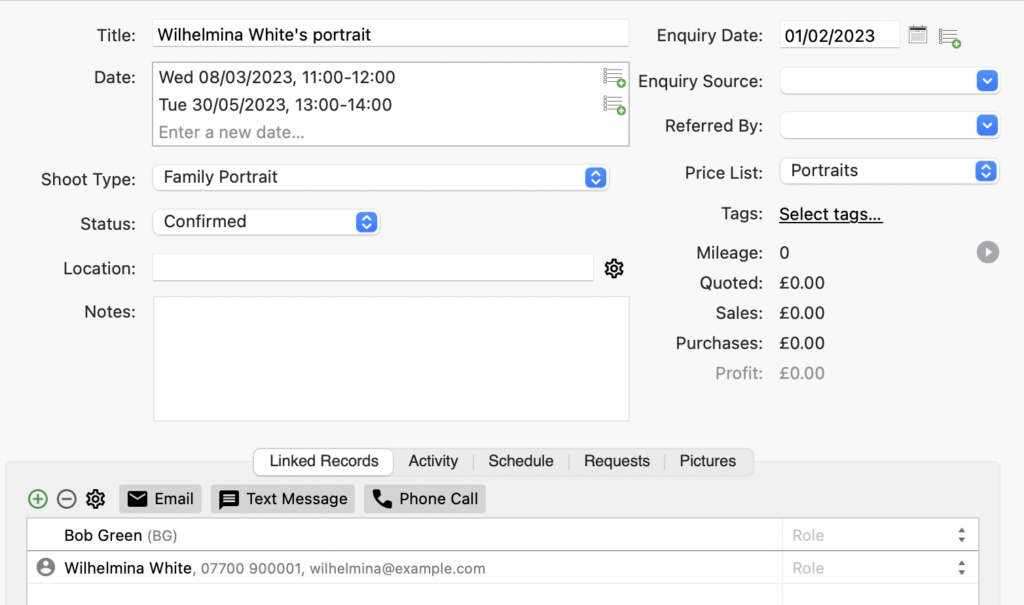
- And the new Session is now showing in the Shoot Record.
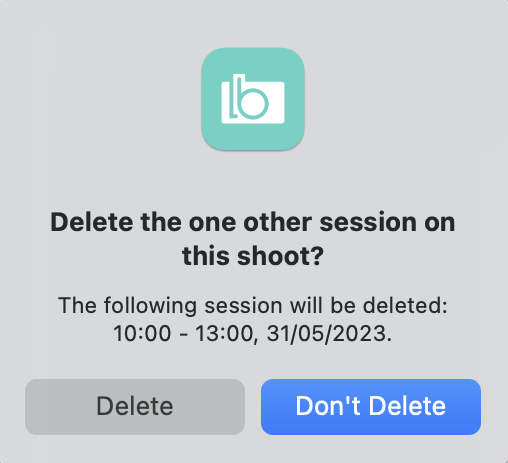
- If you’ve added a session to a Shoot that’s an Enquiry, rather than Confirmed; perhaps because you’ve wanted to offer your client a few options, when they’ve picked the one they want simply right-click on the chosen date and choose “Set Status to Confirmed” from the drop-down menu.
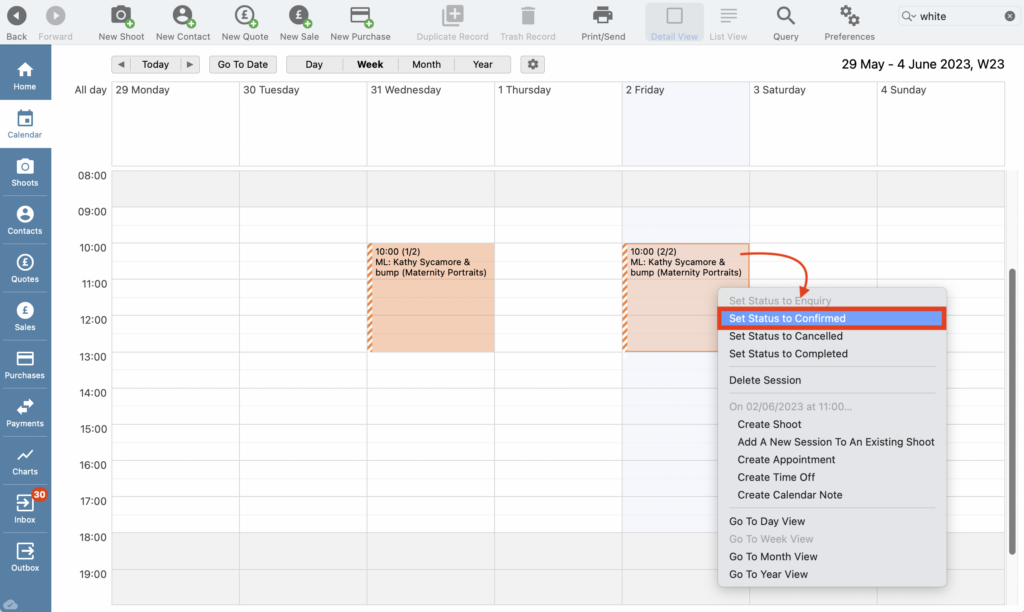
- Confirm the change in Shoot Status.
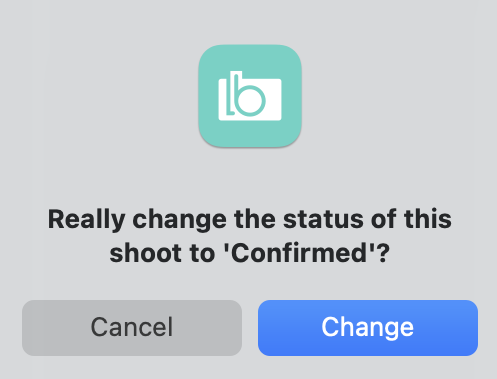
- And whether you want to delete the other Session or not.
Further guides
👉 If you’re not familiar with your way around Light Blue’s built-in Calendar you can find an overview here.
👉 If you are interested in using our Scheduling Calendars this guide shows you how.
👉 This guide gives you an introduction to Zapier.
👉 And if you’re interested in setting up default workflows this article will help with that.