Search for answers or browse our knowledge base.
Can't find the answer you need here? Contact our support team and we'll gladly help you.
How to get data from Light Blue to Quickbooks
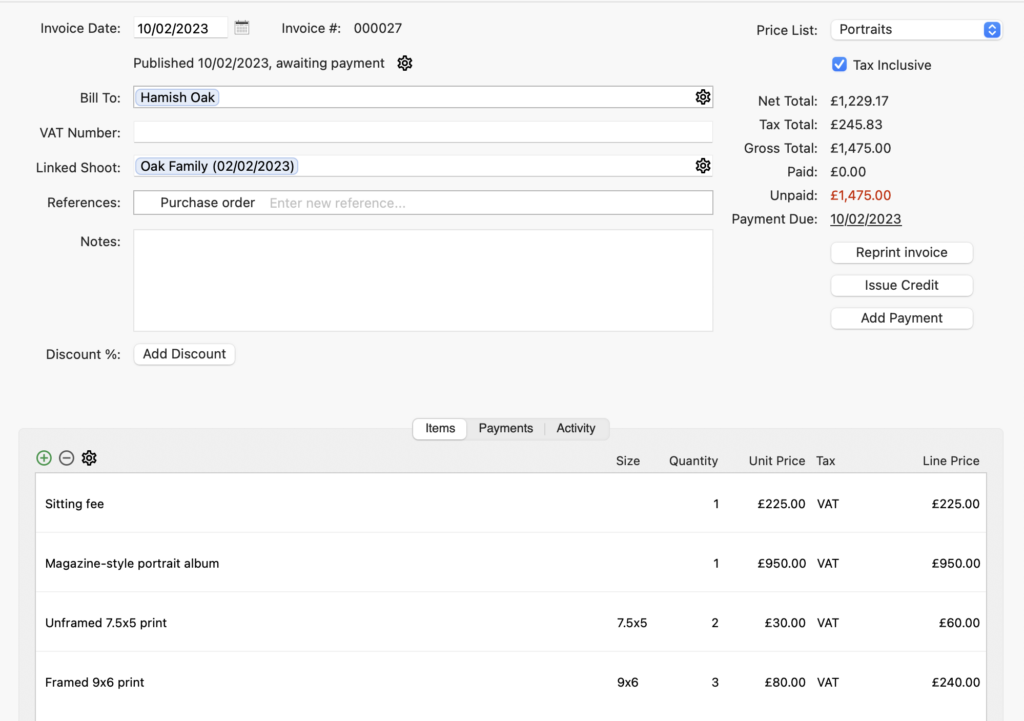
Keeping on top of your finances is a critical part of running a successful (and profitable!) business and by using Light Blue to record all your business transactions you can make this job much simpler for yourself.
You’ll be able to take advantage of Light Blue’s powerful Reports allowing you to analyse your business performance in greater detail; perhaps identifying which area of your business is performing better/worse than others or maybe the effectiveness of different marketing campaigns.
Plus using Light Blue for your invoicing means you’ll be able to use the online features such as Forms, Contracts and Payments too!
However, you may also need to share your sales information with a third-party app such as Quickbooks.
There are two ways that you can share this information:
- Export a CSV file of your invoices from Light Blue and upload it to Quickbooks; this is very straightforward to do in just a few simple steps. It’s also the free option!
- Use Zapier to automatically link Light Blue to Quickbooks; as soon as you create an invoice in Light Blue it will automatically add it to Quickbooks. Zapier’s QuickBooks integration is a “Premium” app, which means you’ll need to be on one of Zapier’s paid plans.
1. Exporting a CSV file from Light Blue and uploading to Quickbooks
Creating the list of Invoice Records to be exported
- The easiest way to do this is to use one of the Quick Queries already available in the main Sales section of Light Blue; generally speaking, the time periods already created will give you what you’re looking for, e.g. Last Month, Last Financial Quarter, Last Financial Year etc.
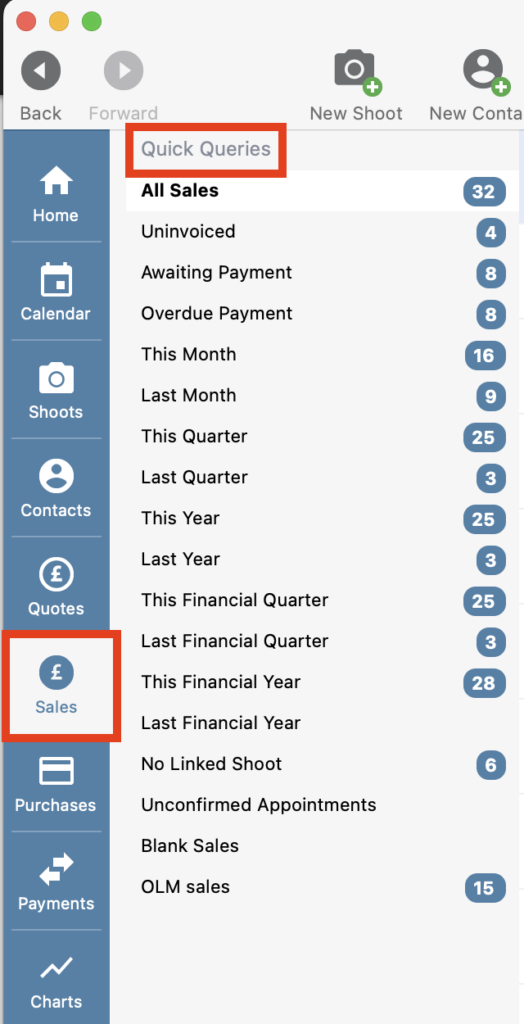
- If however there is a different set of Invoices you want to export, use the Query feature to specify the criteria and generate the list.
Exporting the information
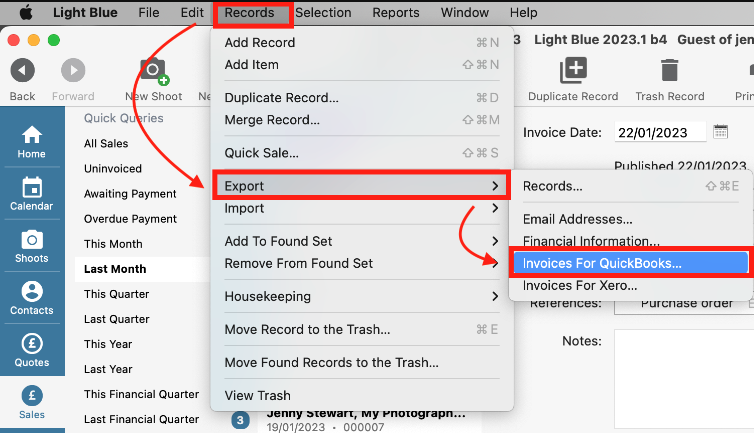
- Once you have the list of Invoice Records, click on “Records” in the main menu bar.
- Choose “Export” followed by “Invoices for Quickbooks” from the drop-down menu.
- You’ll then be given the option of where to save the CSV file and rename it if required.
Importing into Quickbooks
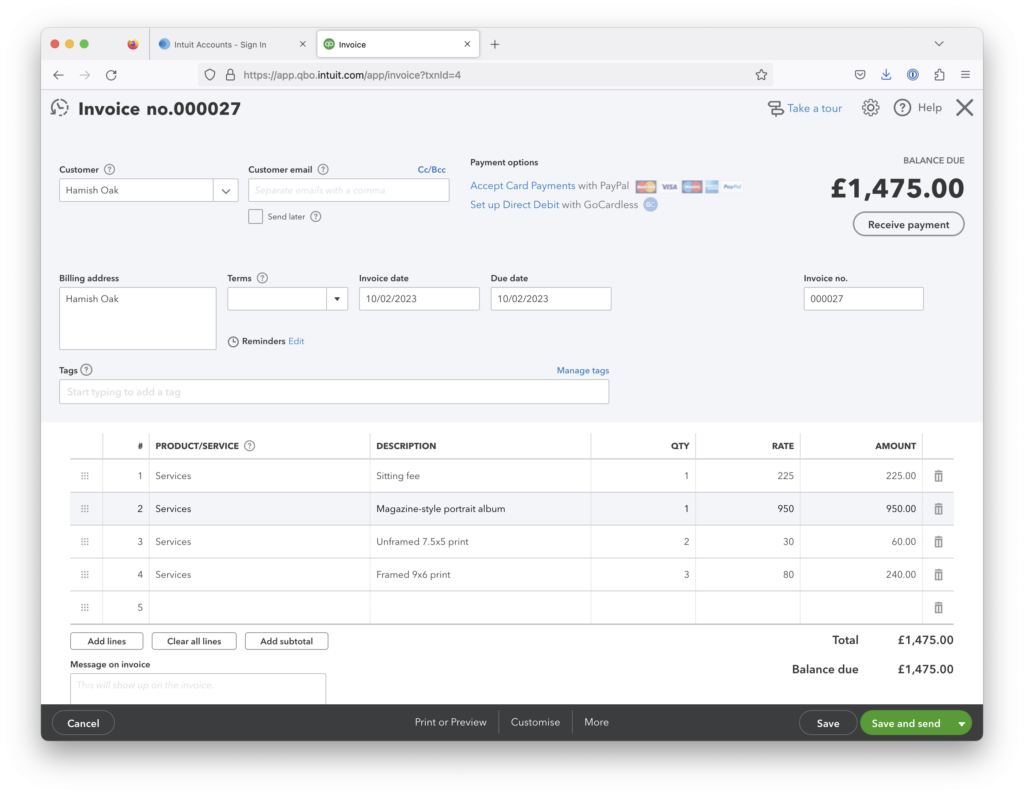
The CSV file exported from Light Blue has been created in a format that doesn’t need any extra work being done to it before being imported to Quickbooks. 👉 This Quickbooks help article (from Step 2) takes you through the import steps.
2. Using Zapier to link Light Blue to Quickbooks
Another way to add your Invoices and Payments to Quickbooks is to link it with Light Blue using Zapier; essentially a service that automates this connection process. NB. You need to be using QuickBooks Online to be able to connect the two; Zapier is unable to access the desktop version. Zapier’s QuickBooks integration is a “Premium” app, which means you’ll need to be on one of Zapier’s paid plans.
👉 Here’s an introduction to how Zapier works.
👉 And if you’ve not already got a Zapier account, here’s their website where you can create one.
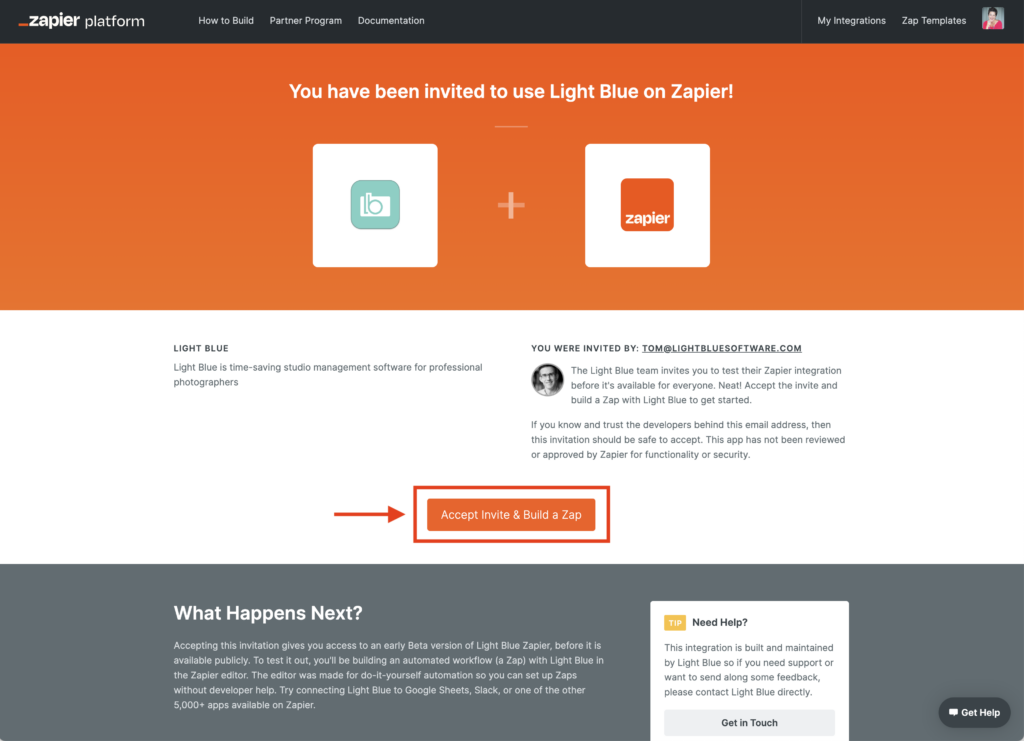
The Light Blue integration for Zapier is currently a “private” action, so you need to click the following link to add it to your Zapier account (instead of searching for Light Blue in Zapier); simply click the “Accept Invite & Build a Zap” button. 👉 Invite to use Light Blue on Zapier.
Once you’re logged into Zapier there are three elements to the zap.
- Creating the trigger; a new Invoice Record is created in Light Blue.
- Creating the 1st action; finding or creating the customer in QuickBooks.
- Creating the 2nd action; creating the invoice in Quickbooks.
All the elements need to be created for the zap to work, however, we’ve broken down the steps into those three elements to make the process a bit easier to follow.
Creating the trigger; a new Invoice Record is created in Light Blue
- Click the “+ Create” button and choose “⚡️ New Zap” from the drop-down menu.
- Start to type “Light Blue” in the search bar and choose the latest version of the Light Blue options given. NB. The screenshot below shows “Light Blue (2.0.1)” but this may well have been updated.
- Start to type “Light Blue” in the search bar.
- A few Light Blue options will be given so make sure you choose the one labelled ‘Latest’.
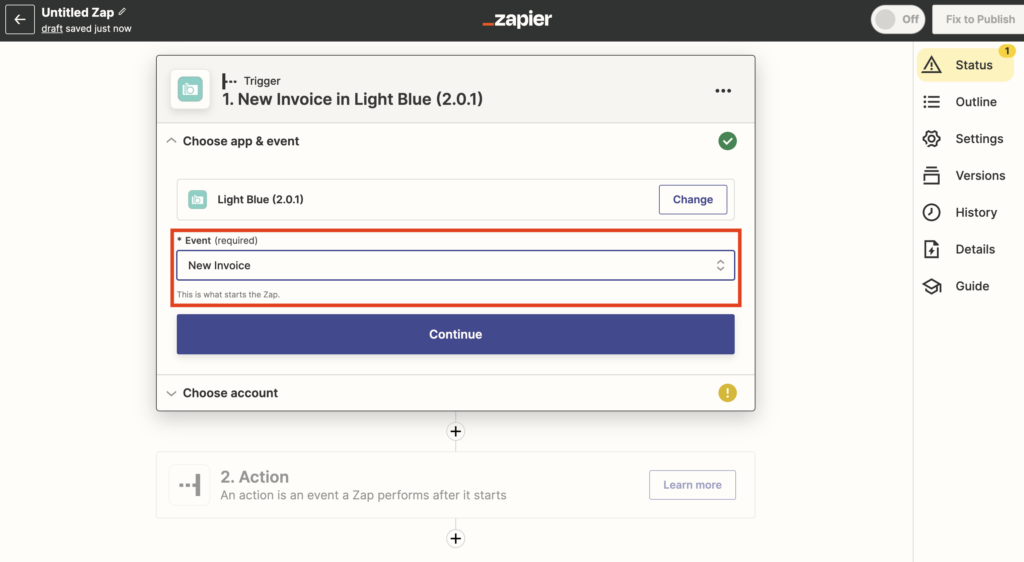
- We’re now going to choose the event that triggers the action so from the drop-down menu choose “New Invoice”.
- Click “Continue”.
- You’ll then be asked to sign into Light Blue; click the “Sign in” button. NB. If you’ve previously created a Light Blue zap, rather than signing in again you’ll be able to simply select the account that’s already connected.
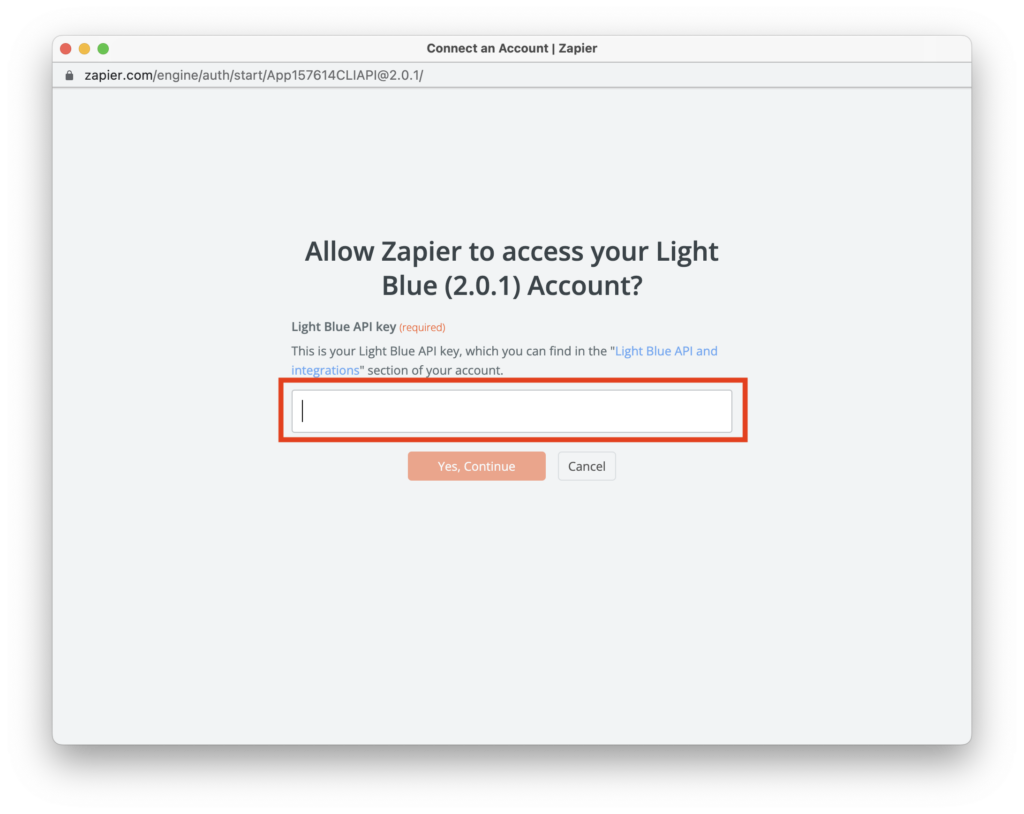
- A pop-up window will then appear asking for your API key; this can be found in the “Light Blue API and integrations” area of your Light Blue account.
- Once you’ve clicked the “Yes, Continue” button your Light Blue and Zapier accounts will be connected.
- Now we need to set-up the details of the trigger.
- You’ll probably want to leave the “Shoot Type” field blank. If you set a Shoot Type here, only invoices linked to shoots of that specific type will trigger the Zap.
- Click “Continue”.

- Click the “Test trigger” button; Zapier will then test the trigger and check it can find an invoice.
- Once it’s been successful, click “Continue”.
Creating the 1st action; finding or creating the customer in QuickBooks
- The next step is to connect QuickBooks to your Zapier account.
- Search for and choose “QuickBooks Online”.
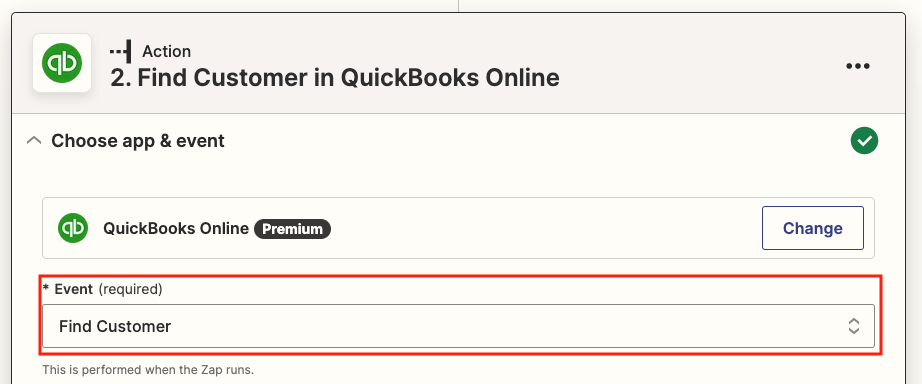
- Choose the Event “Find Customer” from the drop-down menu; this will find the customer in Quickbooks or if not, create a new one.
- Click “Continue”.
- Then follow the prompts to connect your Quickbooks account.
- Now we need to set-up the 1st action details.
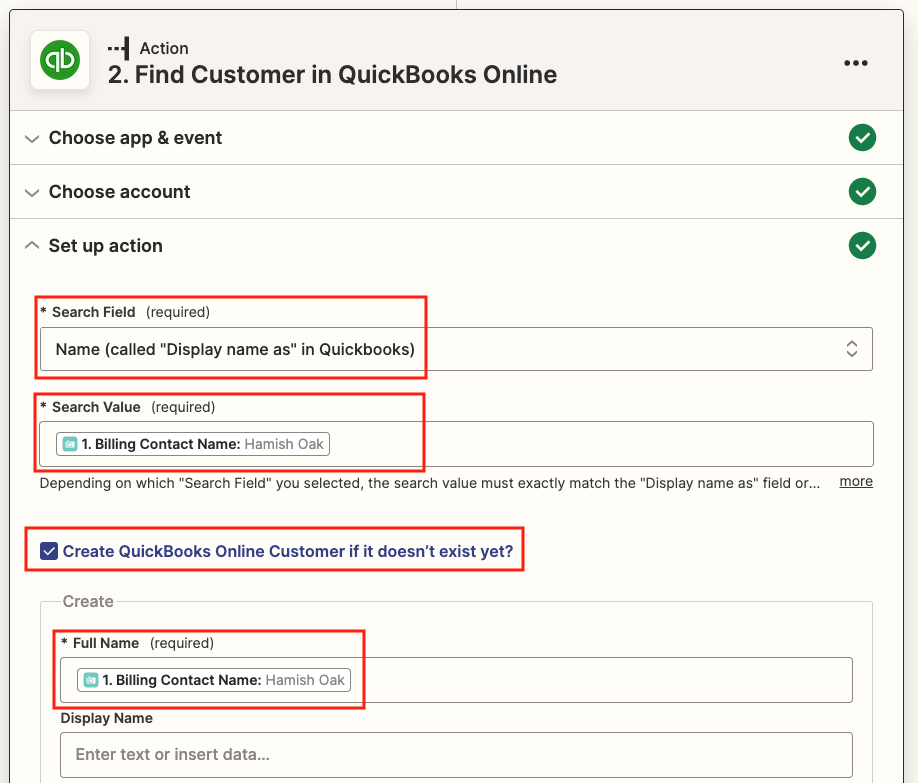
- Start by choosing “Name” in the Search Field and “Billing Contact Name” as the Search Value. NB. The greyed-out name is from the test trigger invoice.
- Check the “Create Quickbooks Online Customer if it doesn’t exist yet” box.
- Choose “1. Billing Contact Name” in the Full Name field.
- Scroll to the bottom and click “Continue”.
- Click the “Test action” button; Zapier will then test the action and either find or create the customer in Quickbooks.
Creating the 2nd action; creating the invoice in Quickbooks
- Once the test for the 1st action has been successful, we need to add another action to complete the Zap.
- Click the small “+” button underneath the word “Close”.
- Search for and choose “QuickBooks Online” again
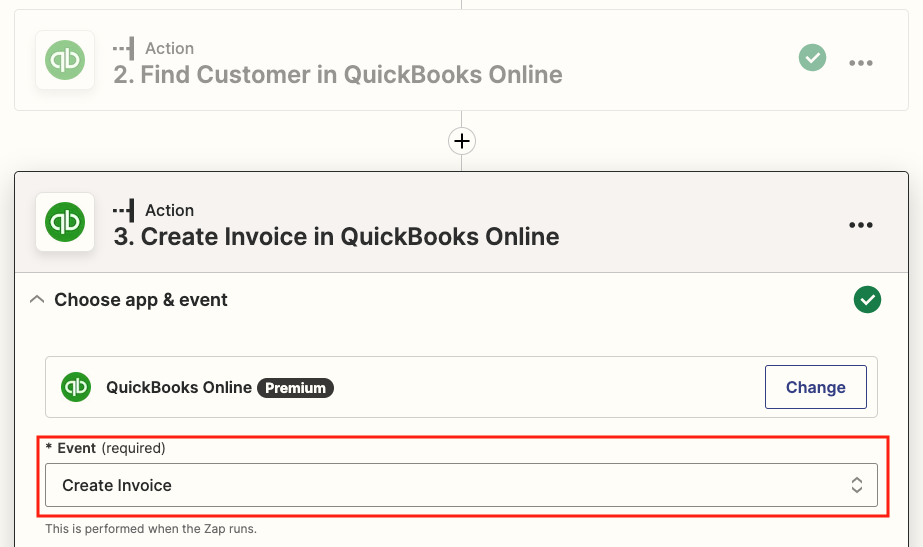
- Choose the Event “Create Invoice” from the drop-down menu.
- Click “Continue”.
- As you’ve already connected your QuickBooks account simply pick it from the drop-down menu.
- Click “Continue”.
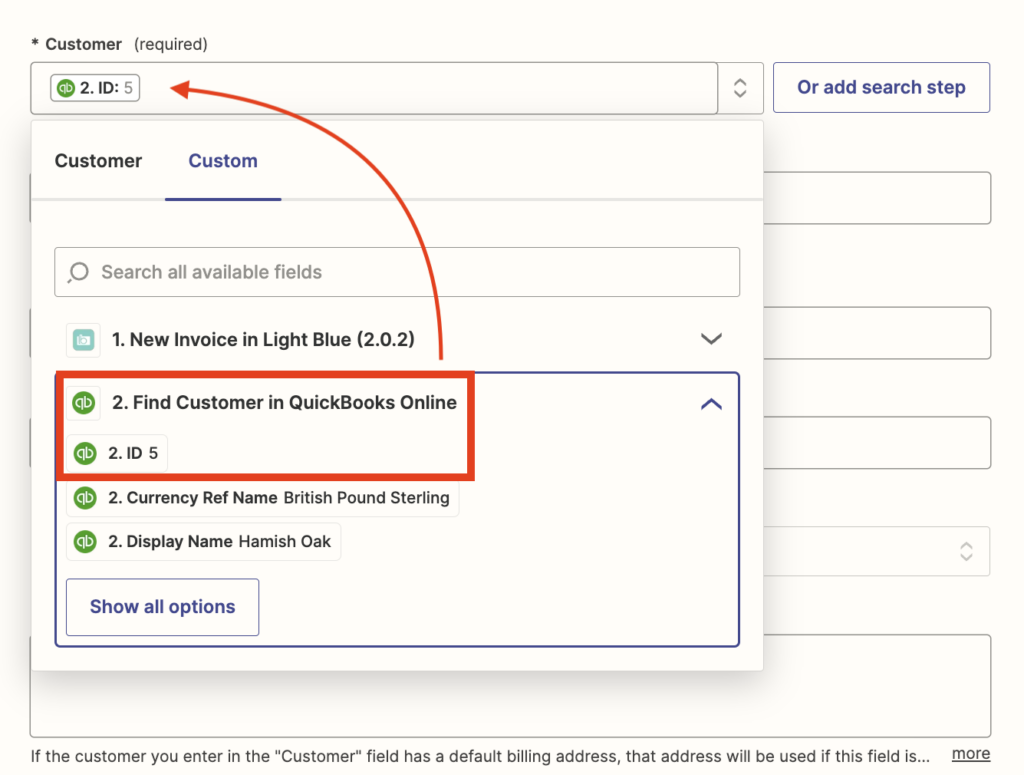
- In the “Customer” field, click in the “Custom” tab and choose the “ID” variable from the previous step in the Zap. This will automatically link the QuickBooks contact that was found/created in the previous step of your Zap.
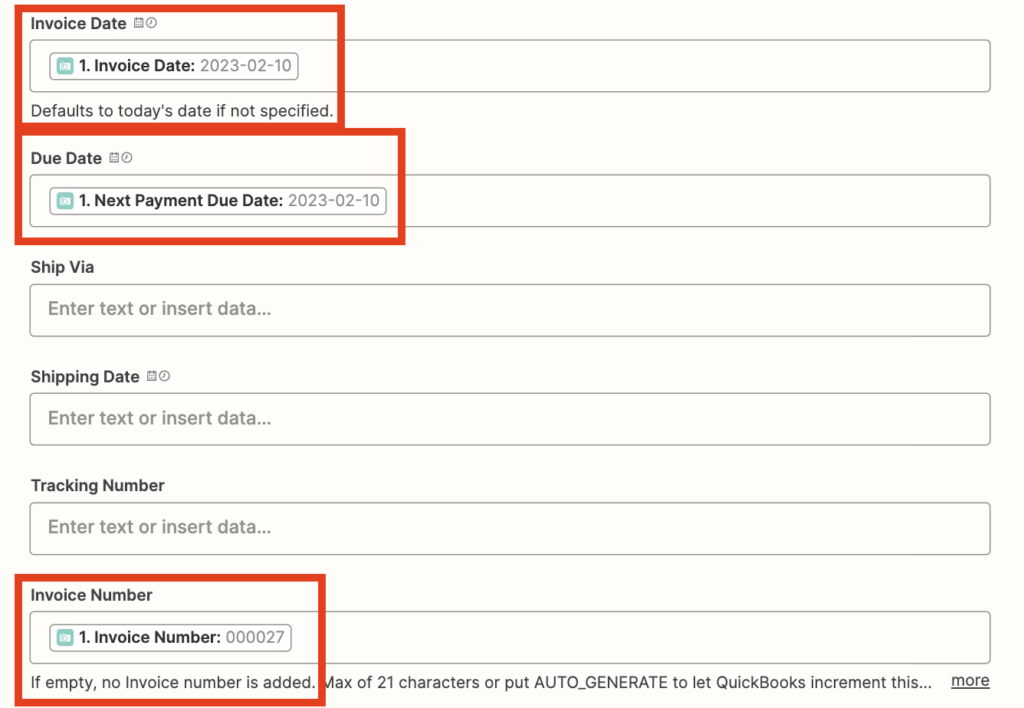
- Scroll down the screen and complete the “Invoice Date”, “Due Date” and “Invoice Number “fields from the “New Invoice in Light Blue” drop-down menu. NB. As before the greyed-out elements are from the test trigger invoice.
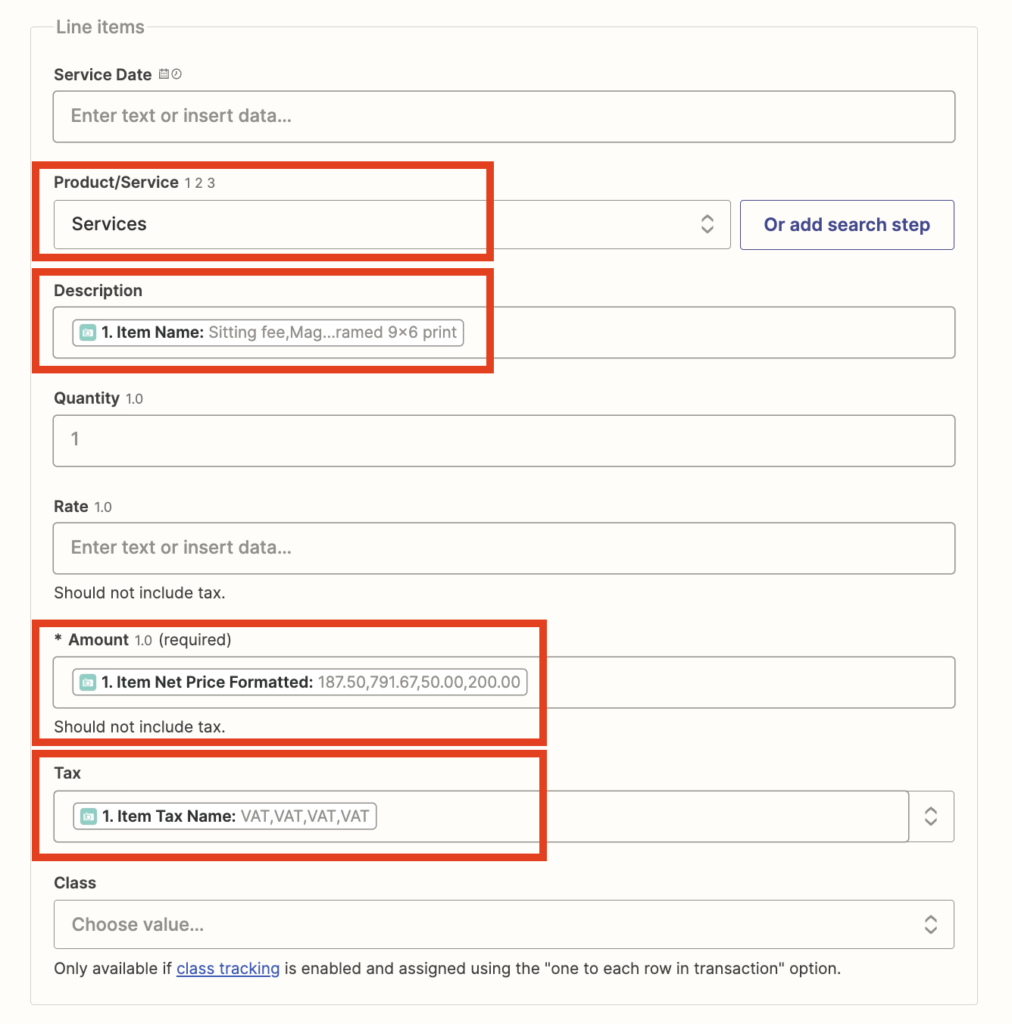
- Then complete the Line item field “Product/Service” choosing the Services option from the drop-down menu.
- Complete the rest of the Line Item fields; Description, Amount and Tax, again using the “New Invoice in Light Blue” drop-down menu.
- Scroll to the bottom and click “Continue”.
- When prompted. click the “Test action” button; Zapier will then test the action to create the invoice in Quickbooks.
- Once the test for the 2nd action has been successful we can give the zap a name and publish it.
- Zapier will now automatically add any Invoice Record created in Light Blue to Quickbooks.