Search for answers or browse our knowledge base.
Can't find the answer you need here? Contact our support team and we'll gladly help you.
Light Blue’s Forms: using contact forms on your website
Getting a new enquiry is great news; your marketing is obviously working and people are wanting to work with you!
And if you’ve used one of Light Blue’s Forms as the contact Form on your website it’ll mean all the details of the new enquiry will be added automatically to Light Blue. You can even send automatic replies, redirect them to a ‘Thank You’ webpage and add Workflows to the Enquiry to make things even more streamlined for you.
There’s also no limit to how many Forms you can create; particularly useful if you need to know different details depending on how they’ve got in touch or what type of package or photography they’re interested in.
In this guide we’ll cover:
- Creating Form Templates including the different Form Fields, automatic email replies, any redirects to a ‘Thank You’ webpage and branding.
- Installing a Form on your website.
- Importing submitted Forms to Light Blue.
Form Templates
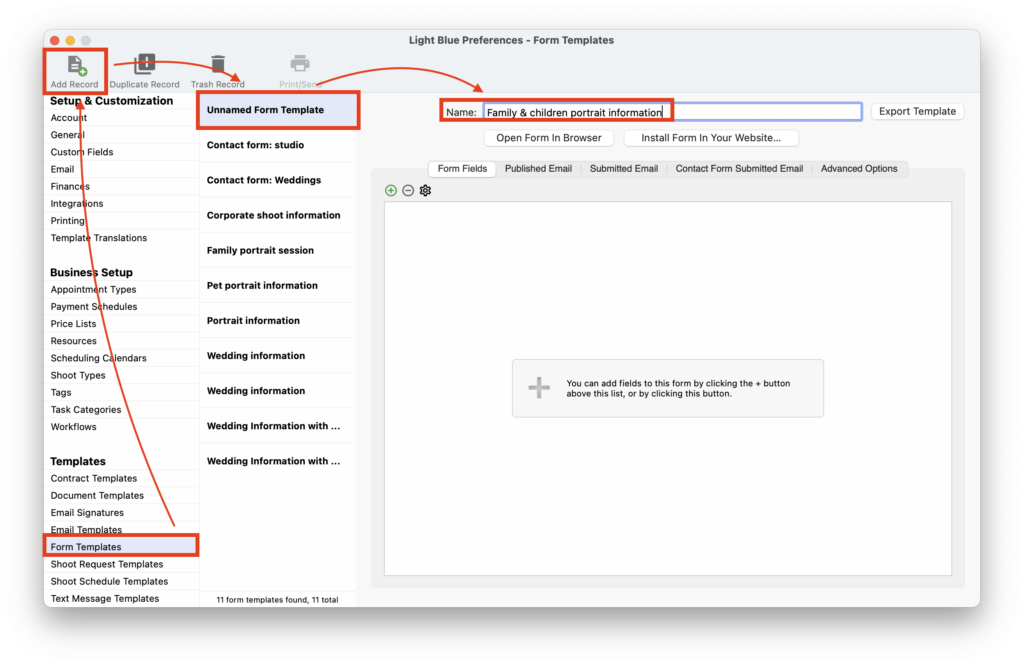
- Before you can add a Form to your website you need to create a Form Template for it; in Preferences, click on “Form Templates” in the “Templates” category.
- Click the “Add Record” button. ⭐️ Top Tip: Light Blue comes with some Templates already installed which might well be a good starting point; choose the “Duplicate Record” button instead and then make any changes needed to create your own version.
- Name the Form appropriately.
Form Fields
- In the Form Fields tab click on the green “+” button to start adding Fields to your Form.

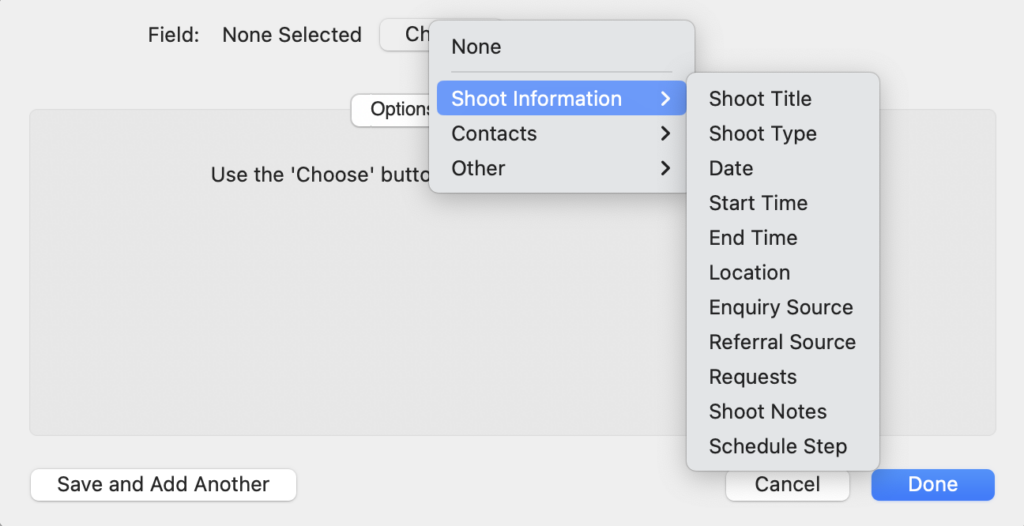
- You can add Fields relating to the Shoot; at the enquiry stage adding the Shoot Type or Date Fields might be useful to see what type of photography they’re interested in and allow you to check your availability.
- And if you’ve created any Shoot Custom Fields you can add them in too. 👉 If you’re not familiar with Custom Fields this article explains what they are and how they work.
- You can also add Fields relating to Contacts; the Main Contact Field relates to the person that is enquiring so will definitely be needed for a contact Form but you may find it useful for wedding photography to include the Wedding Couple Field.
- And as with the Shoot Information fields if you’ve created any Contact Custom Fields you can also add them in. 👉 If you’re not familiar with Custom Fields this article explains what they are and how they work.
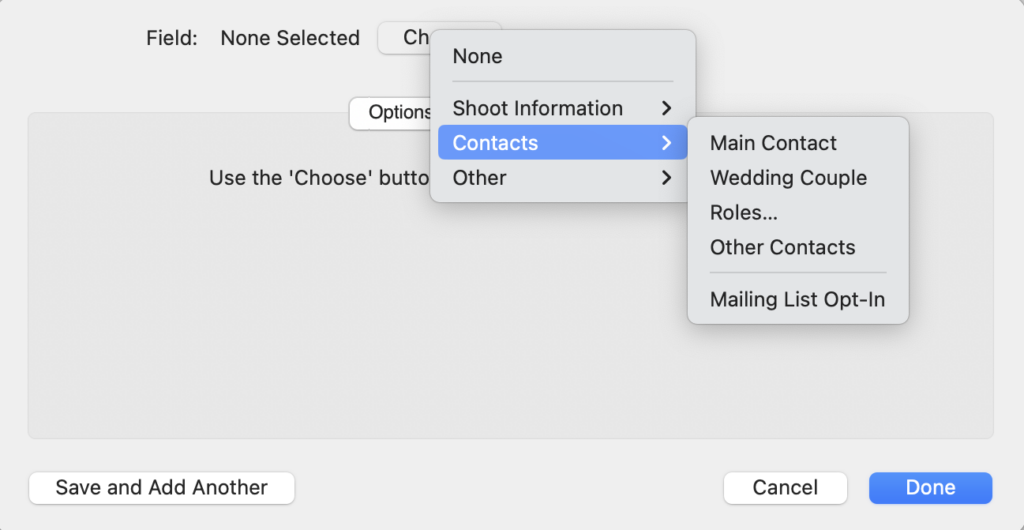
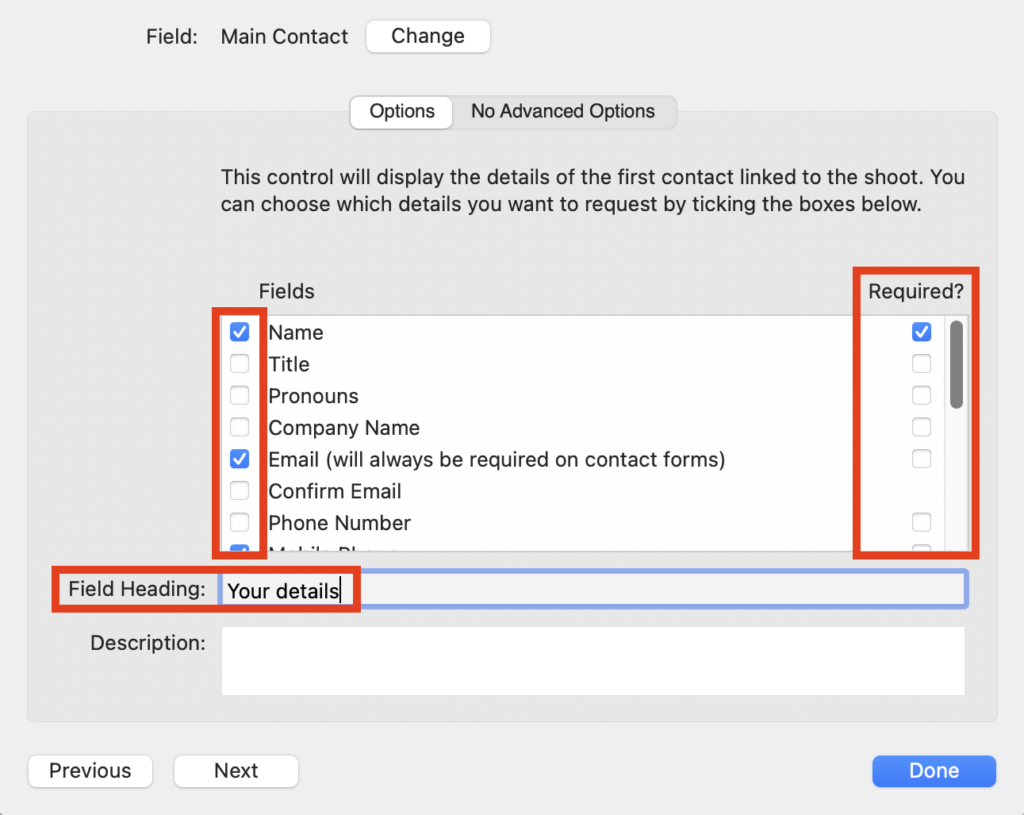
- When you add a Contact field to a form, you can choose what information should be included, whether or not it’s a Required Field and rename the Field Heading if needed.
- And finally, there is the Other Field allowing you to include Headings and Static Text and ask for other information; at the enquiry stage it’s likely you’d only include single line or paragraph text fields for responses to specific questions if, for example, you’d like to find out how they found you/your website. NB. As these Fields are not directly linked to any Light Blue Record fields they will show in the Processed Form in the Activity Panel of the Shoot Record when imported.
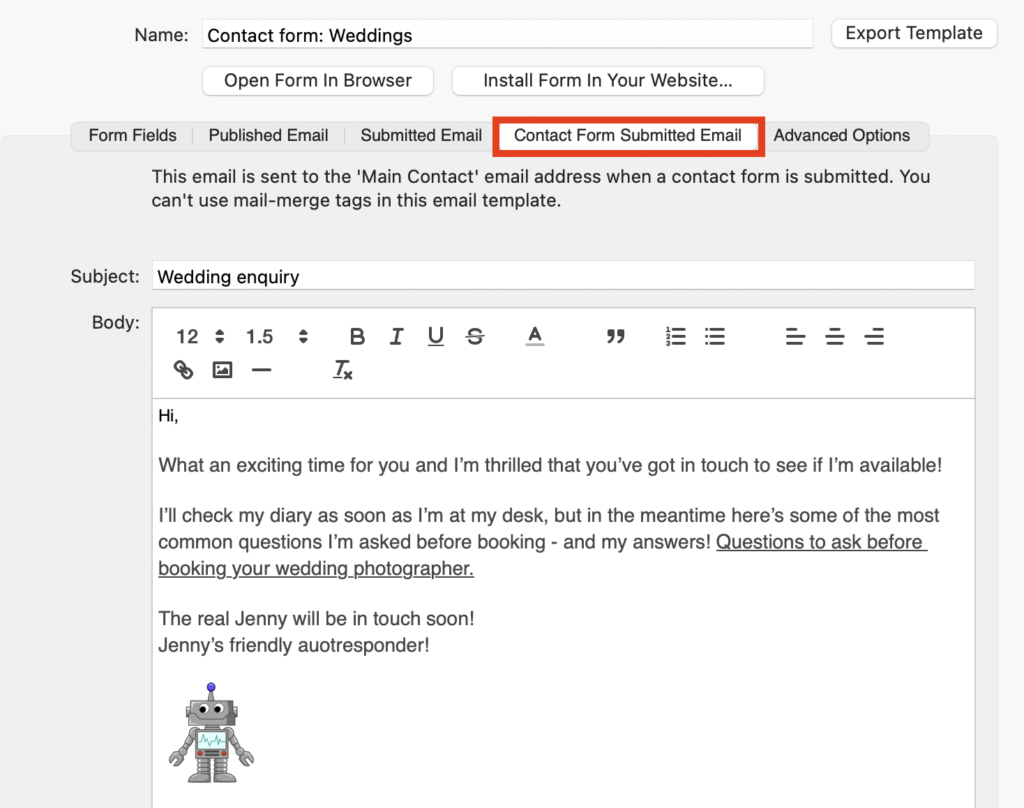
Contact Form Submitted Email
- If you’d like your potential client to receive an automatic email response as soon as they’ve submitted their Form you can write your email in the “Contact Form Submitted Email” tab. It’s a great way to acknowledge their enquiry and yes they’ll know it’s automatic but you can acknowledge that and show a bit of personality!
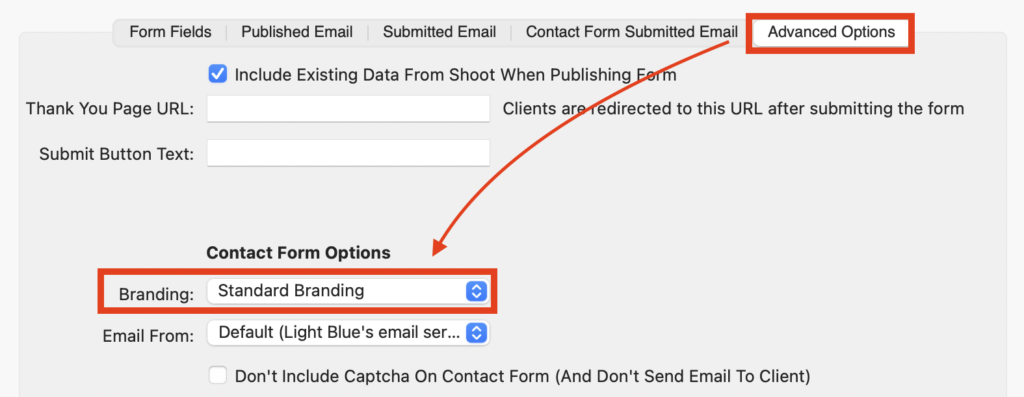
Thank you URL
- You can also redirect your potential client to a different web page once they’ve submitted their Form; handy for adding any extra information you haven’t included in the automatic email or even simply a message to check their spam in case they don’t receive it! Simply go to the Advanced Options tab and add the URL to the “Thank You Page URL” field.

Form branding
- You can apply any of your Client Portal brands to your Form; in the Advanced tab simply choose the correct one from the “Branding” dropdown menu. 👉 If you’d like more information about setting up your Client Portal brands this article will help.
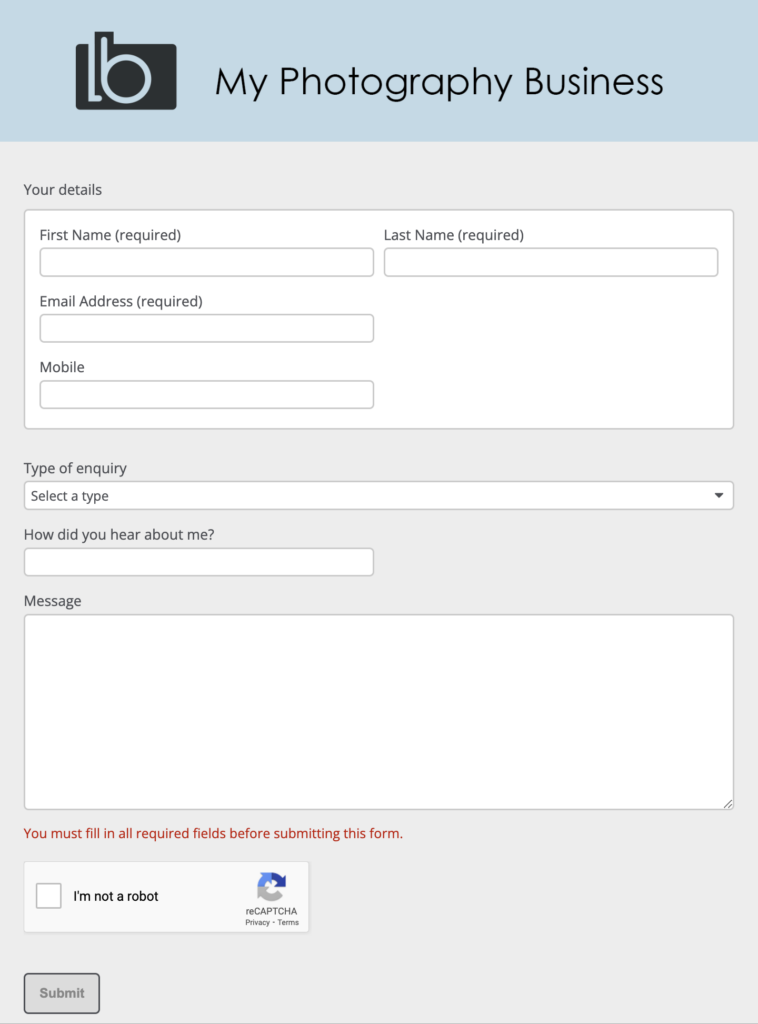
Installing a Form on your website
- Click on the “Install Form In Your Website…” button in the Template.
- Choose whether the form appears as a popup (good for a call to action) or is embedded (handy for your contact page or landing page for a particular marketing campaign) on your website. Or you can create a simple link which will go through to your Light Blue client portal (ideal if your website doesn’t allow you to add HTML code to it).
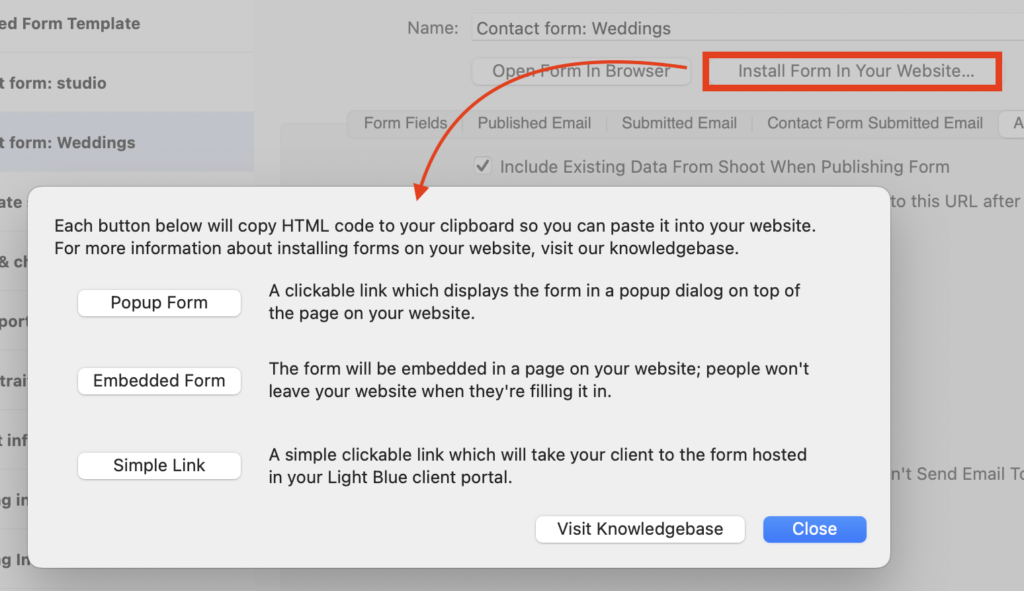
- The HTML code or link will then be copied to your computer’s clipboard ready for you to paste into your website in the correct place.
- If you’ve gone for the simple link option simply add that in your usual way to either words, buttons or images in your website.
- Pasting the HTML code for popup or embedded Light Blue Forms will vary depending on what platform you use. Here’s a few links to help articles for some of the more popular options: 👉 WordPress. 👉 Squarespace. 👉 Zenfolio. NB. There’s no need to re-install a Form any time you make changes to it; it’ll automatically be updated wherever it’s installed.
Importing a Submitted Form
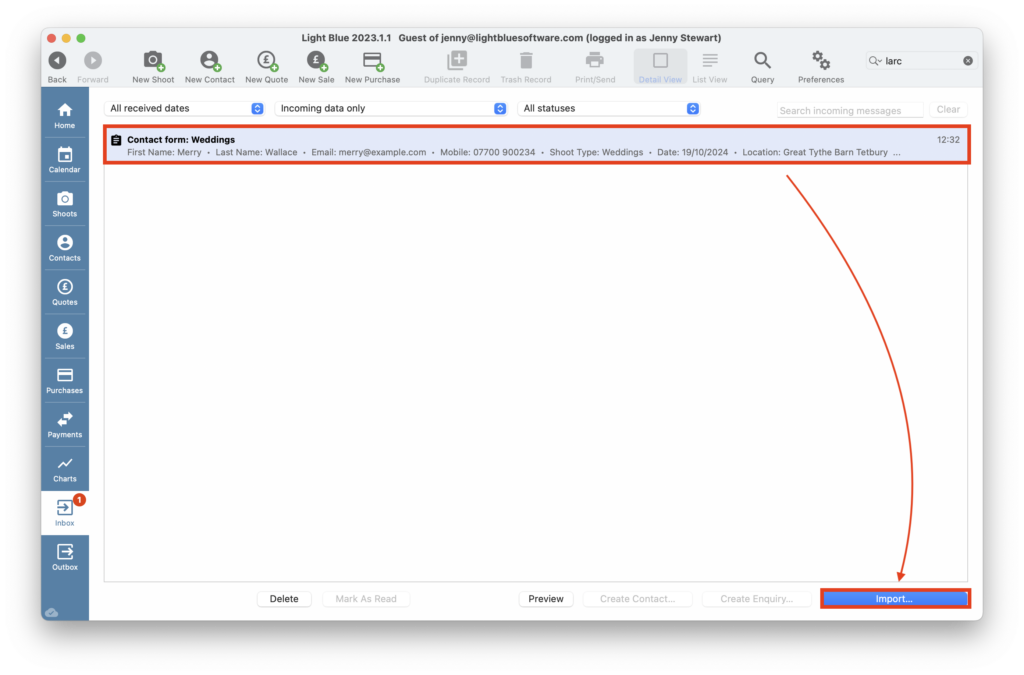
- When your potential client has completed their Form and submitted it, it will appear in your Light Blue Inbox; simply click on it followed by “Import”.
- You can then choose whether new Records are created or existing ones are updated and which data to include in the import.
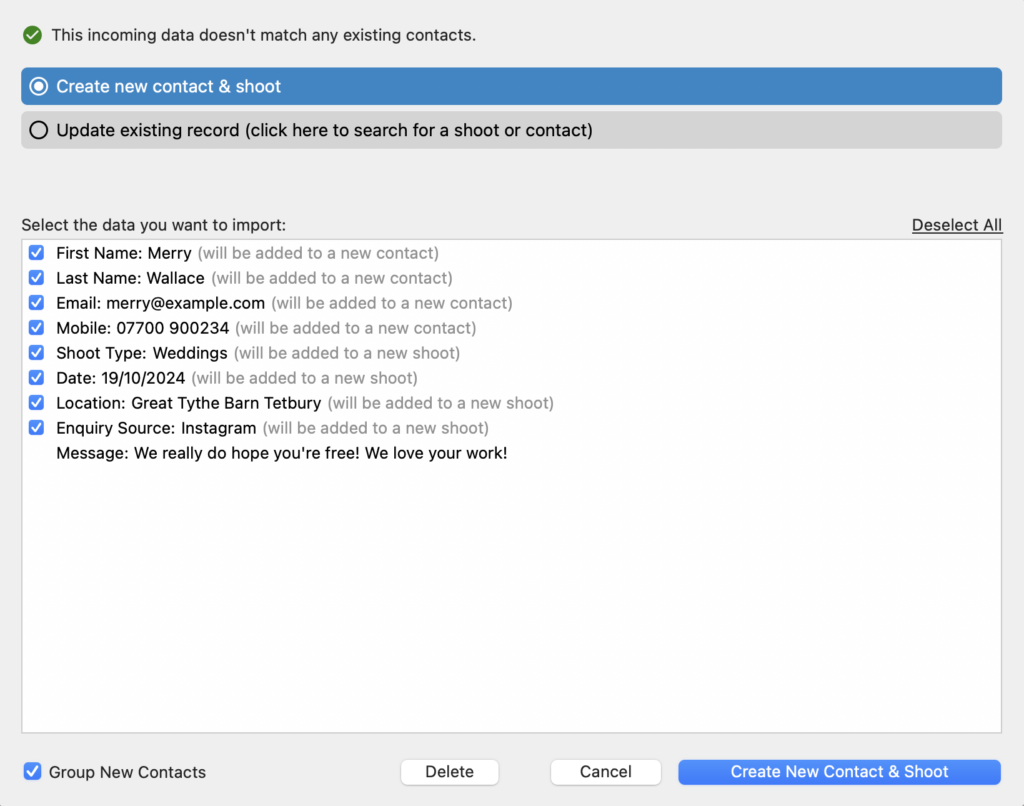
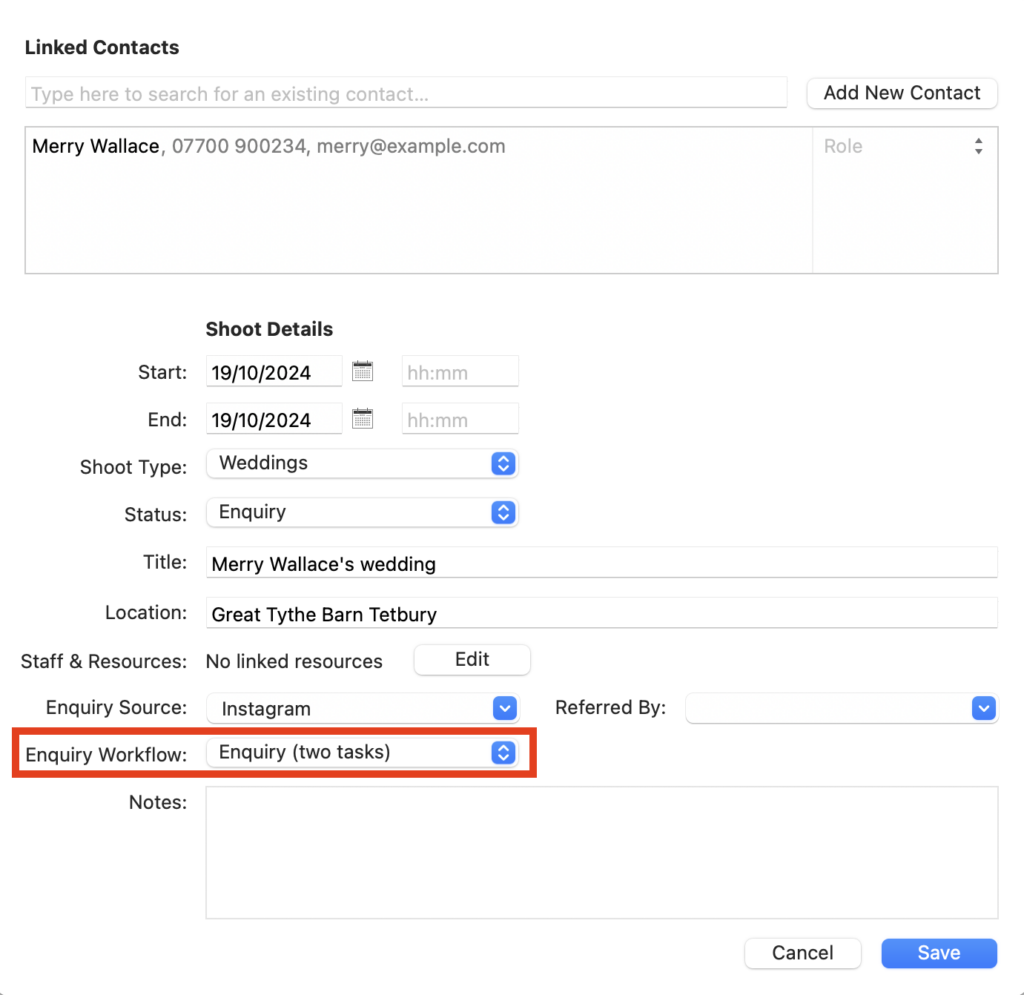
- If you’ve created a new Shoot Record the Shoot dialogue box will appear and, if you’ve set a Default Enquiry Workflow for the Shoot Type, it’ll automatically be added making it easy for you to follow up with the enquiry. 👉 If you’d like more information about setting Default Workflows this article will help.