Speed up your workflow by importing your orders from Fundy
As a busy social photographer, you’re always looking for tools that will help to lighten your workload and save you time. Our friends at Fundy help to save time with all your photo design needs.
With Fundy designer you can design albums and signing books, create wall art, design web collages and watermark images all in one software, but did you know they also do IPS?
Selling products to your clients face-to-face after a portrait session is a long-established method of taking orders and making money. Many photographers choose the in-person sales or IPS model as they believe it is part of giving their client a great customer experience. It will often result in better sales than online galleries as it’s much easier to sell wall art and albums in person when the customer can see the different products you offer.
Light Blue is the core of all of your photography businesses admin and there are substantial advantages to having all of your business information in one place. To help you to have the complete picture, Light Blue can import your in-person sales orders from Fundy, a great way to keep on top of your finances!
After an IPS session, recording your client’s order and linking it to their shoot record in Light Blue helps you to see how successful that session was as well as giving you the all-important bigger picture within your business.
“Recording you IPS sales has never been easier with the new integration between Fundy Designer and Light Blue.”
Andrew “Fundy” Funderburg
Founder Fundy Software
In the guide below we’ll show you how to manage an IPS session in Fundy, then export the helpful information and bring it into Light Blue so that you can link everything together.
One of the great things about doing an IPS session is that you can show clients exactly how their images could look as a canvas or frame on the wall. There are a number of rooms built into the software, but you can also upload images of your client’s homes to show them exactly how their wall art could look in their own home.
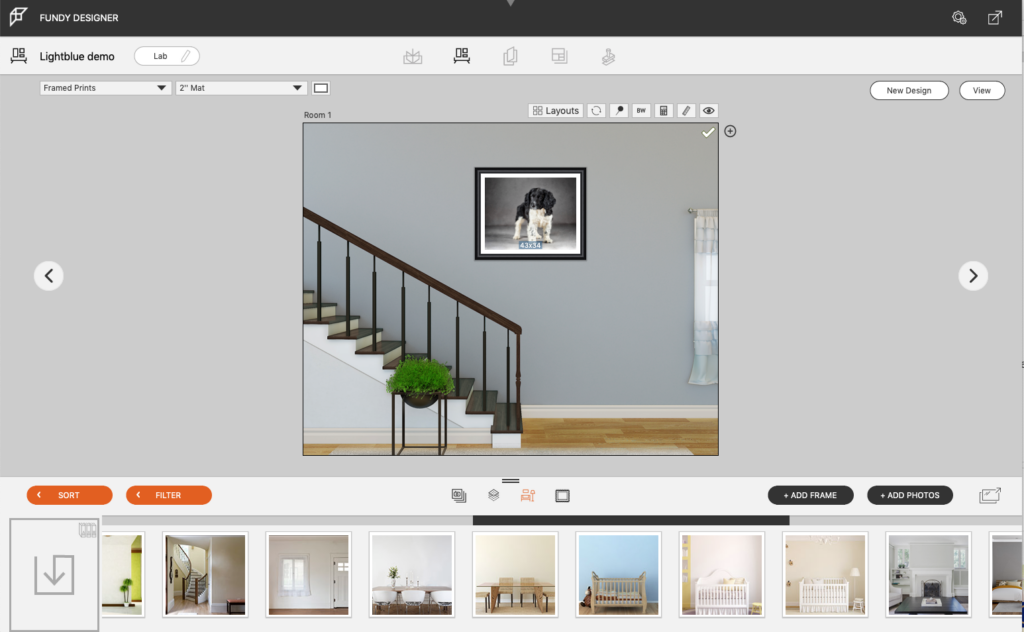
Once you’ve decided on the size and framing you can add the framed print to your client’s order.
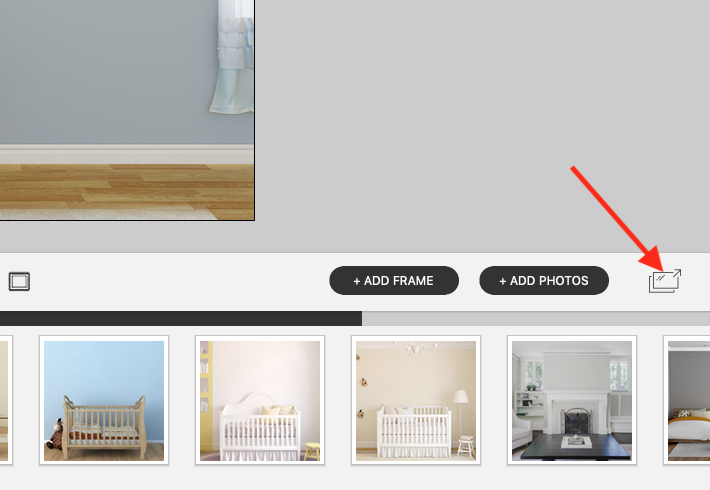
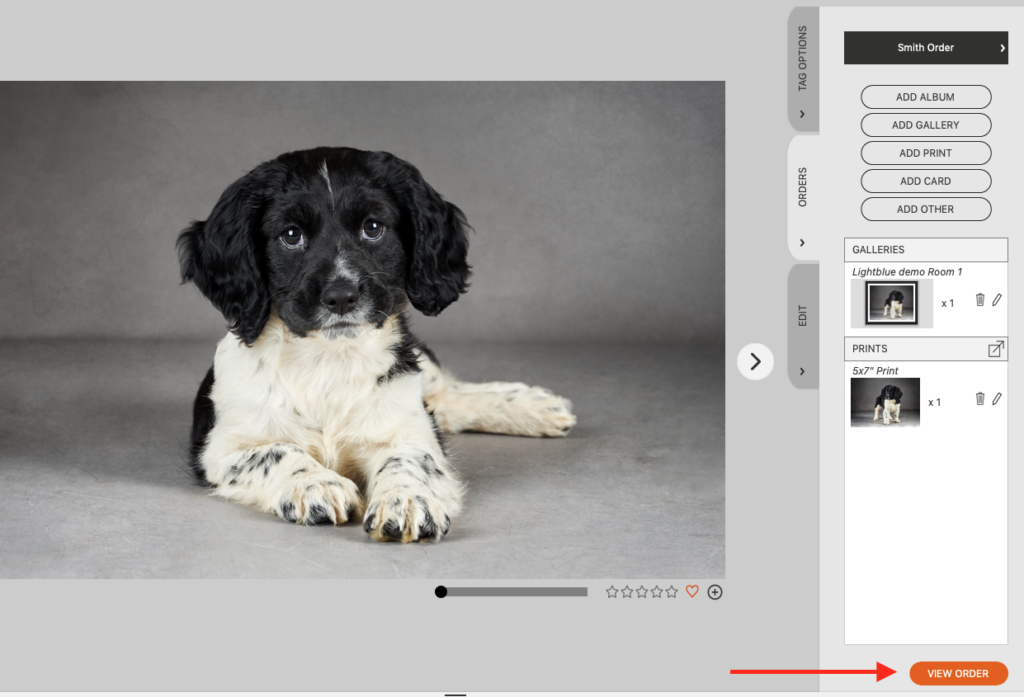
To view the items in your client order click on the image browser button.
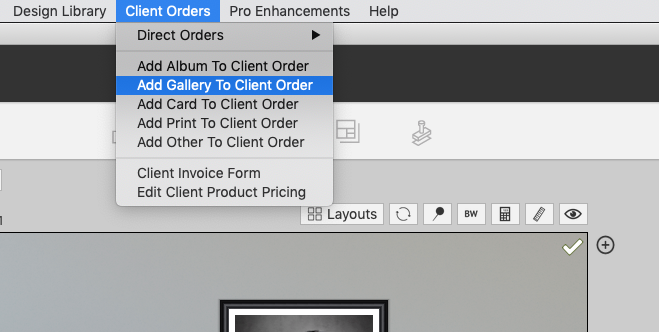
Select the orders tab to show you what’s already been added to your client’s order. You can also add extra items to your order such as prints or cards.
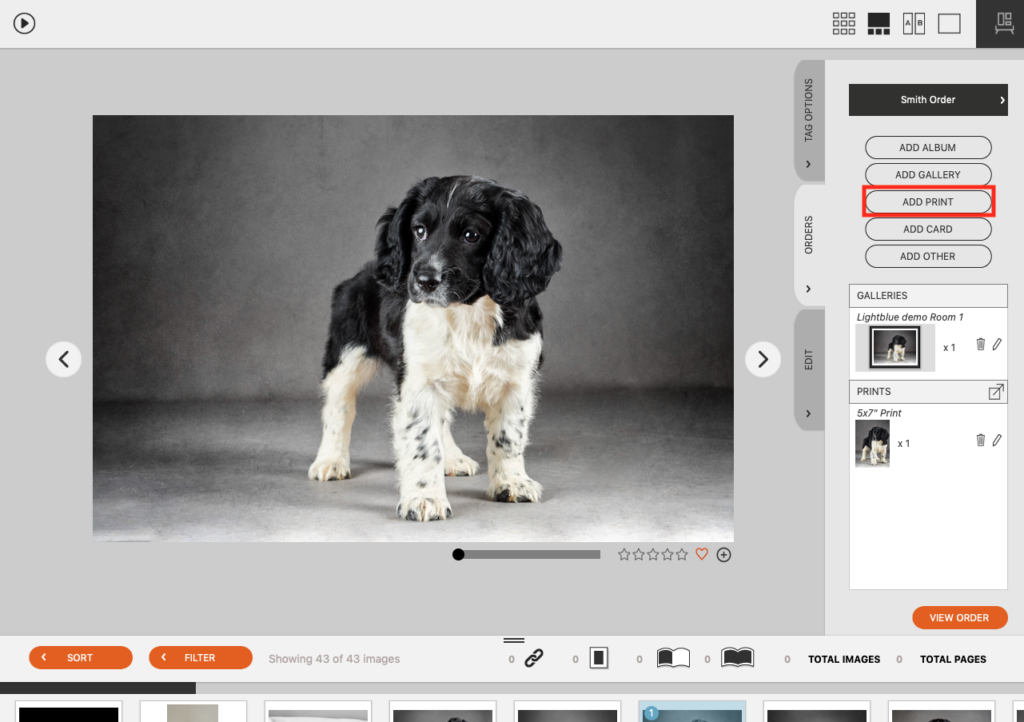
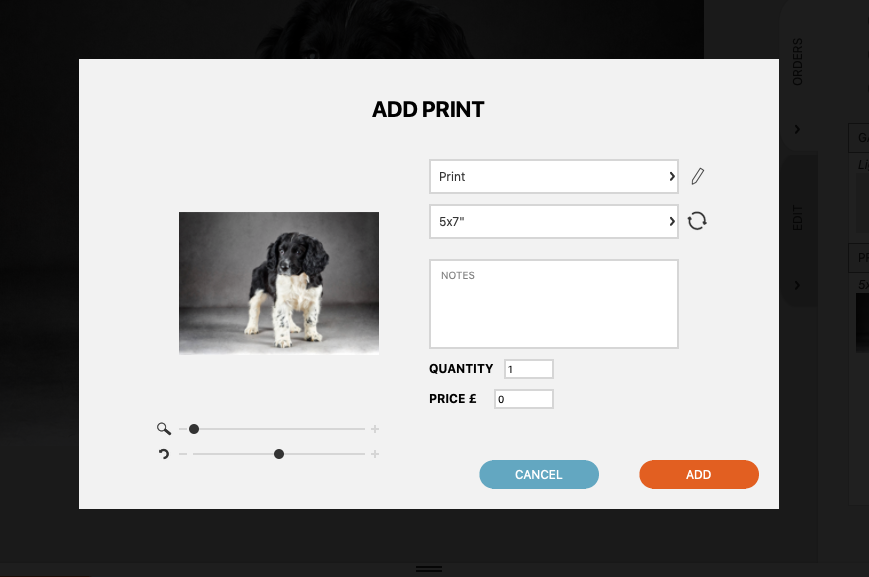
Selecting ‘add print’ will bring up a dialogue box and allow you to select sizing and add notes to your order.
When you have finished adding items you will click on ‘view order’ to see the final selection.
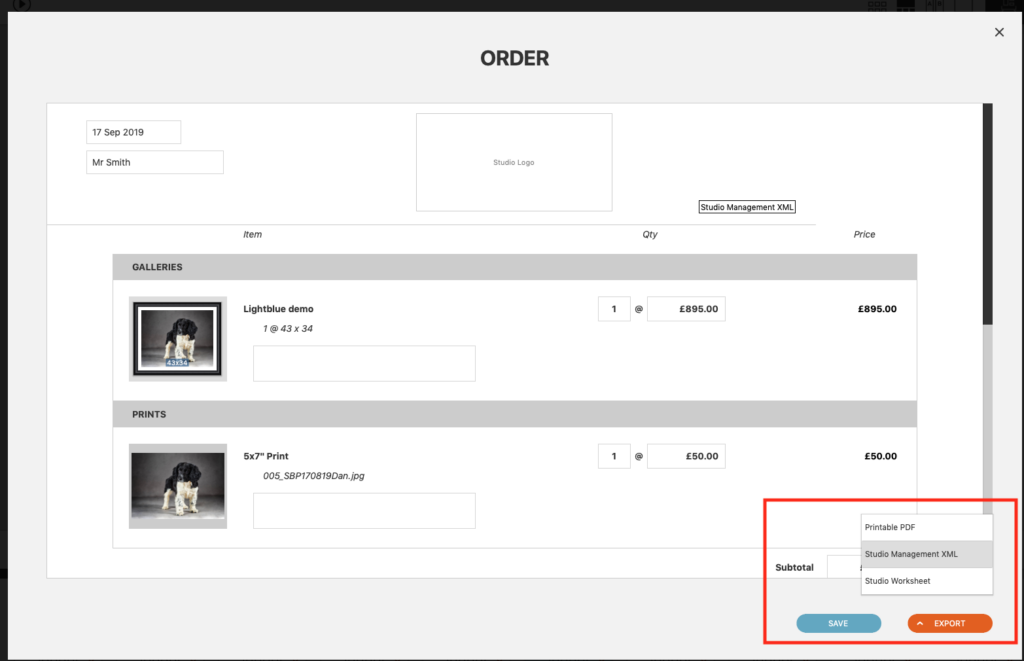
You can then export this order by selecting ‘Export> Studio Management XML’.
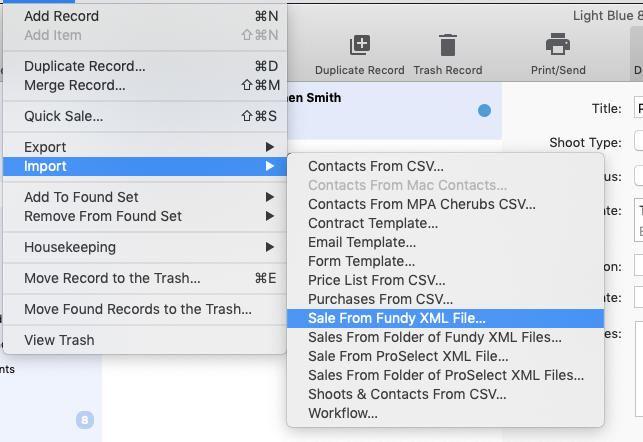
Once you’ve exported your order from Fundy, you’ll want to import it as a sale in Light Blue. To do this, go to the Records menu, select Import, then ‘Sale From Fundy XML File’.
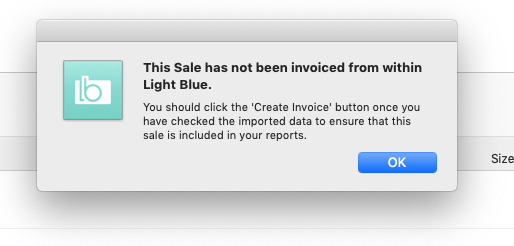
This will import the Fundy order into Light Blue as a sale. It’s really important to remember that you still need to turn the sale into an invoice, even if you’ve already taken payment for the sale from the customer. Turning the sale into an invoice flags it for inclusion in various reports in Light Blue. You will get a reminder to do this when you import the XML file.
You can choose whether to send the invoice to your customer. If you’ve already given them a copy of their Fundy order at the viewing session, you can uncheck the Print/Send box and Light Blue will simply create an invoice number for the sale.
You’ll also want to make sure that you link the sale to your shoot record. Click on the cog in the linked shoot record and choose ‘Link Shoot’.
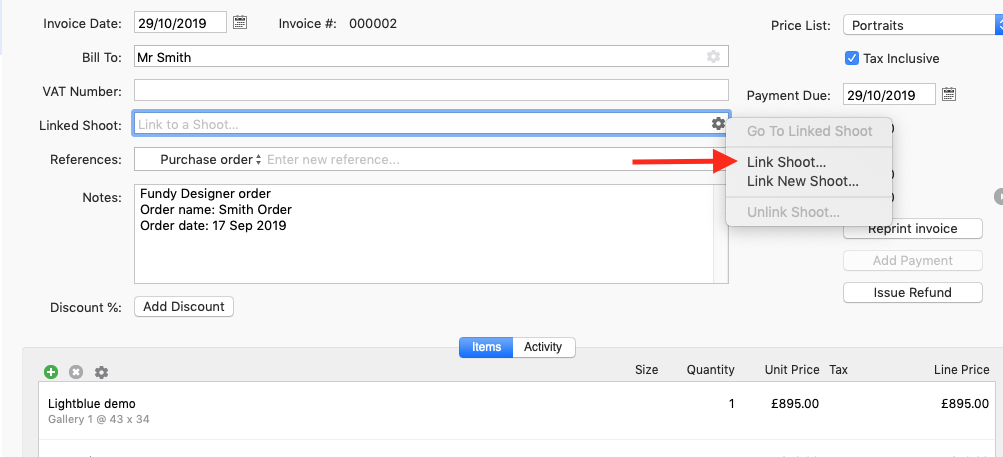
Start typing the shoot name and it will appear in the drop down menu.

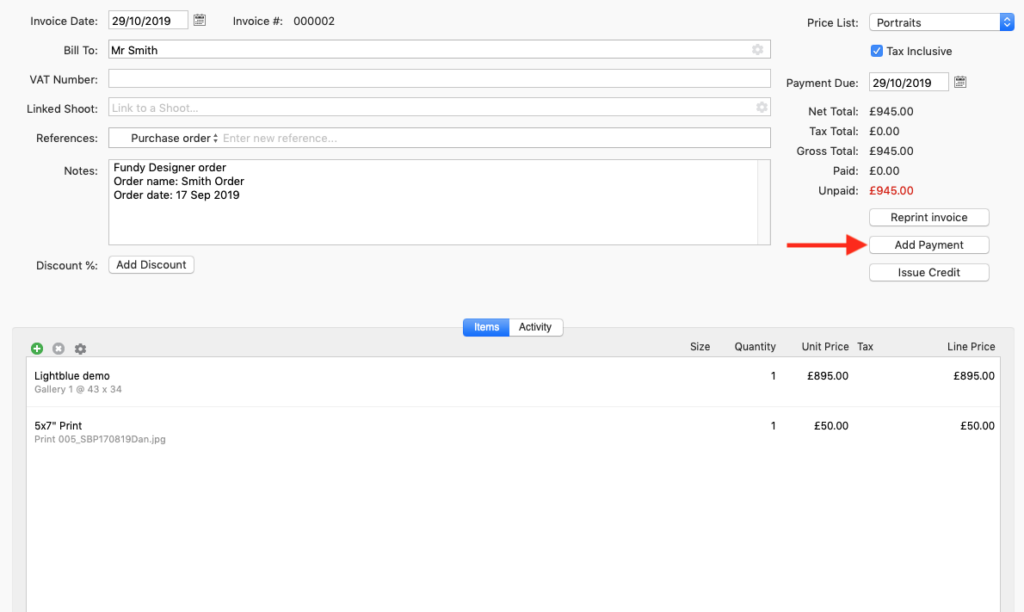
If the customer has already paid you for the order you can mark is as paid simply by clicking the “Add Payment” button on the sale record.
By importing your Fundy orders into Light Blue, you’ll always have a clear idea of your sales income, as all that information is in one place. We hope you find this helpful in streamlining your order system. We also have integrations from Shootproof and theimagefile which we will cover in future blog posts. We looked at our integration with ProSelect in this blog post.
We’d love to know if you are already using some of these integrations and how you find it helps you & your business!
Related
- Light Blue 2026.1 is here!
- Light Blue 2026.1 release notes
- Light Blue 2026.1 prerelease testing
- Light Blue 2025.1.4 release notes
- Light Blue 2025.1.3 release notes
- Light Blue 2025.1.2 release notes
- Light Blue 2025.1.1 release notes
- Light Blue 2025.1
- Light Blue 2025.1 release notes
- How to Build Long-Term Relationships With Your Portrait Clients