Asking your clients to opt into your mailing list
New Mailing List Opt-In Form
With Light Blue 7.1.2, you can now send your clients to a special form that allows them to opt in to your mailing list. Each of your contact records has a special URL that identifies them, and you can get that URL in two different ways:
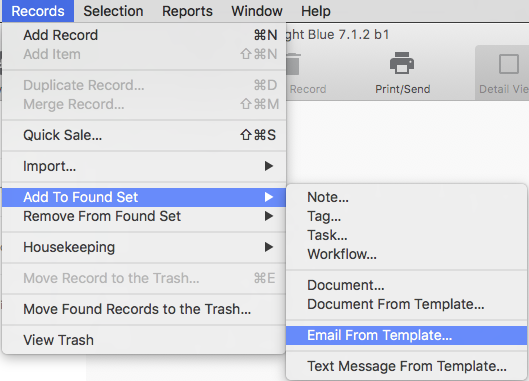
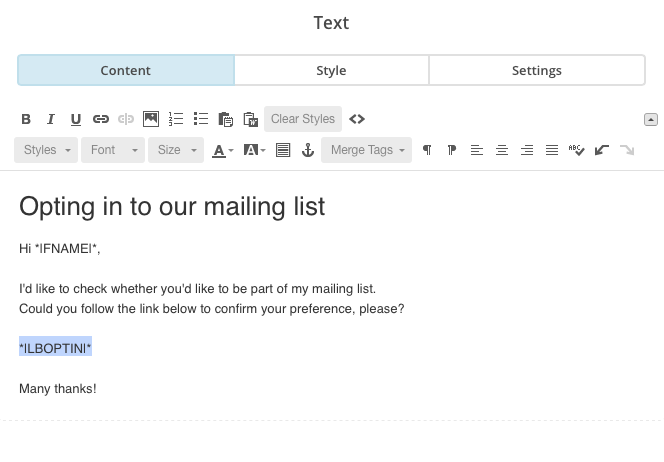
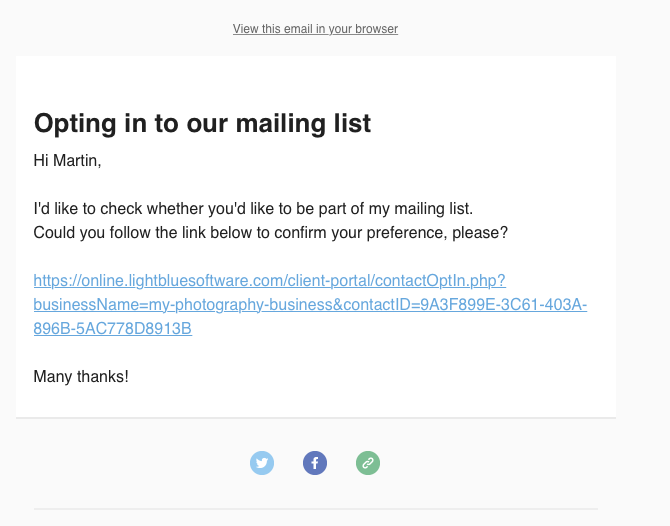
- If you only want to send mailing list opt-in links to a small number of clients, you can use the %ContactMailingListOptInURL% mail-merge tag in an email template.
- If you want to send mailing list opt-in links to lots of clients, you can export a CSV file of contact names, email addresses, and URLs from Light Blue. You can then import this spreadsheet into a service like MailChimp to email it to your clients.
Your client portal branding is automatically applied to your mailing list opt-in form, and can customise the text that appears on the form by logging into your account on our website.
Read on to learn how to use either of those methods of sending a mailing list opt-in form to your clients!
Using Light Blue
If you want to email a small number of contacts, you could send an email to your clients using an email template.
After you’ve queried for the records that you’re interested in, either by using the Query dialog or one of your Quick Queries, then you could send an email to all of those contacts based on a template that you’ve already set up.
There’s a short tutorial covering how to create your own email templates here.
You’ll need to include the %ContactMailingListOptInURL% mail-merge tag in your email template, so that each contact receives their own unique link to the special opt-in page.
It’s a good idea to try sending a test message to yourself first, to make sure that you’re happy with how everything appears & works, before sending it out to your customers.
We’d discourage you from using this approach to send more than a small number of emails, because you can run the risk of your mail host temporarily suspending your account for sending too much mail or marking your address as a producer of spam.
Using MailChimp
If you have a larger group of clients you’d like to invite to opt into your mailing list, we’d recommend using a service like MailChimp.
MailChimp is great for sending big mail-outs to lots of contacts. You can personalise those messages to include information that’s unique to each person, too. That means that you can include the unique URL that identifies each client in the email to that person.
In order to do that, you need to add a list of contacts to MailChimp.
1. Exporting a spreadsheet of contacts, including their unique opt-in URLs
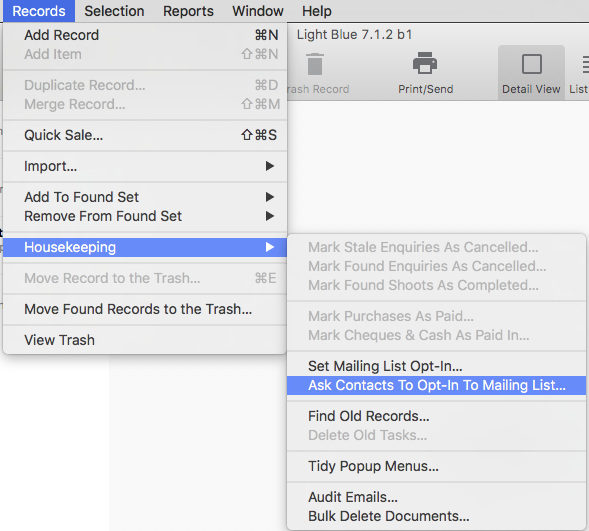
The first step is to export your contacts’ names, email addresses, and the unique URLs that they can use to opt into your mailing list. You should use the Query dialog or one of your Quick Queries to find the contacts that you want to include in this mailing, and then go into the Housekeeping section of the Records menu and select ‘Ask Contacts To Opt-In To Mailing List’.
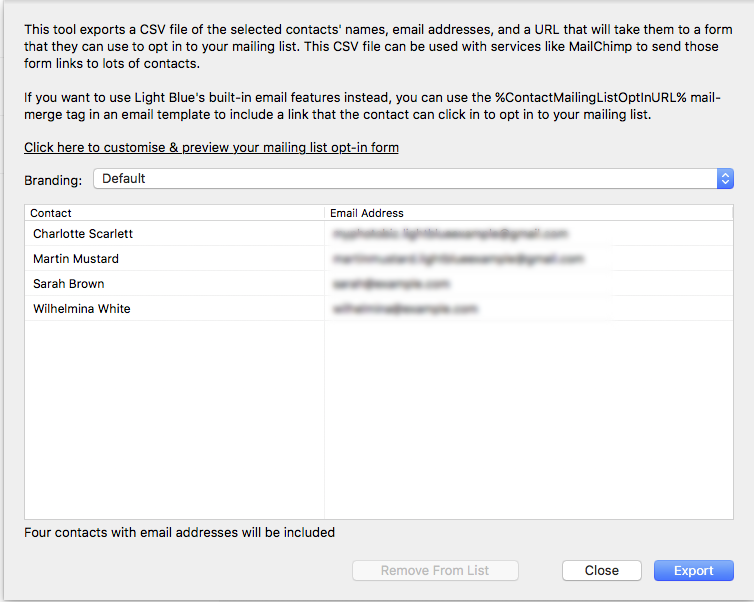
Light Blue will give you a preview of the contacts who will be included. You can remove contacts by selecting them and clicking the ‘Remove From List’ button. When you click the ‘Export’ button, Light Blue will export a CSV file that you can import into MailChimp.
2. Creating a special “List” in MailChimp
Log in to your MailChimp account and then, in the Lists section, click ‘Create List’.

Give the list a name and complete the other required information, then save the list. You don’t need to include the “Enable double opt-in” or “Enable GDPR fields” options for this list: the purpose of messaging contacts on the list is to ask them to complete their unique opt-in form which will update Light Blue.
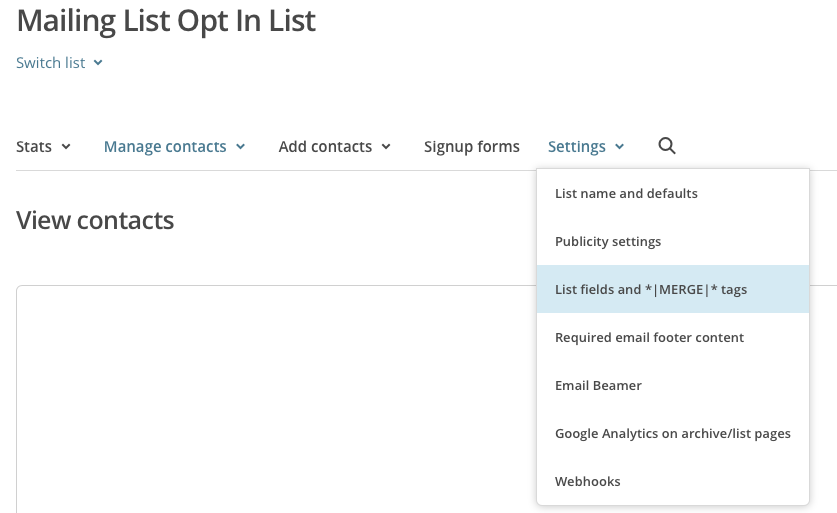
3. Adding a special field to the list for the unique URL
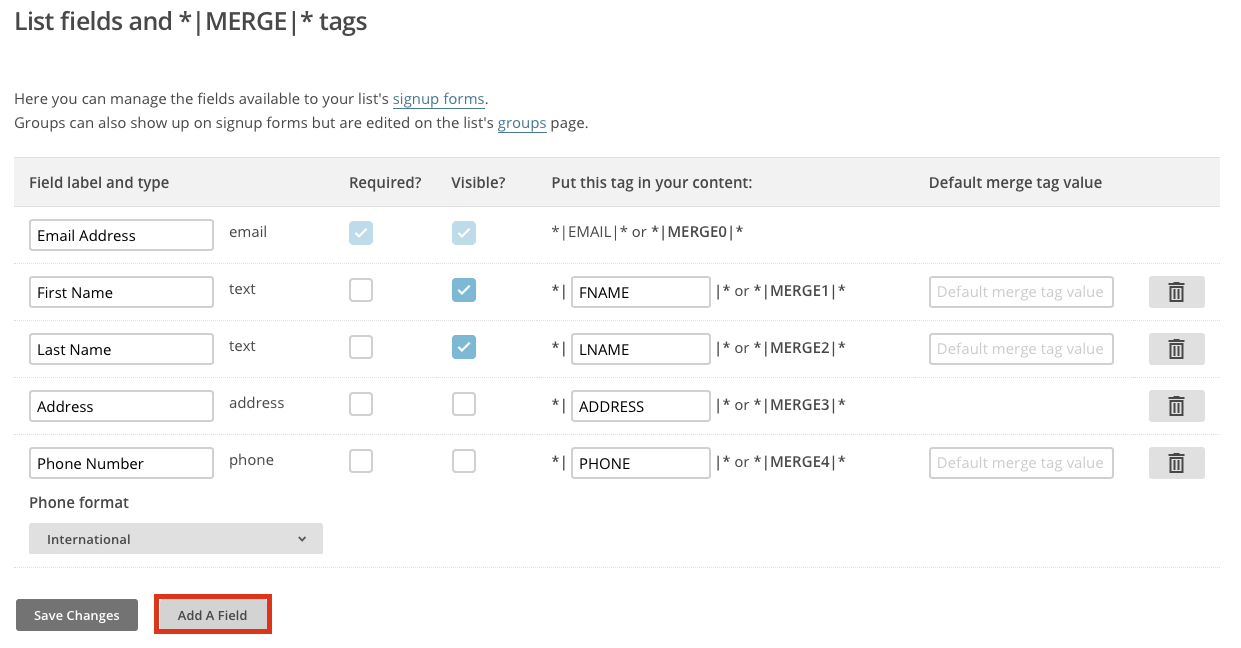
Once you’ve created the list, we need to set up a special list field to store the unique opt-in form URL. In the Settings menu, click on “List fields and *|MERGE|* tags”:
Click the “Add A Field” button at the bottom:
 Choose Website as the type:
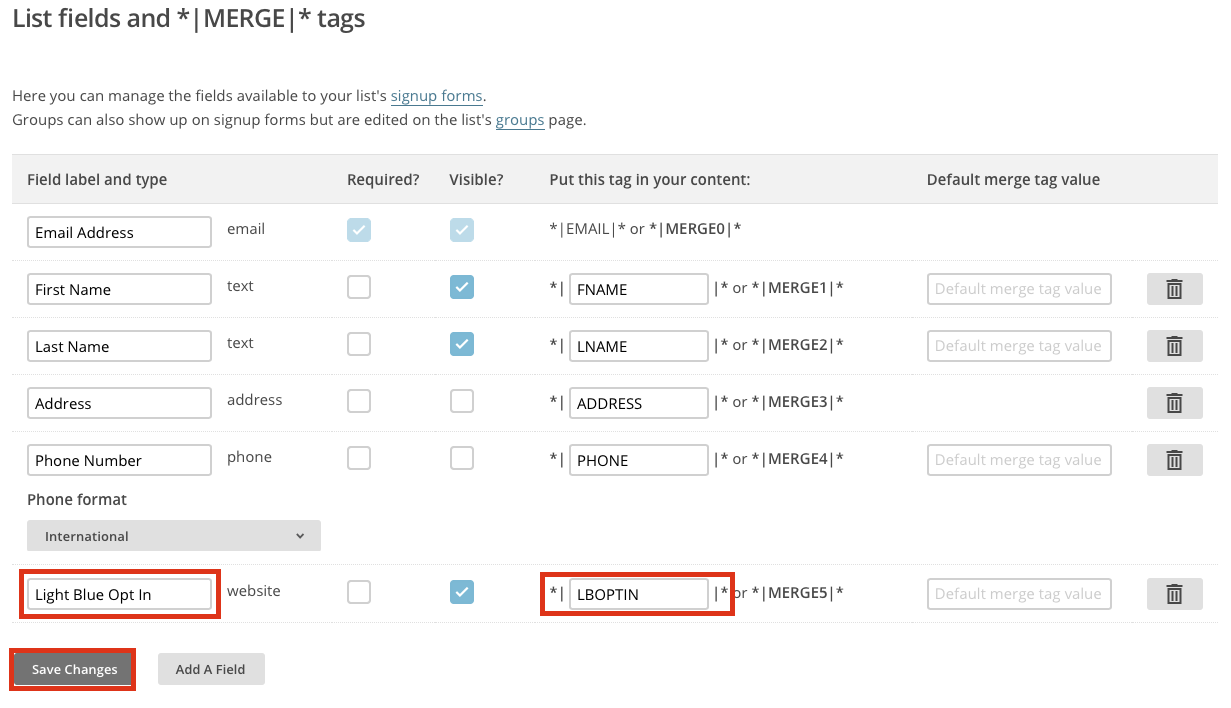
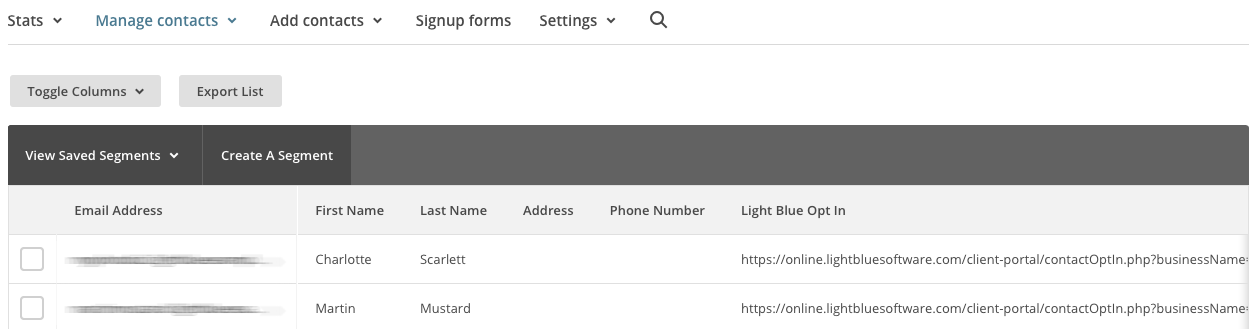
 Give the field a name & tag name (e.g. “Light Blue Opt-In” and “LBOPTIN”) then save your changes:
 4. Importing the contacts from Light Blue into the MailChimp list
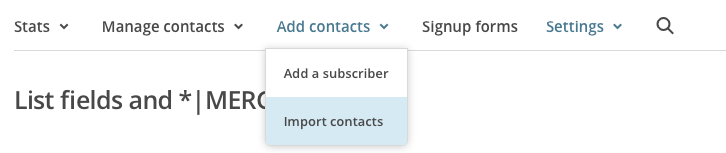
You’re now ready to import the CSV of contacts from Light Blue into MailChimp. To do that, click Add Contacts > Import Contacts:
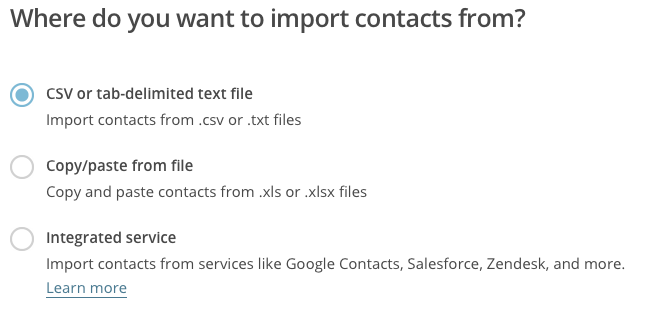
 Choose CSV or tab-delimited text file and click Next:
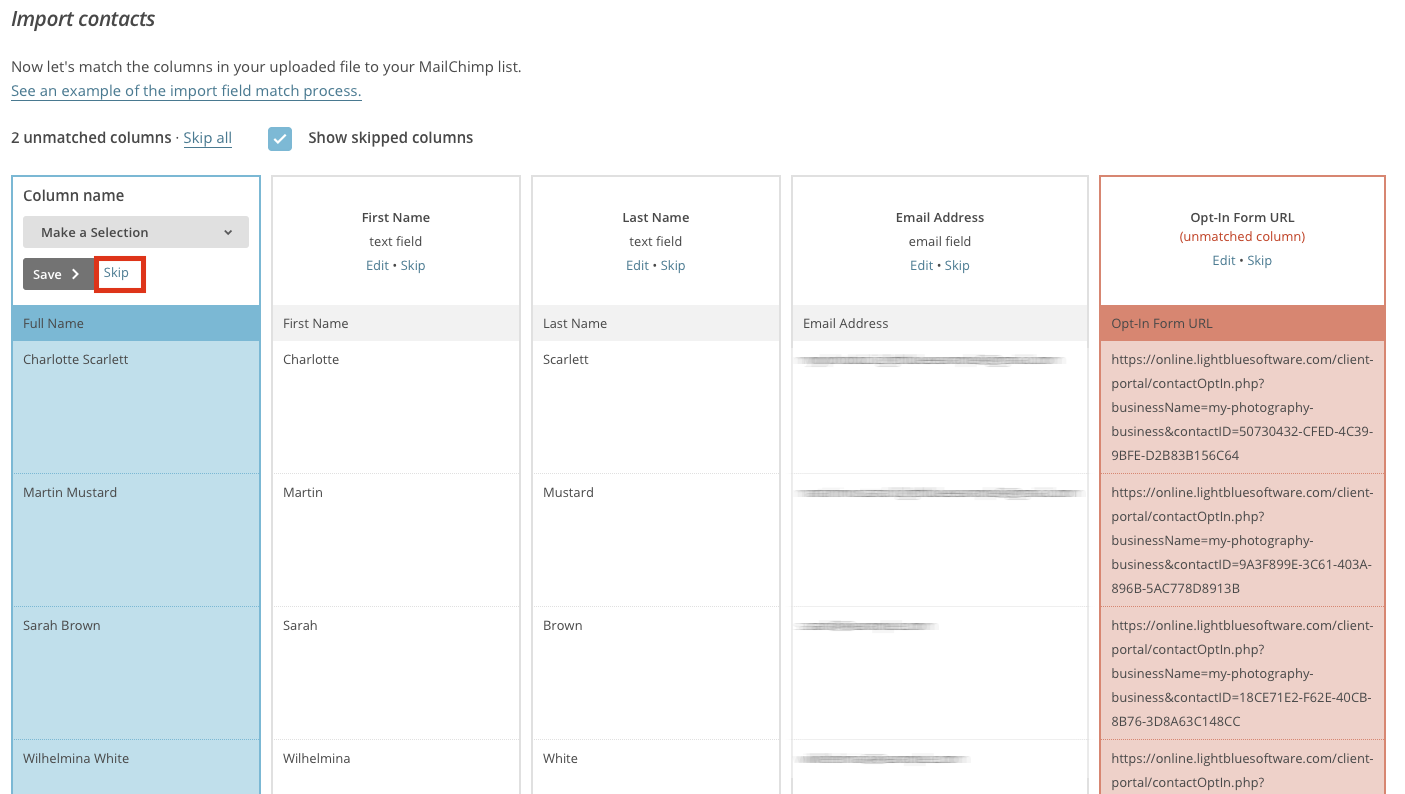
Choose the file that you exported from Light Blue. Now you can map the columns in the CSV file to the relevant MailChimp fields.
Light Blue’s CSV file includes a full name field, which isn’t relevant to MailChimp, so you can click “skip” so MailChimp ignores it:
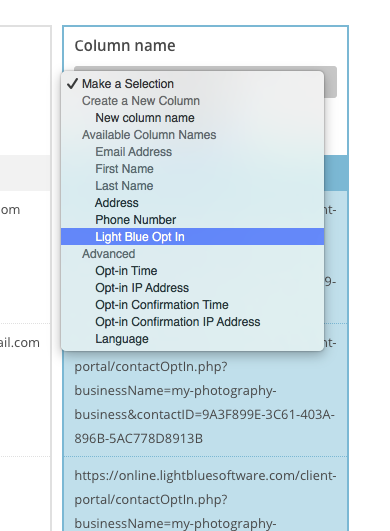
When you get to the unique Opt-In Form URL column, choose to map that to the “Light Blue Opt In” field that you created earlier:
Click Save, then click Next.
Categorise the imported contacts as “subscribed” so that we can send the email to them:
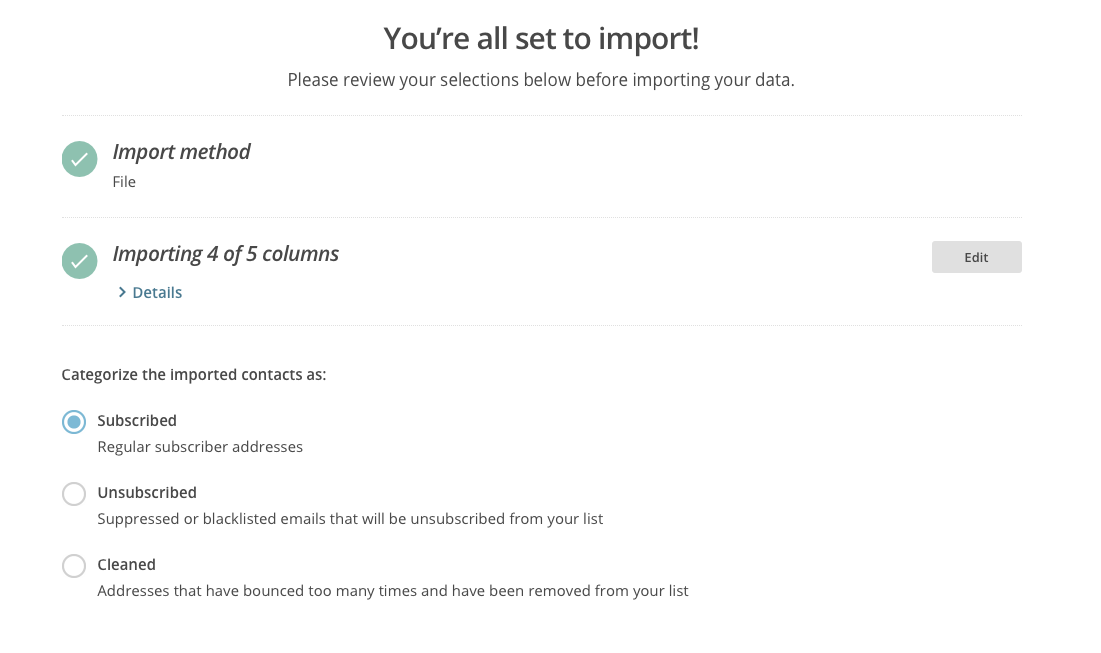 When you click Import, MailChimp will import the contents of the CSV.
 5. Creating & sending the email message
You can now create your email message which will be addressed to the contacts in this list by creating a new email campaign. To do that, return to your MailChimp account home screen and click the “Create Campaign” button.
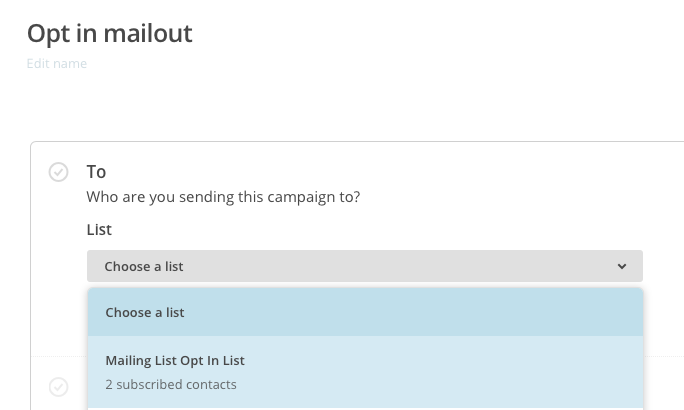
Choose to “create an email” and give the campaign a name (e.g. “Opt in mailout”). In the To field, click “Add Recipients”, then choose the list you created earlier:
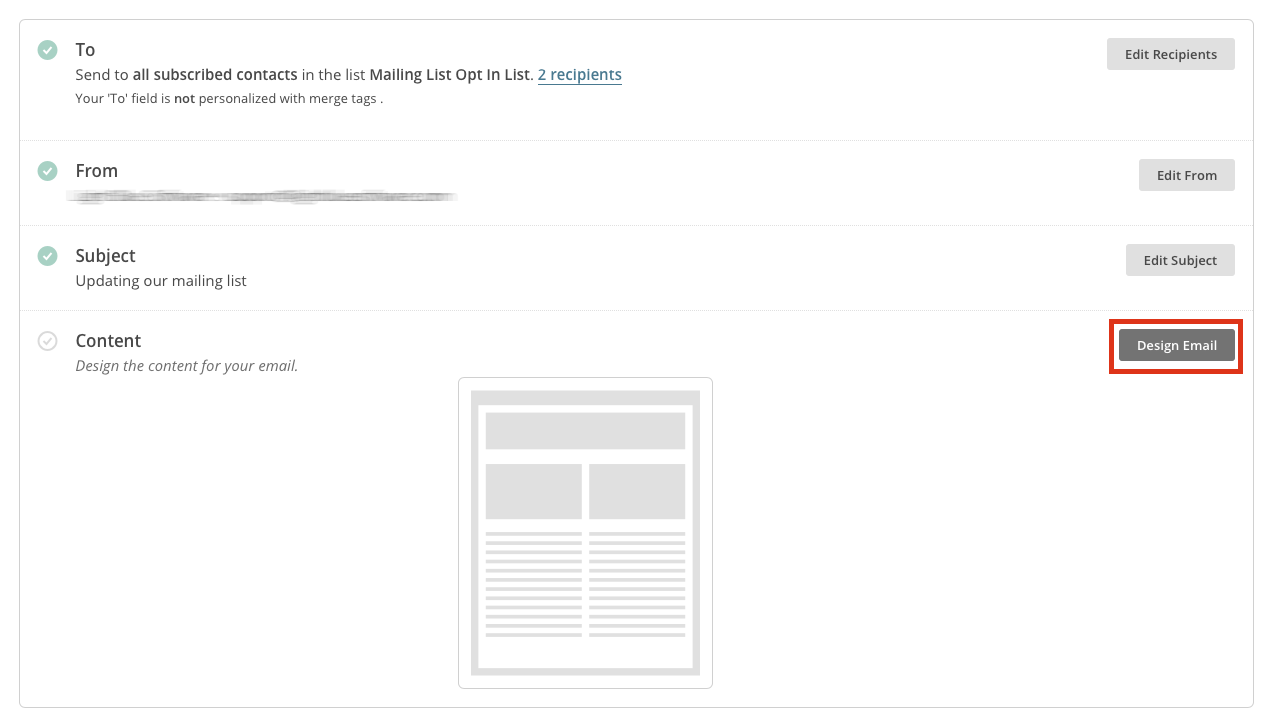
Enter relevant “from” & “subject” fields, then click on the “Design Email” button to design the content of your message.
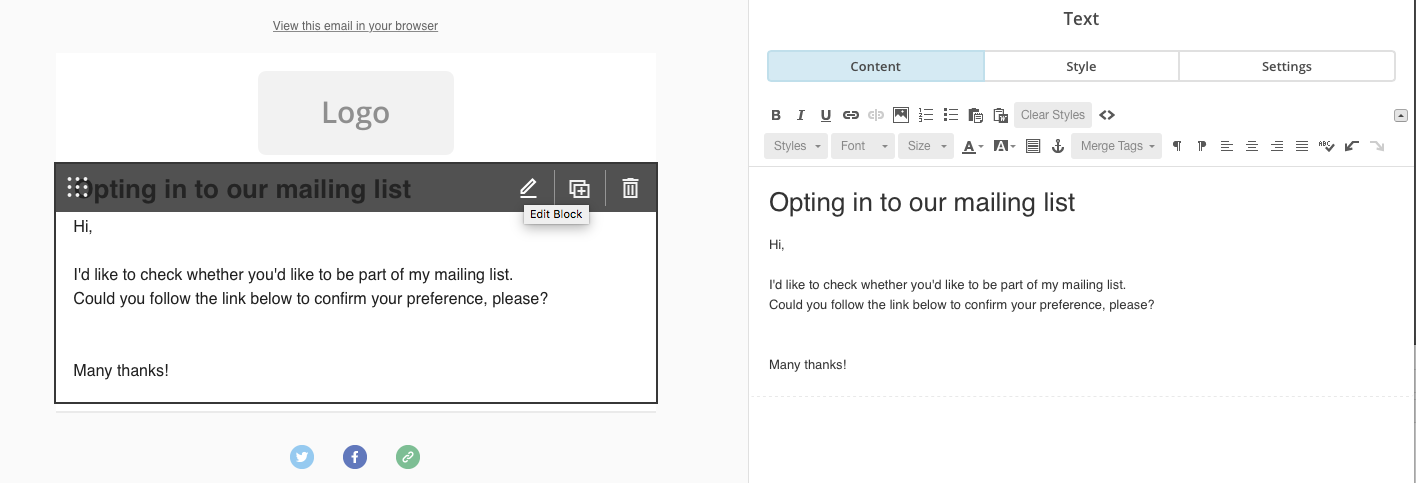
 Choose a layout format that you want to work with and start to compose your email message. Click on the text of your email, choose to edit the text block.
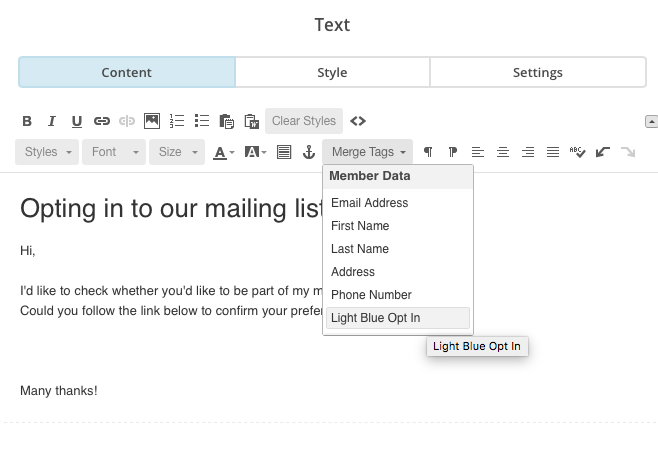
You can now customise the text of the email so that it can include the unique URL. To do that, click on the “Merge Tags” button and choose the “Light Blue Opt In” tag that you created earlier:
Once you’re done, click “Save & Close”. You can send a test message to preview how the email looks. When you’re ready, click the “Send” button to send the email to all of the contacts that you imported.
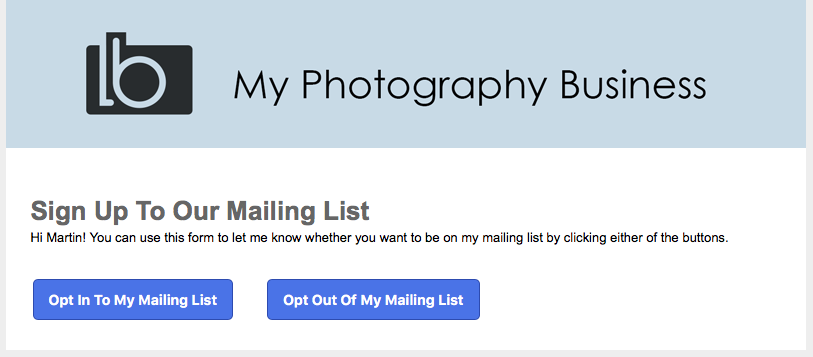
Customising your mailing list opt-in form
Your client portal branding is automatically applied to your mailing list opt-in form, and can customise the text that appears on the form by logging into your account on our website.
The customisation options for your opt-in form include:
- Whether or not you want to receive a notification email whenever a client opts in or out of your mailing list via this form.
- The heading and text that appears on the form.
- The text of the buttons on the form.
- The headings and text that appears on the pages that are displayed when a client opts in or out.
Related
- Planned maintenance
- Light Blue 2026.1 prerelease testing
- Timezone support added to scheduling calendars
- Light Blue 2025.1.4 release notes
- Christmas & New Year support
- Light Blue 2025.1.3 release notes
- Light Blue 2025.1.2 release notes
- Scheduled website maintenance
- Light Blue 2025.1.1 release notes
- New Zapier actions open up new automation options