Search for answers or browse our knowledge base.
Can't find the answer you need here? Contact our support team and we'll gladly help you.
Using the Time Off feature
Time Off is a small but powerful feature of Light Blue allowing you to block availability in all the applicable Scheduling Calendars at once, removing the need for you to update them individually. Perfect for giving you back some precious time that you can use elsewhere in your business!
You can block the availability of any Resource you’ve set up in Light Blue; it could be for annual leave or sickness of an individual staff member, your whole team might be attending a workshop or show, or perhaps even one of your rooms or pieces of equipment is out of action.
Setting Time Off
You can access the Time Off dialog box in a couple of ways depending on your preferred way of working:
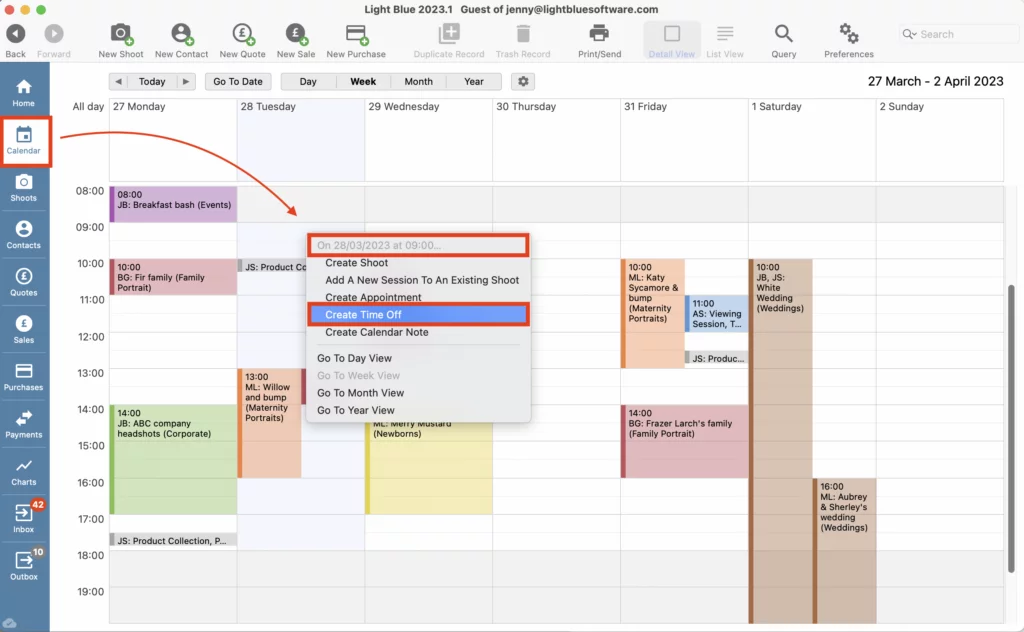
From the Calendar view
- Go to the Calendar view.
- Right-click on the date and time you want to log Time Off.
- Click “Create Time Off” from the menu options.
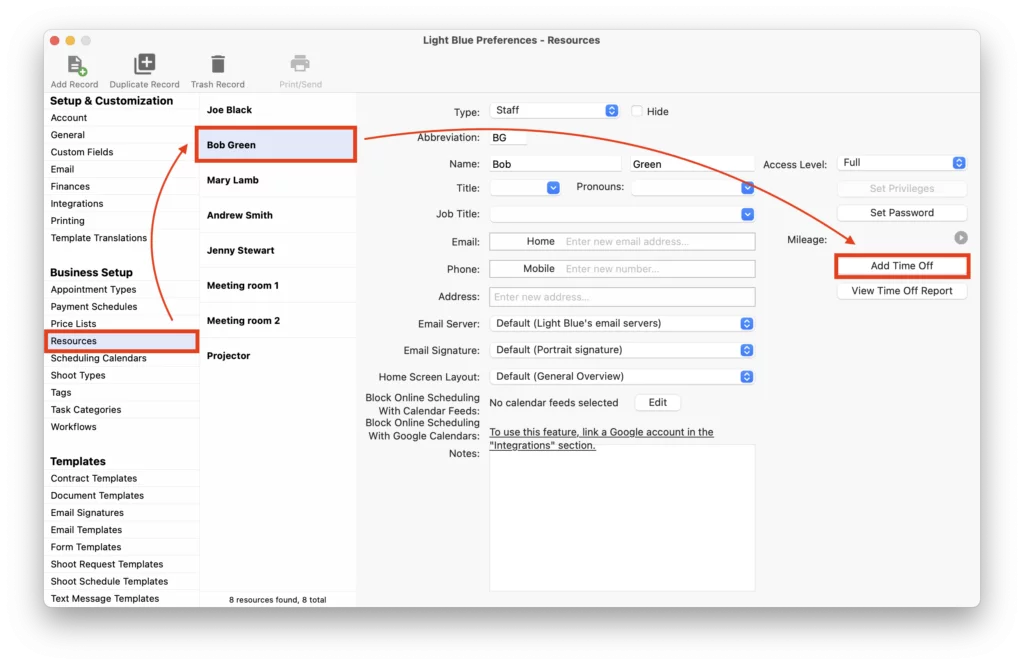
In Preferences
- Go to the Resources section in Preferences.
- Click on the applicable Resource.
- Click on “Add Time Off”.
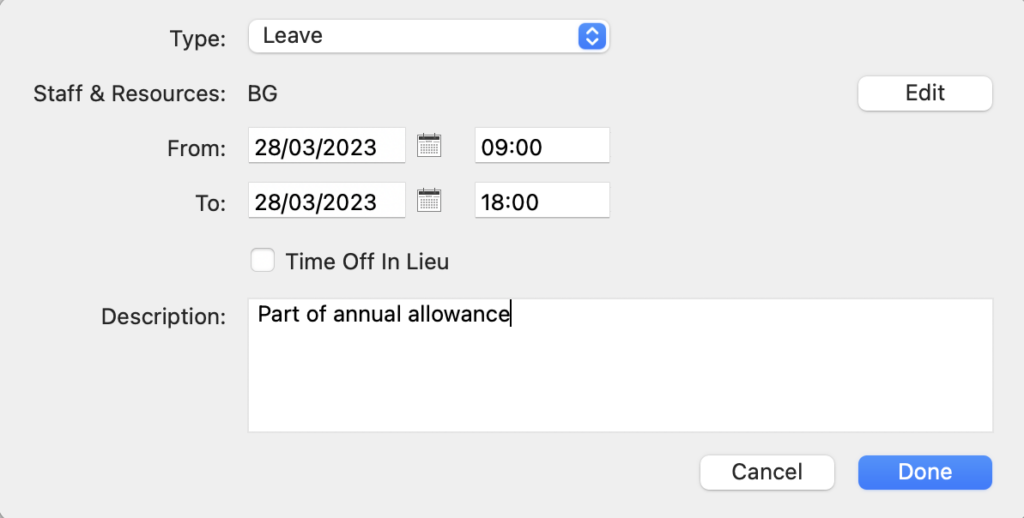
Time Off Details
- Once you have the Time Off dialog box showing, choose the Time Off Type from the drop-down menu options.
- Click “Edit” to amend/choose the Resources. NB. If none are chosen Light Blue will automatically apply the Time Off period to all Resources.
- Complete the time frame.
- Add a description if needed.
- Click “Done”; Light Blue now blocks out the availability in any Scheduling Calendars that use this Resource. NB. By default the Scheduling Calendar will use the Resources set in the Shoot/Appointment Type though, if needed, you can override this in the Scheduling Calendar itself.
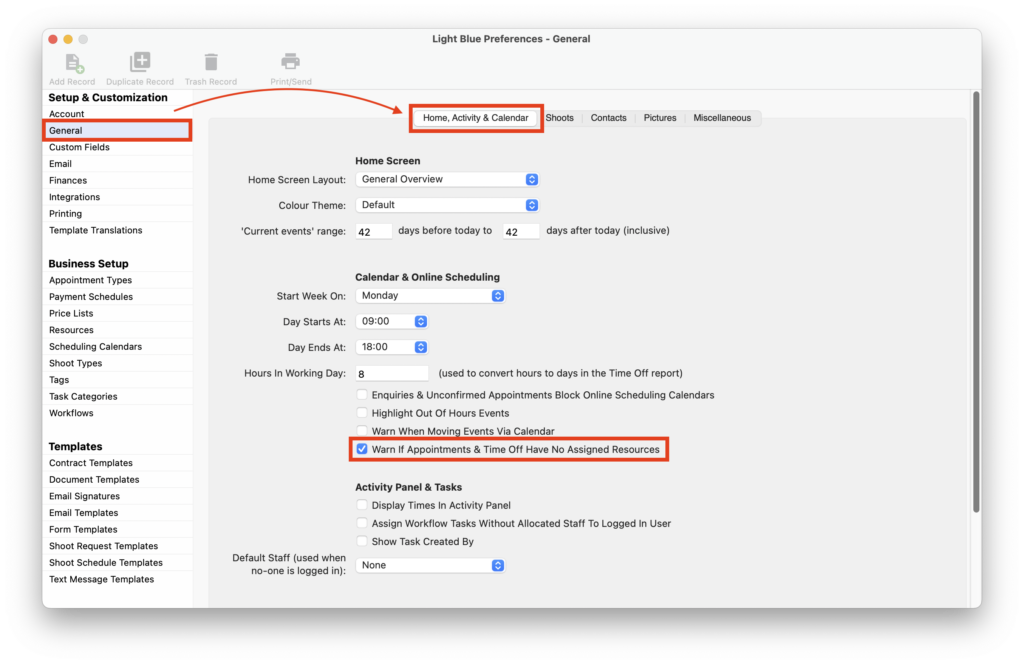
⭐️ Top Tip: In the “General” section of Preferences you can check the “Warn if Appointments & Time Off Have No Assigned Resources” box for them to appear in red in Light Blue.
Scheduling Conflicts
If there’s already a Shoot or Appointment linked to the Time Off period for a Resource, the Record/s will appear in Light Blue in red. This will also happen with any Shoot or Appointment manually booked during this time.
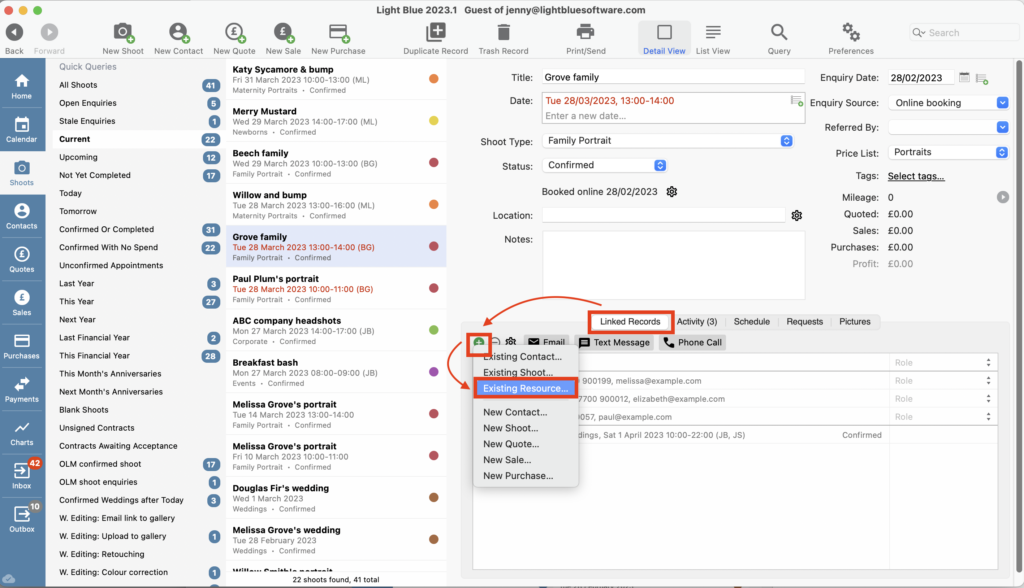
- Go the Linked Records tab of the Record and click on the green “+” button.
- From the menu options choose “Existing Resource…” and amend accordingly.
Amending Time Off
- If you need to amend any Time Off entries go to the Calendar view.
- Double-click on the applicable Time Off entry and amend accordingly.