Search for answers or browse our knowledge base.
Can't find the answer you need here? Contact our support team and we'll gladly help you.
Managing your work using Task Categories
Being able to see at a glance the type of work that you’re needing to do over a particular time frame is helpful to get an overview of your workload coming up. And it’s particularly useful if you want to concentrate on a particular type of work at one time.
Many of us find we can be more productive if we do the same work, but for various clients, in one go; it could be doing all your outstanding post-production or perhaps making your client catch-up calls. Whatever the activity is though, it’s about doing it in one block of time.
And making use of Light Blue’s Task Categories is a great way for you to achieve both of these things.
A refresher; what are Tasks?
Tasks are essentially reminders of things that need to be completed manually. They can be part of a Workflow of regular things you do, or you can add ad-hoc ones directly into the Activity tab of the Record that you’re in.
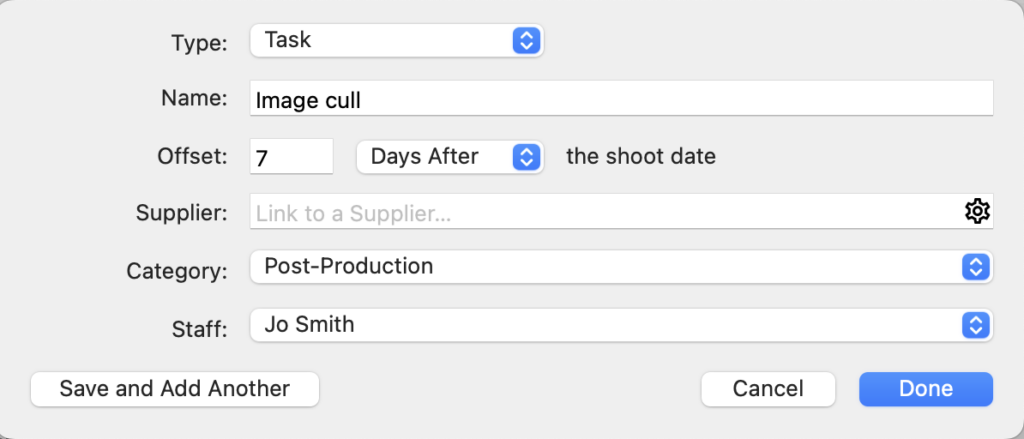
Each task has various elements to it:
- “Name”: A free-form box to enter a short description of the task to be completed.
- “Offset”: The number of days before or after the important date (that the workflow is based around) when this task will become due. NB. This option is only shown when you’re adding a Task to a Workflow.
- “Category”: A drop-down menu to choose from.
- “Staff”: If you have tasks that are always completed by a particular member of your team, assigning the task directly to them from the drop-down menu is useful.
What are Task Categories?
Task Categories allow you to group Tasks that are similar to each other.
Light Blue has already set up a few of the most common ones for you (Admin, Client Communication and Post-Production); however, it’s very straightforward to add any more you may need for how your business works.
How to create a new Task Category
There are two ways you can do this.
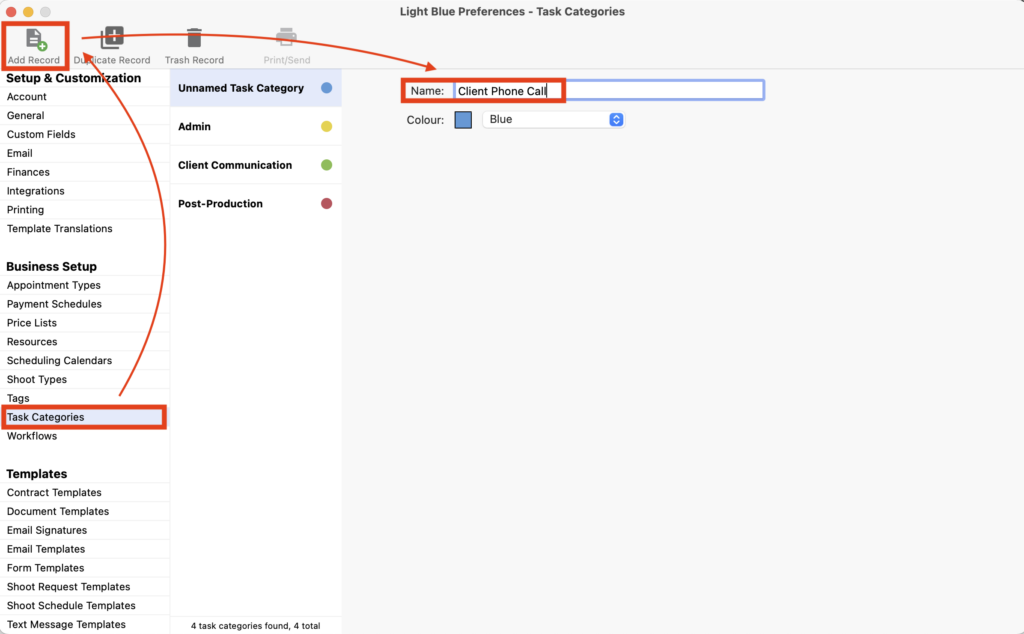
1. Directly within Task Categories
- In the Preference pane, click on “Task Categories” in the “Business Setup” category.
- Click on “Add Record” in the menu bar.
- Name the new Task.
- And if needed, change the Colour; a handy feature so you can see at a glance what type of Task it is.
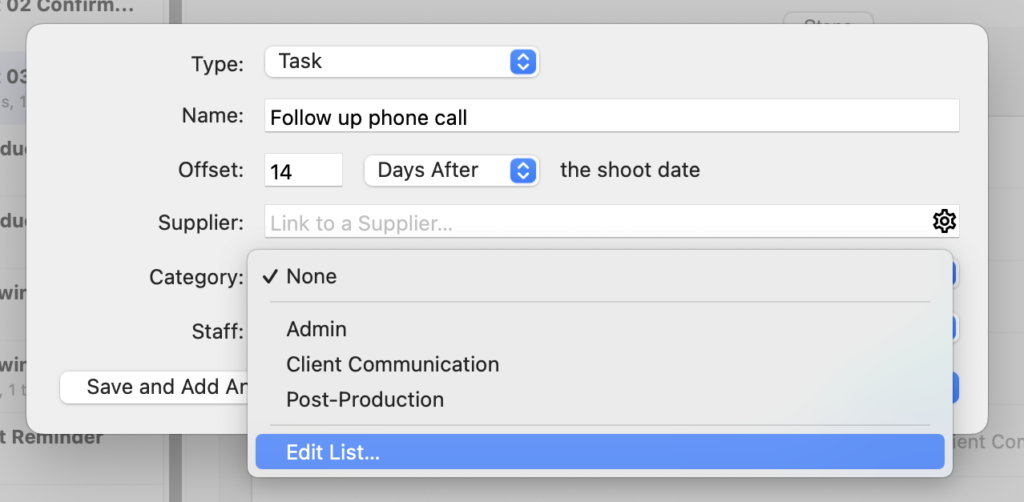
2. From Workflows in the Preference pane or the Activity tab of a Record.
- You may already be adding steps to a Workflow or adding an ad-hoc reminder in the Activity tab when you realise that an extra Category would be beneficial.
- Simply click on “Edit List…” from the Category drop-down menu and you’ll be taken straight to the “Task Categories” section and you can follow the steps above.
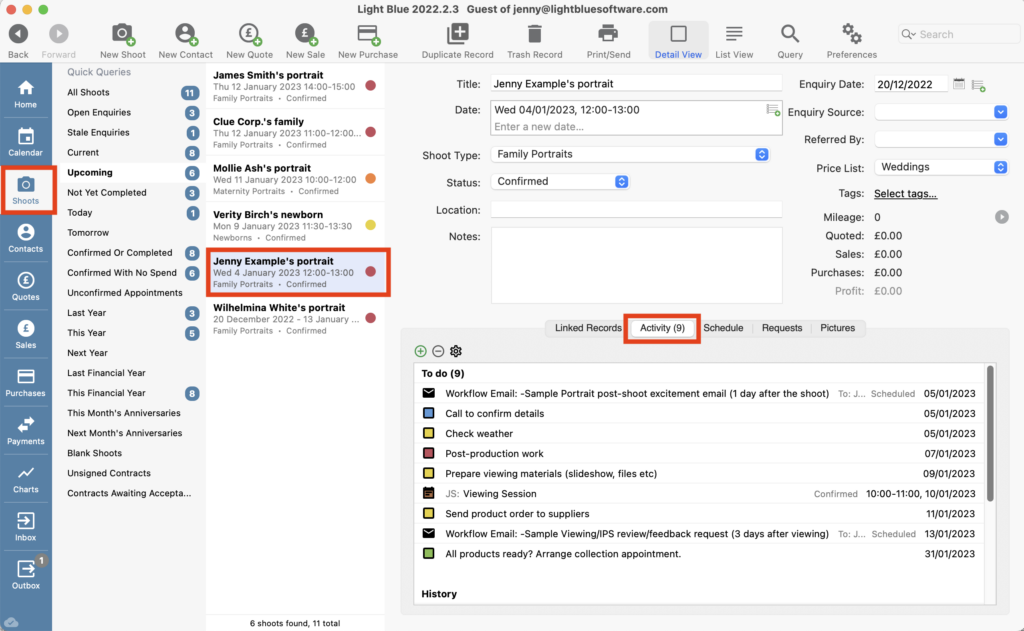
Viewing the Tasks coming up
In the Activity tab of any Record, you’ll be able to see all the outstanding “To do”’s. These include any automatic email and texts associated with that Record. along with your manual Tasks. And if you’ve assigned different colours to each of your Task Categories you’ll get a good overview of the type of work it is.
NB. Ad-hoc Tasks and Workflows are generally added to a Shoot Record however, it is also possible for them to be added to other record types within Light Blue such as Contacts or Quotes.
This method is absolutely fine for viewing “To do”’s on a record-by-record basis, but to get an overview of all your outstanding Tasks and to facilitate focused working we want to use Light Blue’s “Task Manager” widget.
Using the “Task Manager” Widget to manage your work
Light Blue’s Home Screen is a customisable dashboard giving you the flexibility to show the most helpful and important information about your business all on one screen,
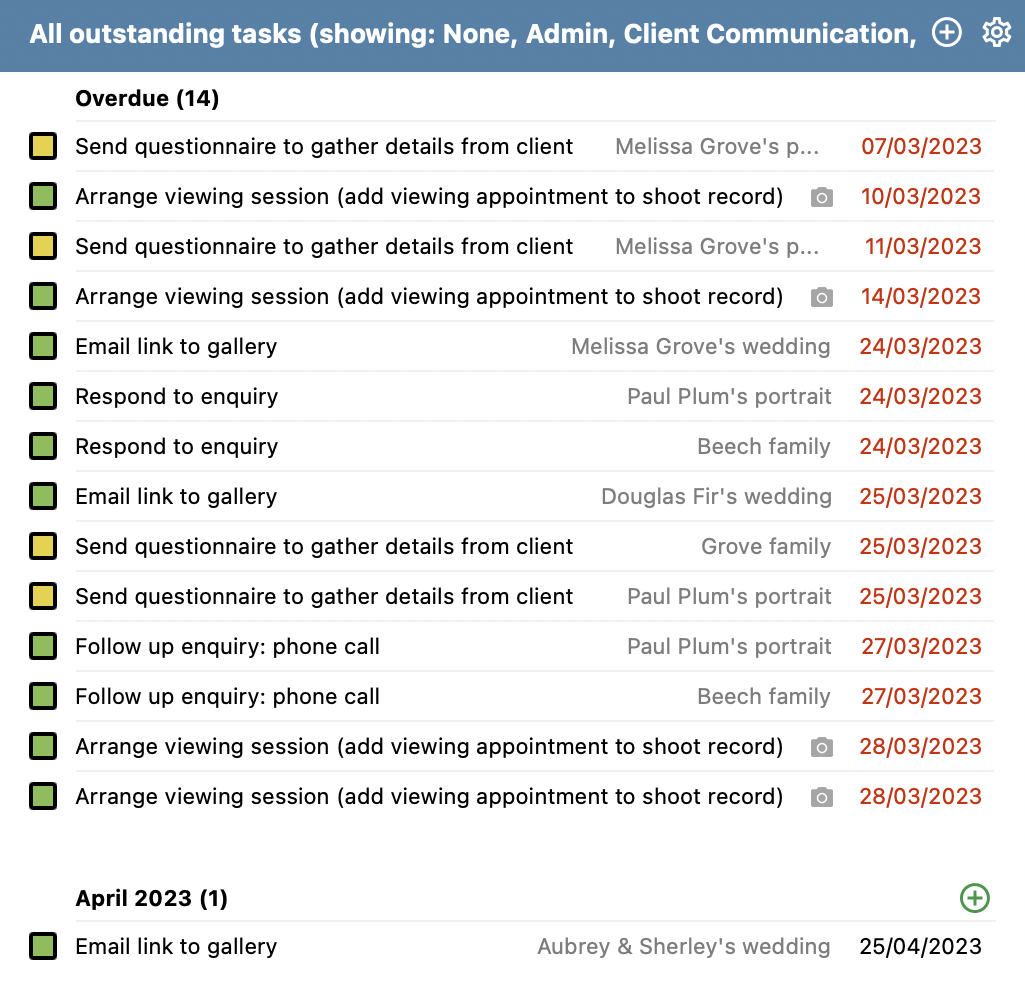
The Information is displayed on the Home Screen in Widgets with the “Task Manager” Widget showing “All outstanding tasks”.
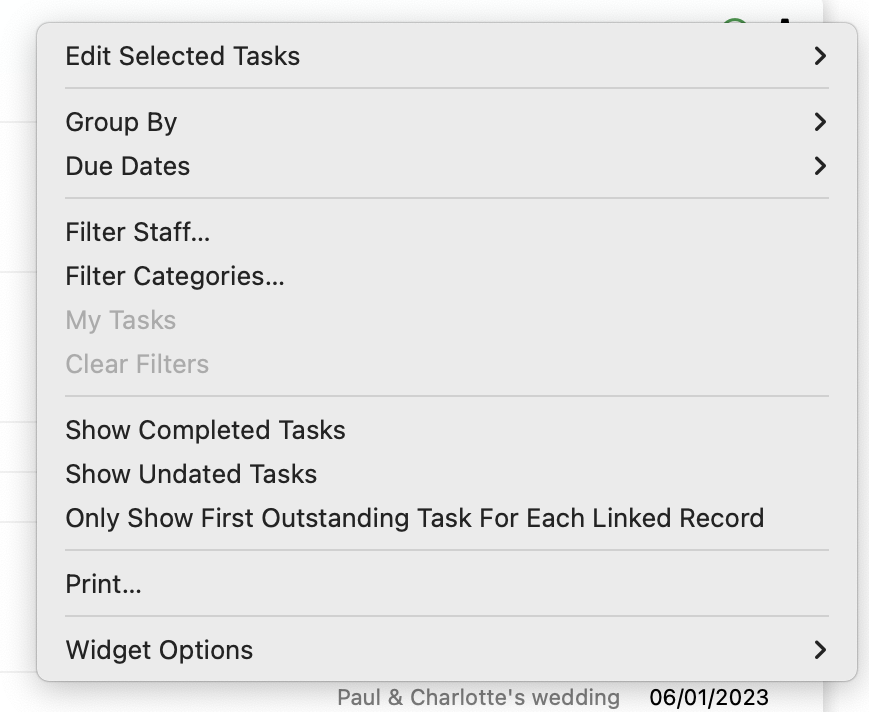
Clicking on the options cog in the top right corner of the “Task Manager” Widget reveals various options to customise the Tasks shown.

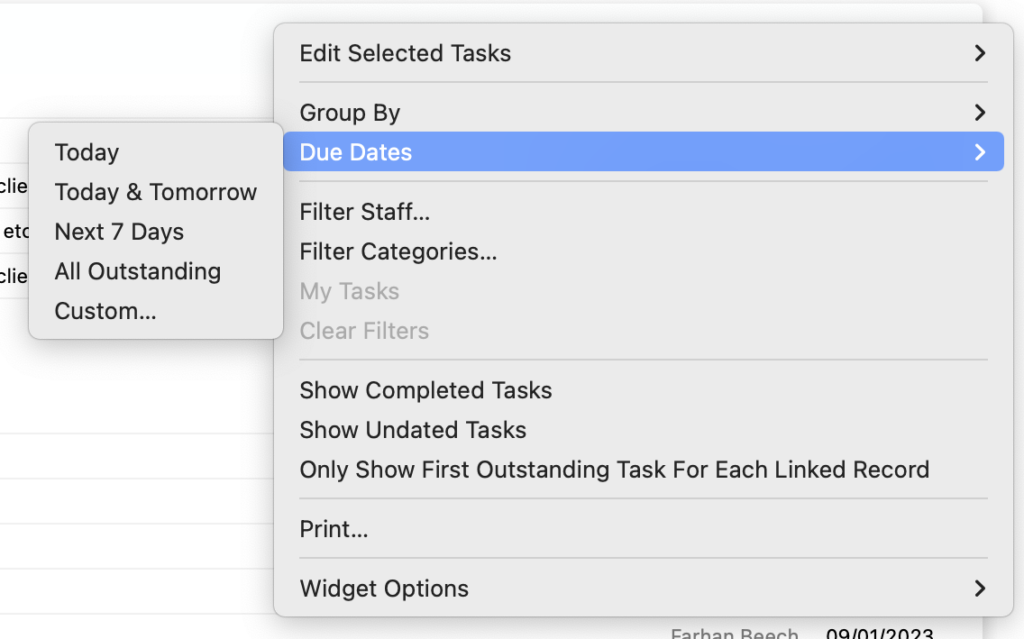
Number of Tasks displayed
The “Due Date” option alters how many tasks are shown.
The “Today” or “Today & Tomorrow” views are ideal for managing your immediate workload. The “Next 7 Days” view is good for assessing next week’s tasks with the “All Outstanding” view being ideal for long-range planning.

Grouping of Tasks
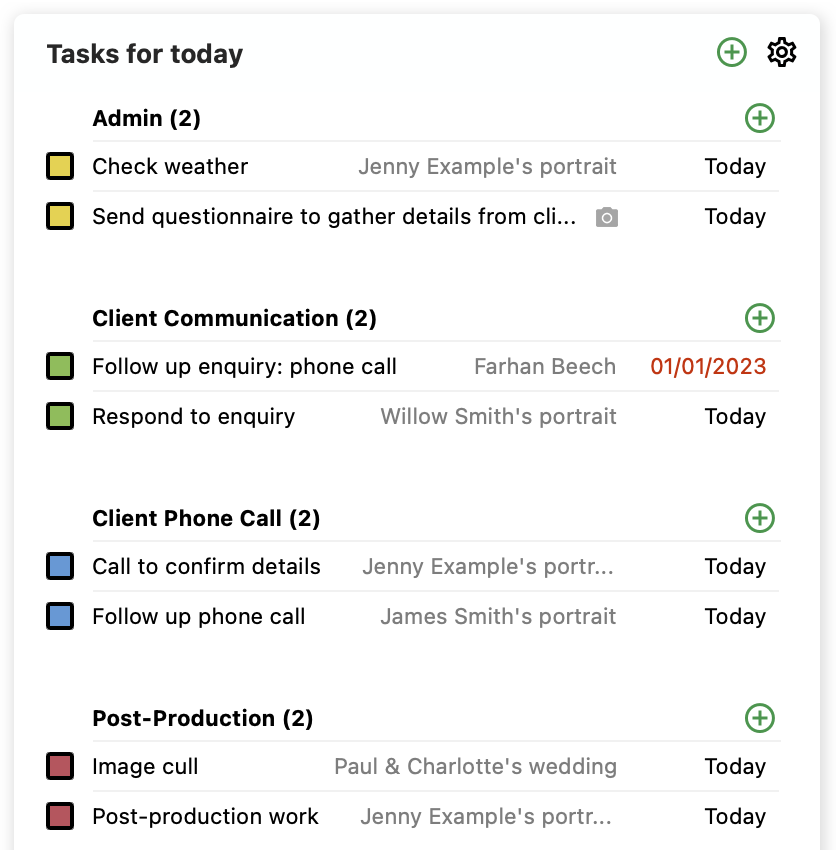
It’s possible to group Tasks in various ways; by their Due Dates (as shown in the above screenshot), their Category (shown below), the Staff member responsible or the Linked Record that the Task is assigned to.
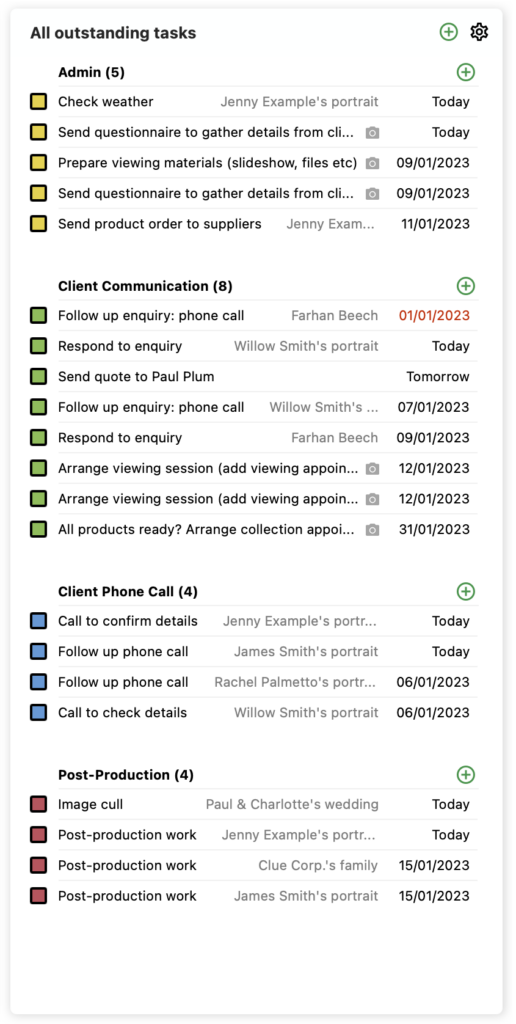
Filtering of Tasks
You can also filter Staff and Categories so you only see the Tasks that are assigned to a specific member of Staff or Category. And in busy periods when you may be falling behind this can be a useful way to ‘declutter’ your Task Manager.
The first screenshot below shows all the Outstanding Tasks, many of which are overdue. Then in the second, the Post Production Task Category has been removed which immediately makes the list look a little less overwhelming.
👉 If you’d like further suggestions on how you can use the Home Screen to manage your post-production, do read this help article.
Prioritising your Tasks by Category
Showing today’s Tasks grouped by Category is a great way to work through your most urgent work in a methodical way by focusing on one Category at a time; everyone has different working styles but many find this a useful way to plan their day. Simply choose the order which works best for you.