Search for answers or browse our knowledge base.
Can't find the answer you need here? Contact our support team and we'll gladly help you.
Importing your ProSelect orders into Light Blue
Light Blue has a new ProSelect integration that makes it easier to import ProSelect orders because you no longer need to manually export them from ProSelect. You can find full details of our ProSelect integration in this article.
If you’re using the specialist software ProSelect for your in-person sales (IPS) you’ll want to want to include these orders in Light Blue too; having all the information relating to a shoot in one place allows you to see how successful the session was, keep on top of your finances and take advantage of Light Blue’s powerful reporting features.
And thankfully you don’t have to manually re-enter them into Light Blue; there’s a handy import feature that you can use instead!
Exporting your order from ProSelect
First of all, we need to export the information from ProSelect; there are a couple of ways you can do this.
1. From the Order itself
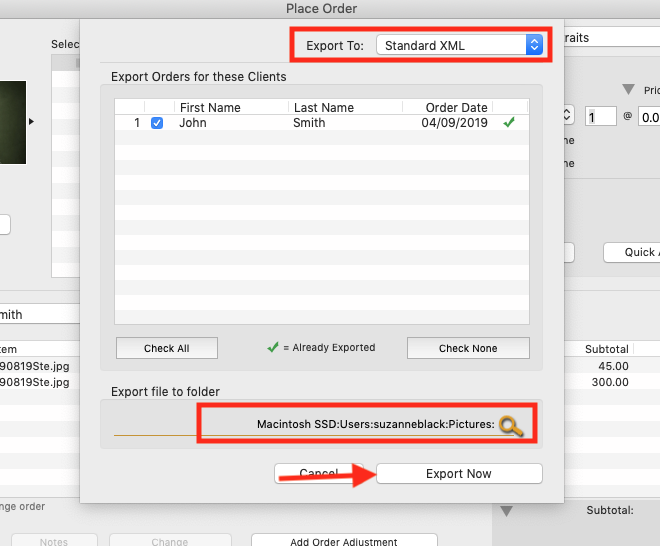
- Click “Export Order” at the bottom of the Place Order dialog.
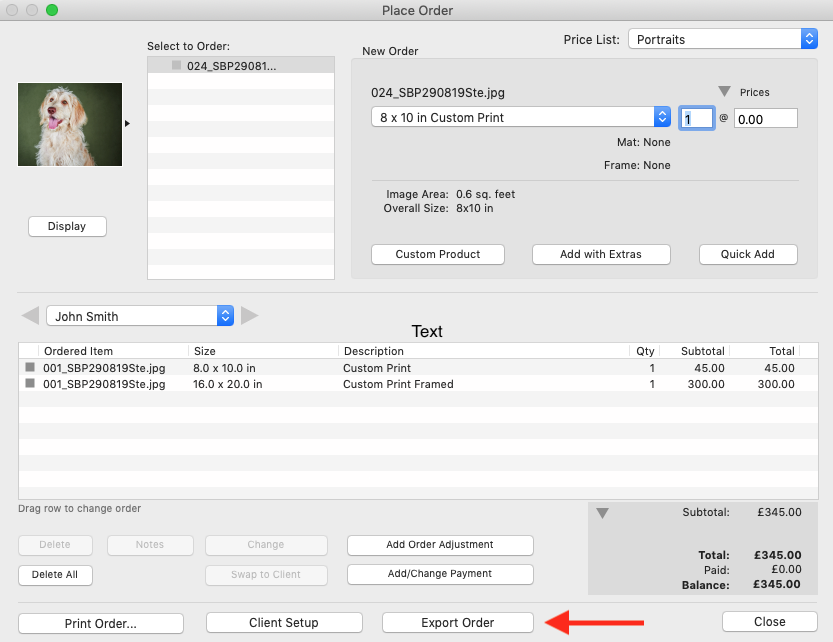
- In the Export dialog, choose “Standard XML” as the export option.
- Choose the folder you want to export to.
- Then click “Export Now”.
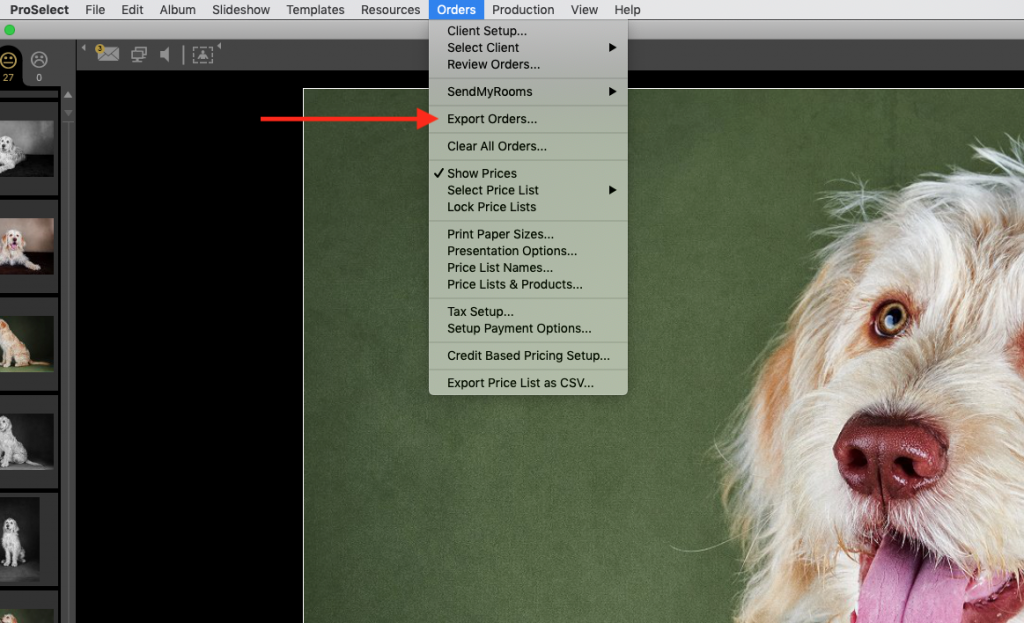
2. From Orders in the main menu
- Choose “Export Order …” from the drop-down menu.
Importing the order into Light Blue
Now we have all the relevant information from ProSelect, we want to import the order into Light Blue as a Sale Record.
- Go to “Records” in the main menu.
- Select “Import” followed by “Sale from ProSelect XML File… “ from the drop-down menu options.
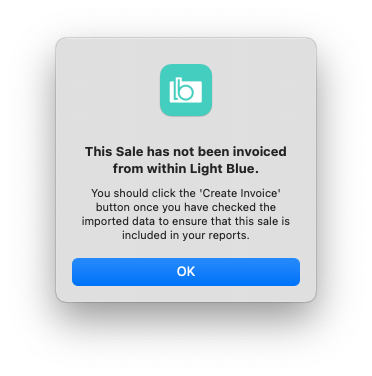
- NB. Even if you have already given your client a copy of their ProSelect order and taken payment from them, an Invoice still needs to be created in Light Blue so it’s included in Light Blue’s Reports; a pop-up reminder dialog will show when you’ve imported the Sale. We’ll cover how to create the Invoice once we’ve linked the sale to a Shoot Record.

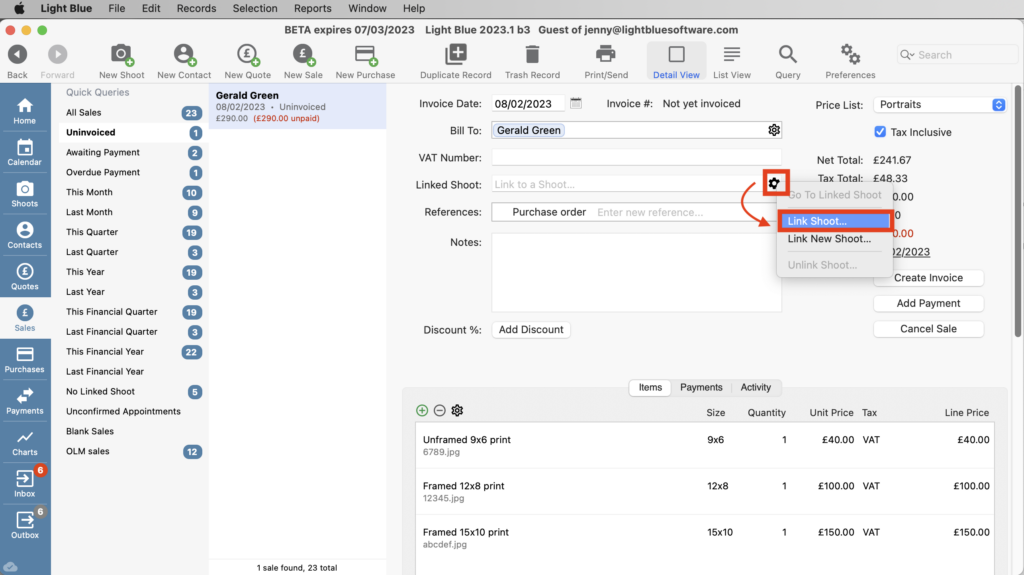
Linking the Sale Record to a Shoot Record
Whilst the ProSelect order export provides the details of the sale. Light Blue now needs to know which Shoot Record the sale applies to.
- In the Sale Record, click on the cog to the right of the Linked Shoot field and choose “Link Shoot”.
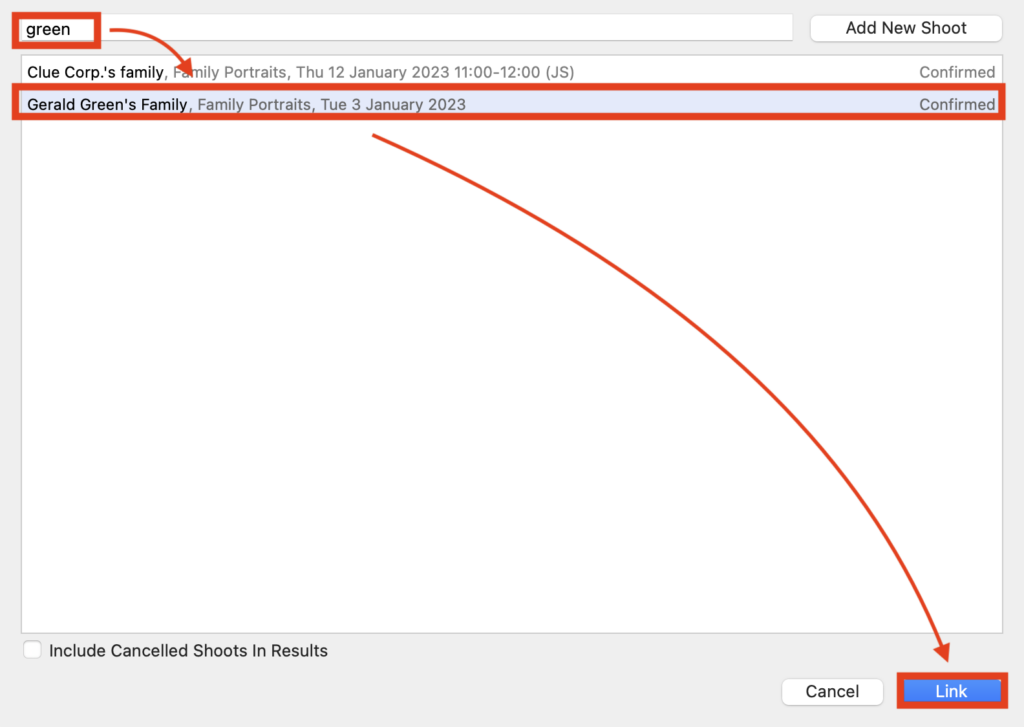
- Start typing the shoot name, click on the correct one from the list that appears and click “Link”.
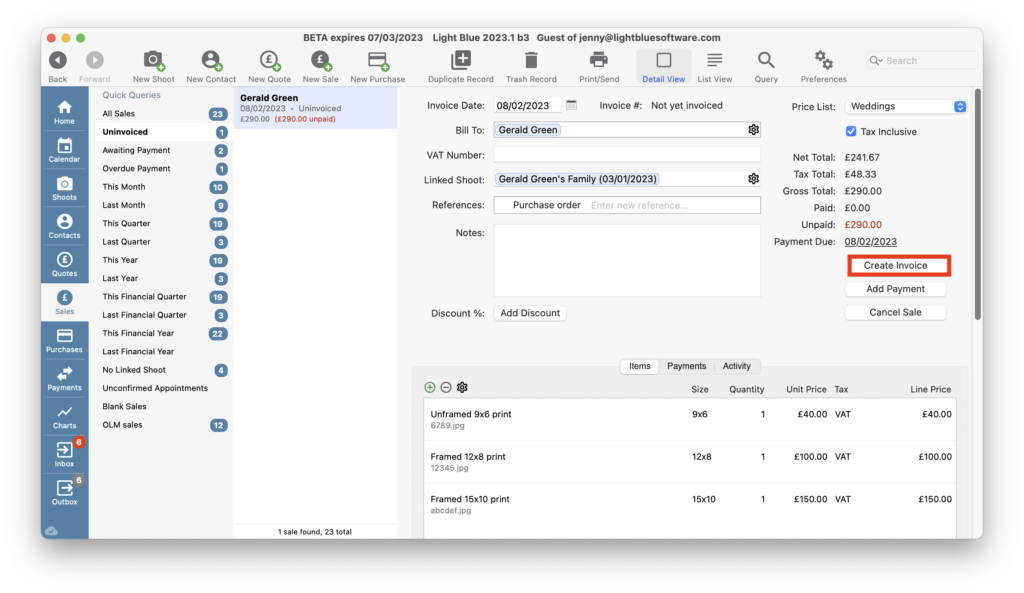
Creating the Invoice
As explained above, it’s important to create an Invoice within Light Blue so the sale is included in Light Blue’s Reports.
- In the Sale Record, click “Create Invoice”.
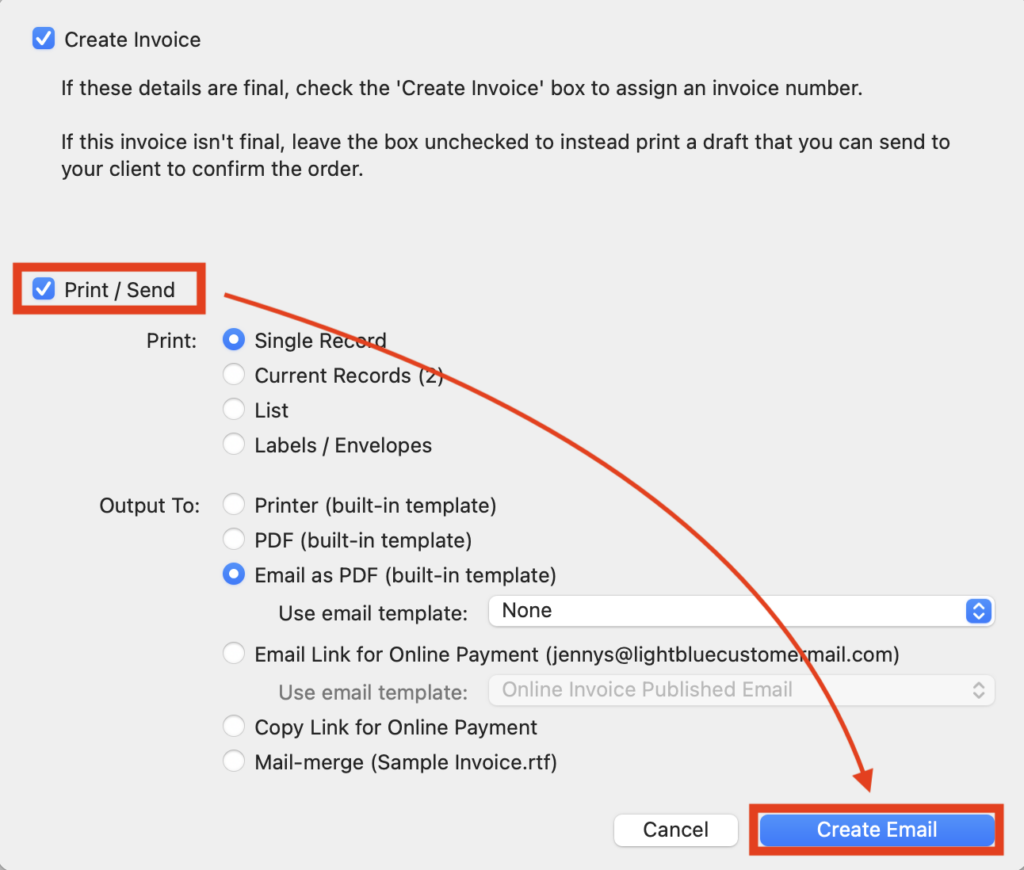
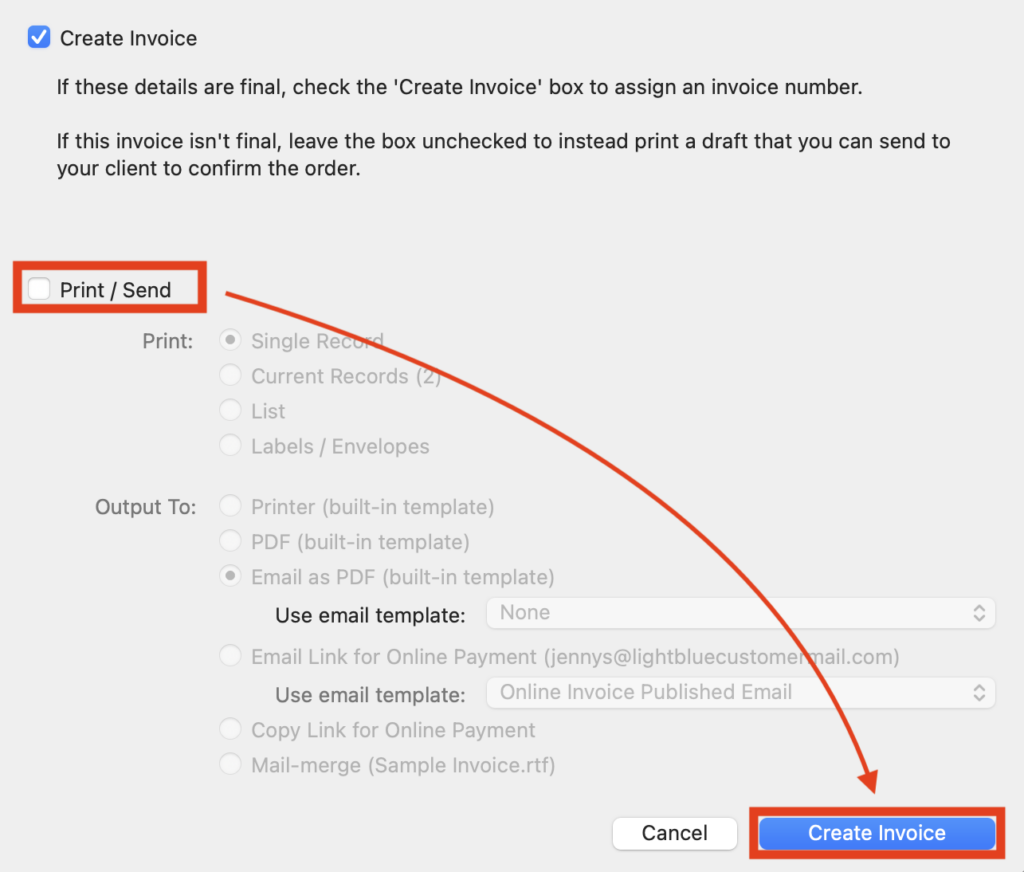
- In the Invoice dialog, check/uncheck the “Print/Send” box depending on whether you want to send the Light Blue Invoice to your client or not.
- Click “Create Email”/”Create Invoice”.
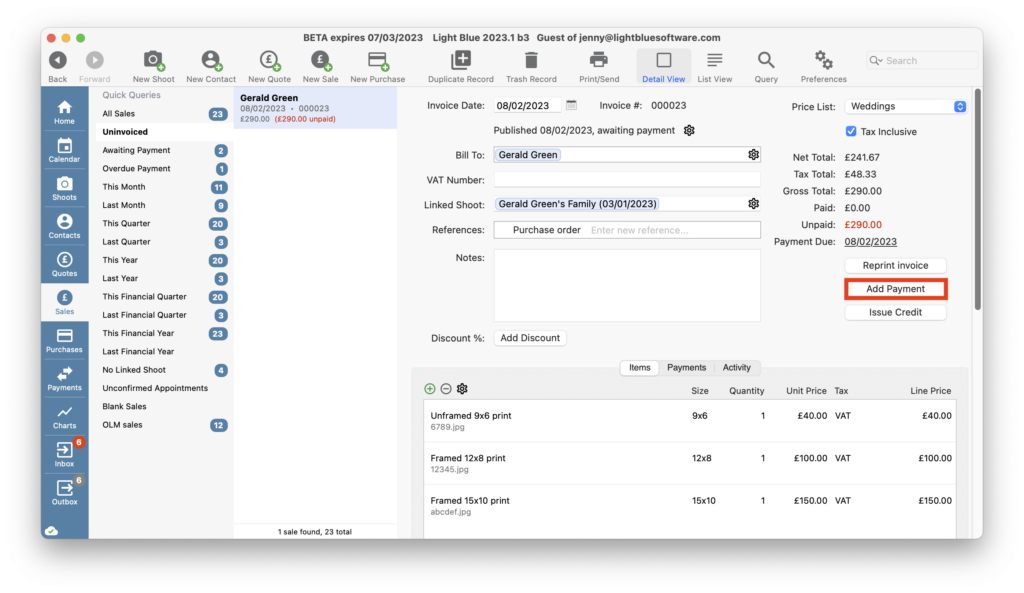
Recording Payment
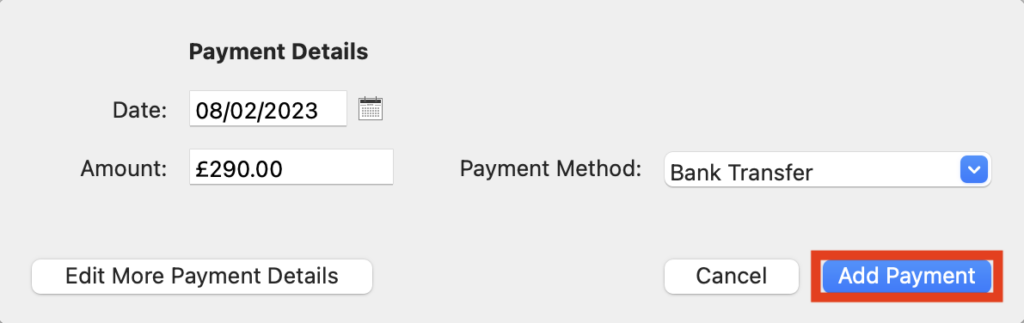
- If your client has already paid you, in the Sales Record click “Add Payment”.
- Complete the “Date” and “Payment Method”.
- Click “ Add Payment”.