Search for answers or browse our knowledge base.
Can't find the answer you need here? Contact our support team and we'll gladly help you.
Getting off to a good start with Shoots & Contacts
Getting off to a good start with shoots & contacts
Your business is built around your clients and the shoots you do for them, so they’re what Light Blue is built around too. Start getting yourself organised right away by entering your forthcoming bookings! Once your existing clients & shoots are in Light Blue, you can build on them to make use of so many of its powerful and helpful features.
This page will help you with:
- Adding shoots & contacts manually
- Linking shoots & contacts together
- Importing existing information
- Migrating from another system
Need more help?
We understand that different people learn in different ways, and that you may have questions or feel that you’d like some help with the best way to do things. We’re here to help! Book a free 1:1 session
Adding shoots & contacts manually
There are number of helpful tools that automatically bring records into Light Blue, and/or add a lot of contacts and shoot records in one go. However, there will still be occasions where you will need to add records in to Light Blue manually.
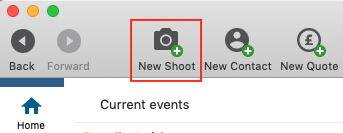
Generally we recommend starting with the shoot record, since your business is based around shoots. To create a new shoot click on the “New Shoot” button in the toolbar and Light Blue will guide you through entering the basic information you need for any shoot.
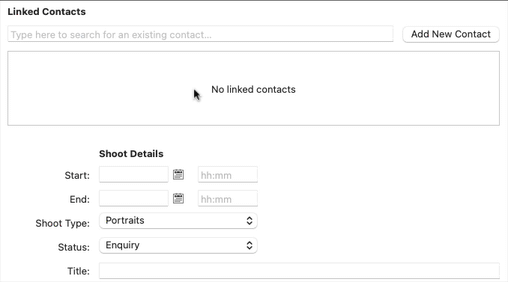
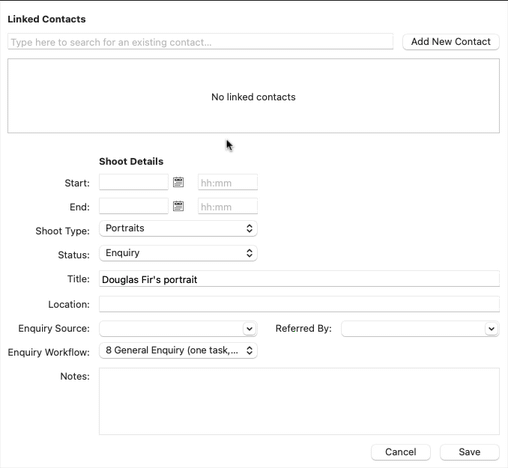
You can add a contact to the shoot by typing their name in the “Linked Contacts” box. If the contact is someone you’ve worked with before then we’ll offer to link their existing contact record.
If you’re adding someone new then you can click on the “Add New Contact” button. That will open a new window where are you can quickly add details about the contacts who are linked to the shoot.
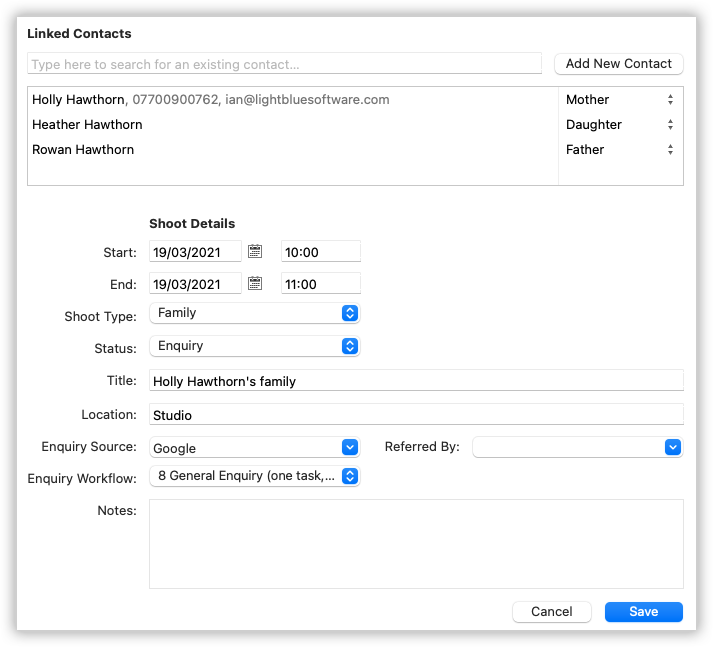
You can add as many contacts to a shoot as you like and you can add more details to the contact record(s) later.
If you client has a particular date in mind then you can also enter that into the “New Shoot” window, as well as telling Light Blue what type of shoot it is. You can also enter details such as the location of the shoot and how the client heard about you, but you can always enter these details later.
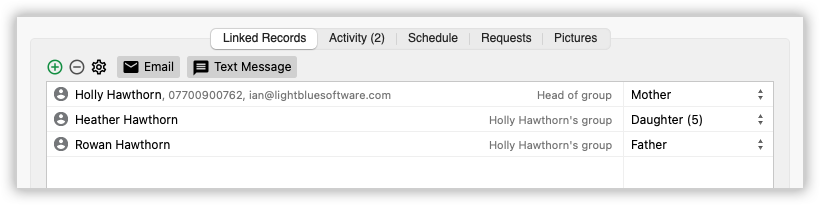
When you click the “Save” button in the “New Shoot” window, you’re taken to the shoot details screen. The contact(s) you added will appear in the “Linked Records” tab, and you can view their record(s) in full by double click on them.
If you just want to create a new contact without linking them to a shoot, then you can click on the new contact button at the top of the screen and enter their details.
You can always add more details to a shoot or contact record later.
Linking shoots & contacts together
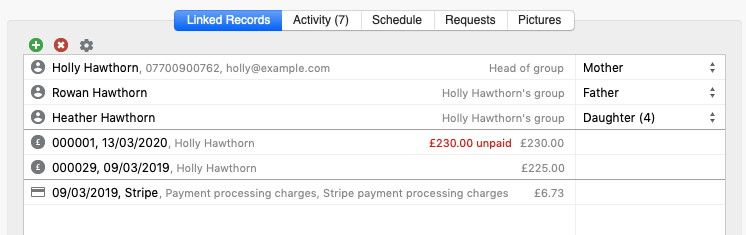
One of the great strengths of Light Blue is having everything linked together in one place. This saves spending time jumping between different apps and services or re-entering information in many places.
If you already have some contacts in Light Blue and you wish to link them to an existing shoot record, go to the Linked Records tab of the Shoot, click on the green plus button and choose to link an existing contact.
You can link a shoot or contact to any other shoot or contact record by going to that records Linked Records tab, clicking on the green plus, and choosing to link either a knew for existing record to it.
Importing existing information
If you have a list of shoots or contacts that you wish to bring in to Light Blue from another source, then we have a range of tools I can help you to do that.
Importing contacts from a spreadsheet
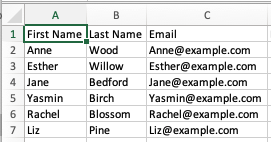
Light Blue can import a list of contacts from a CSV file – a file format which can be produced by a lot of different applications and services. If you have the contact details in some other form of spreadsheets, you can convert it into a CSV using Excel, Pages, or Open Office.
Each row of the spreadsheet will represent a different contract. Each column of the spreadsheet contains a different piece of information about that contact, which will go into Light Blue (for example the contact’s first name, last name, email address etc).
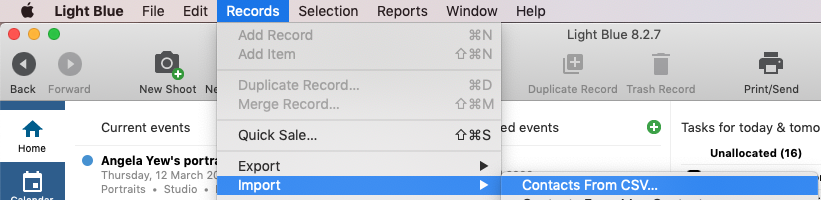
To import contact from a CSV, click Records, Import, Contacts from CSV.
Then choose the CSV file that you wish to import.
You will then see a dialogue where you can match up the columns in your spreadsheet to the relevant fields in Light Blue. Simply drag the field names on the right hand side to match to the spreadsheet columns on the left.
When you’re ready, click the import button.
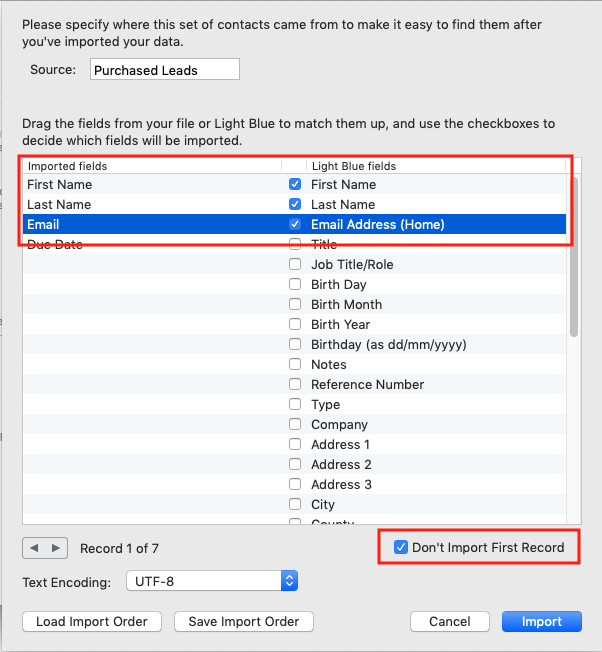
You may wish to check the “Don’t import first record” checkbox if the first row of your spreadsheet simply contains the names of the columns rather than useful information.
Importing shoots & contacts from a spreadsheet
Similar to importing a list of contacts from a spreadsheet, it is also possible to import shoot and contact information together.

Each row of a spreadsheet will represent one shoot and one linked contact. Each column of the spreadsheet contains a different piece of information about that shoot or it’s linked contact (for example the date of the shoot, the contact’s phone number, the location of the shoot etc).
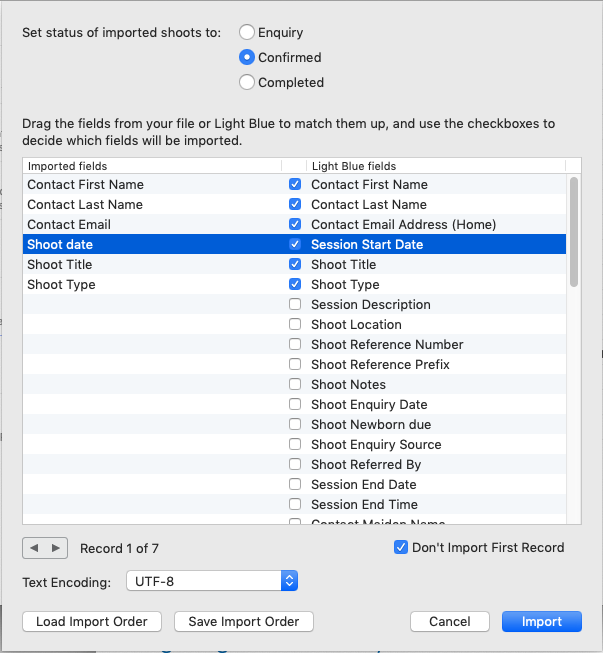
When you import the contacts and shoots into Light Blue from spreadsheet Light Blue will automatically link the shoot and contact record to each other.
Importing contacts from the Mac Contacts app
If you’ve got a list of contacts in the Mac contact application, then importing them into Light Blue is nice and easy.
Click on the record menu, import, contacts from Mac Contacts.
Choose the contact the group that you wish to import from, which will import all of the contacts in that group.
If you just wish to import certain contacts you can search for them instead.
The contacts and their details are now created in your Light Blue database.
Migrating from another system
If you’re currently using another system to manage your business, we can help to find the most effective method of migrating over to Light Blue with a free, no obligation, migration session.Schedule a migration consultation