Search for answers or browse our knowledge base.
Can't find the answer you need here? Contact our support team and we'll gladly help you.
🎥 Installing Light Blue’s Forms and Scheduling Calendars on your website
Installing two of Light Blue’s most useful features on your website is great for encouraging potential clients to make an enquiry or even book a session with you there and then.
All the data is automatically imported into Light Blue freeing up your valuable time to focus on things other than admin! And Light Blue has made the process to install them to your website really easy as it creates the HTML code or link for you and adds it to your computer’s clipboard; you then simply paste it into your website.
To learn more about how to do this watch the video below; though if you prefer to learn by words and pictures, have a read of the help article instead!
Which Light Blue features can be installed?
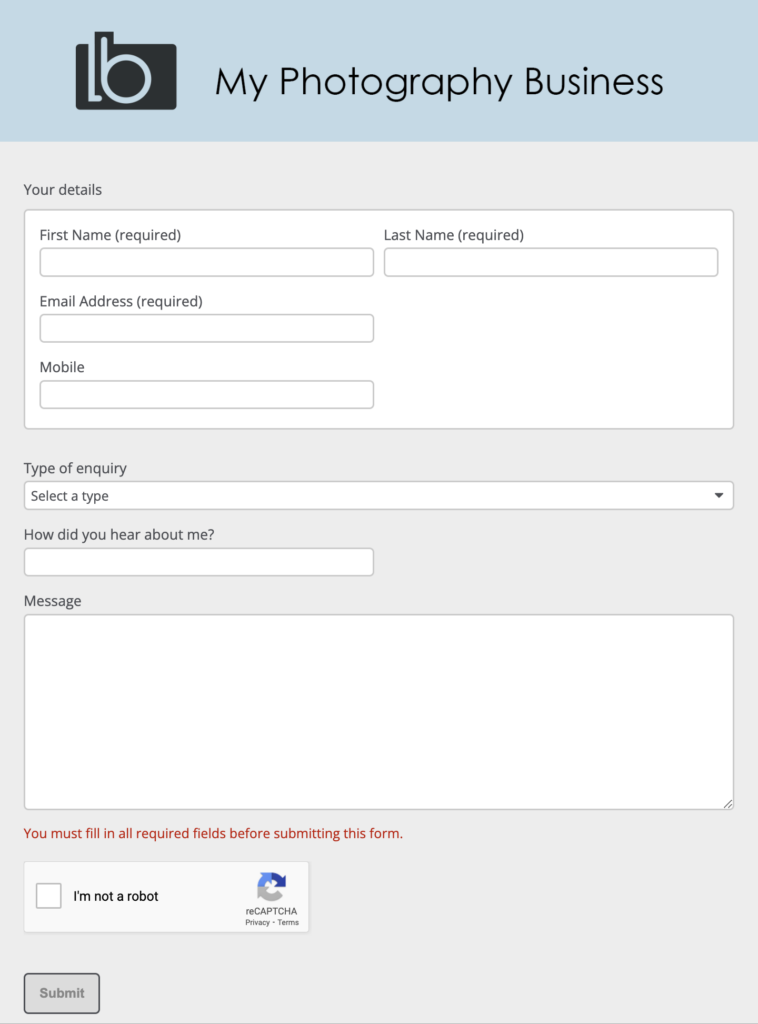
A Form
Light Blue Forms can be used in a variety of ways however contact Forms are great to capture a potential client’s contact details, what type of session they’re interested in, how they found you and anything else you’d like to include!
They’re straightforward to set up and then use and there’s no limit to how many Forms you can create in Light Blue; you can even add any of your Client Portal brands to them.
👉 If you need to learn how to set up your contact Form head on over to this help article.
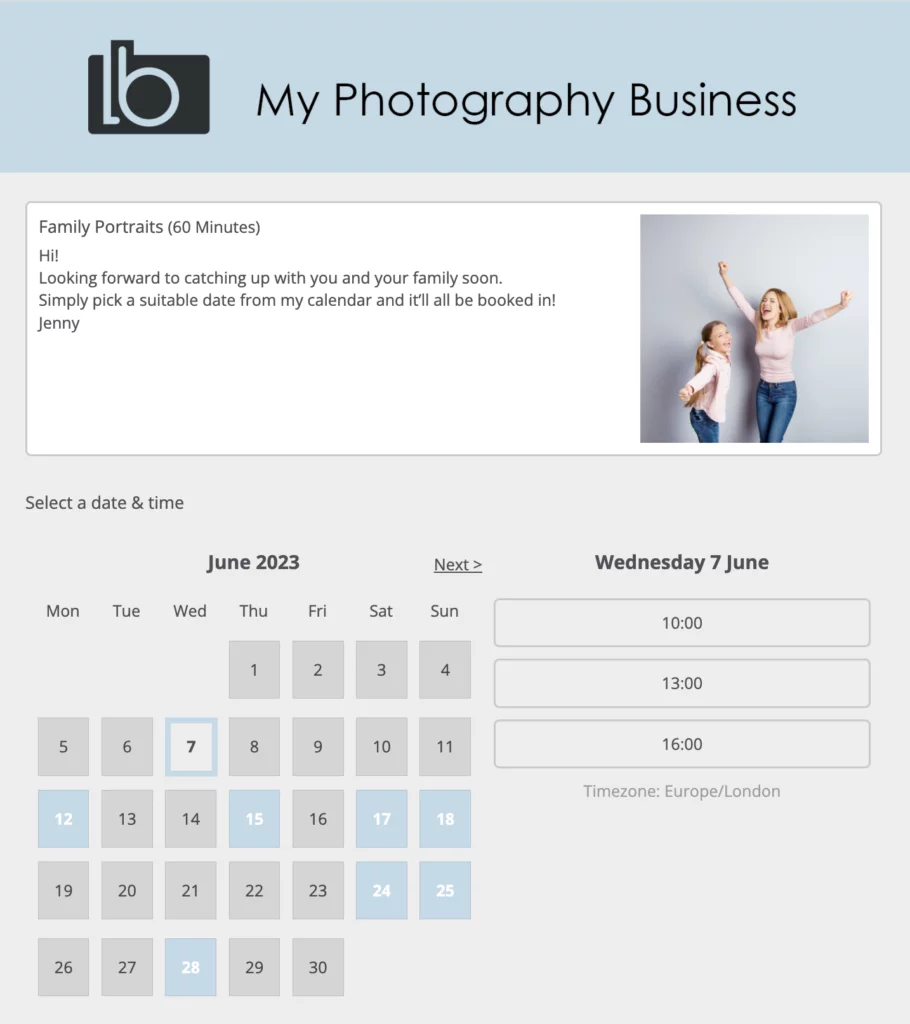
A Scheduling Calendar
Installing a Scheduling Calendar on your website is ideal if you’re happy taking bookings without a need for any other communication before they book; perhaps for mini sessions, discovery calls or maybe even training. Your client simply picks an available time and completes their booking form; you can even include a Contract and Booking Fee to streamline things further.
👉 If you need to learn how to set up your Scheduling Calendar head on over to this help article.
The different ways to install them
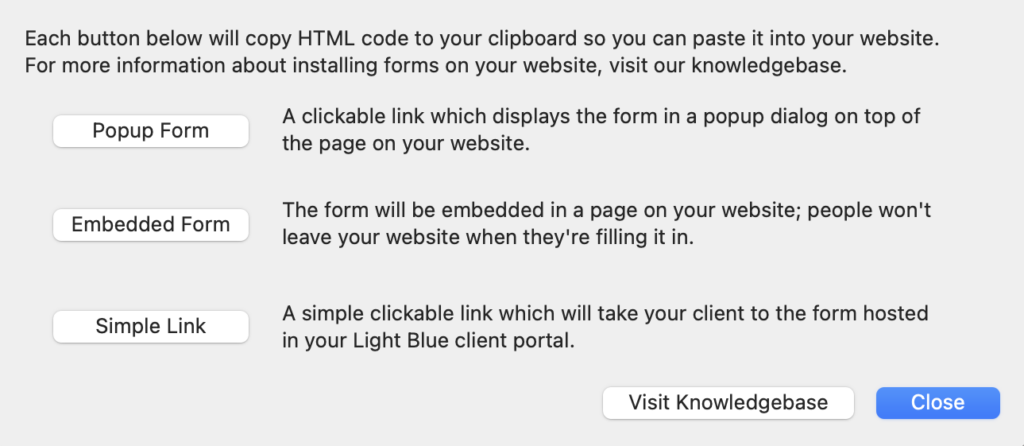
Popup
Your Form or Scheduling Calendar will appear as a popup dialog; a great way of adding a call to action to any page on your site.
Embedded
If you embed your Form or Scheduling Calendar it’s part of overall webpage design; useful on your contact page or a landing page for a particular marketing campaign.
Simple Link
You can also add a simple link to copy or a button on your website and your client will be taken to the Form or Scheduling Calendar in your Light Blue Client Portal; ideal if your website doesn’t allow you to add HTML code to it.
Copying the HTML code or link from Light Blue
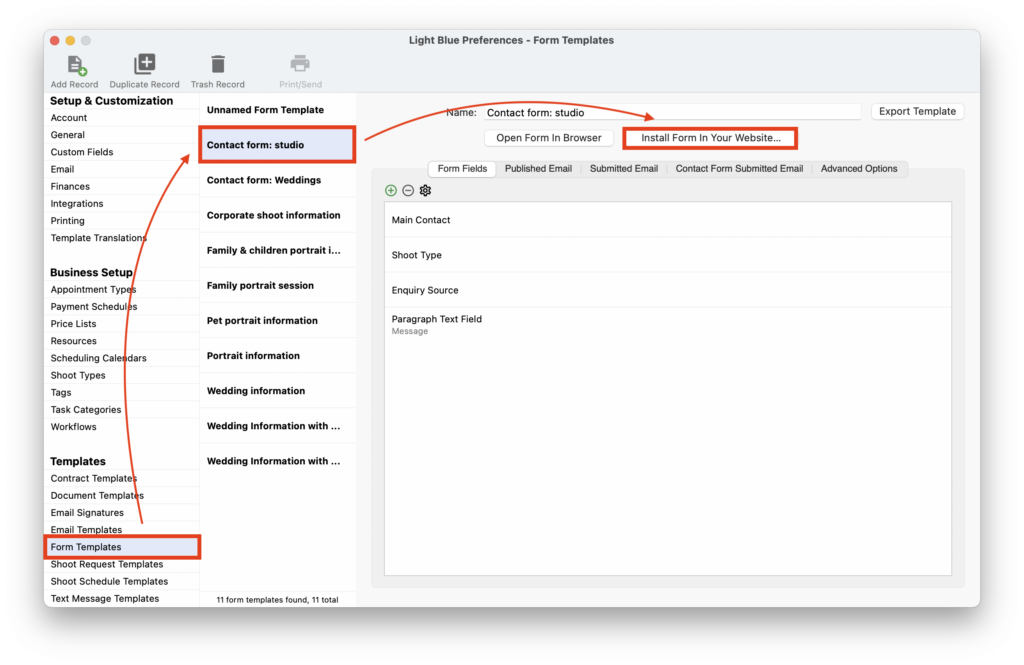
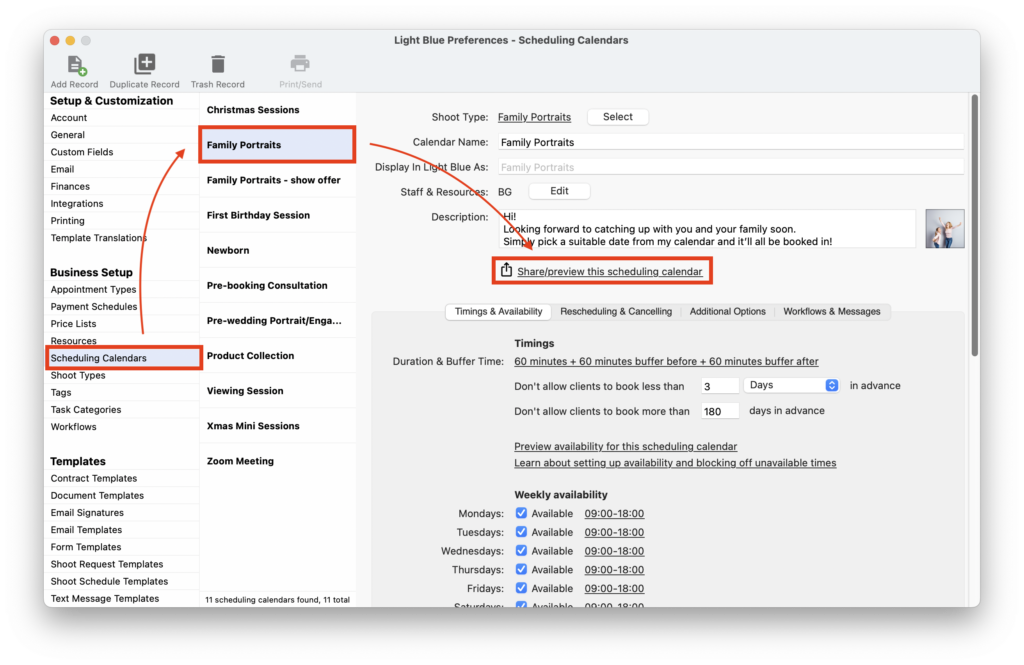
- In Preferences go to either the Form Templates or Scheduling Calendars section and select the Form or Scheduling Calendar you want to install on your website.
- If it’s a Form, click the “Install Form In Your Website…” button.
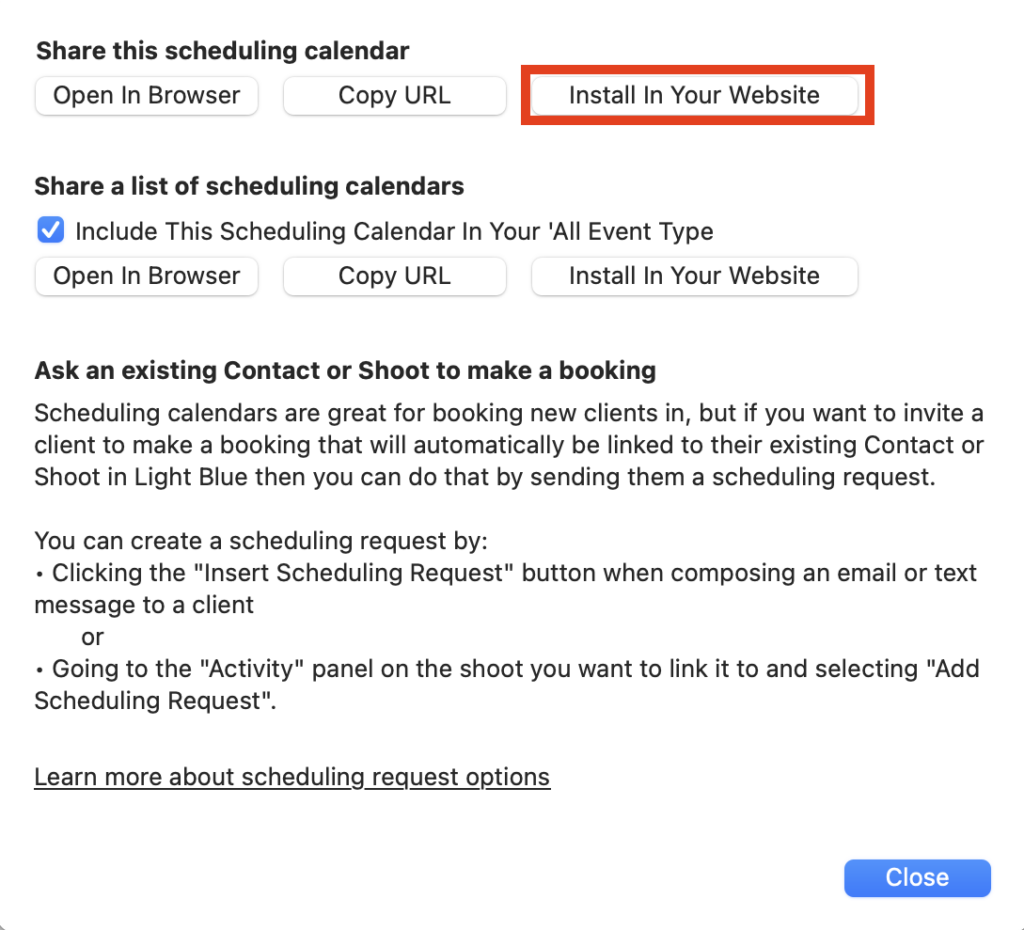
- And if it’s a Scheduling Calendar, click the “Share/preview this scheduling calendar” link, followed by the “Install In Your Website” button.
- Choose how you want to install your Form or Scheduling Calendar, i.e. as a popup, embedded, or a simple link and click the appropriate button.
- The HTML code or link will then be copied to your computer’s clipboard ready for you to paste into your website in the correct place.
Pasting the HTML code or link into your website
- If you’ve gone for the simple link option simply add that in your usual way to either words, buttons or images in your website.
- Pasting the HTML code for popup or embedded Light Blue Forms will vary depending on what platform you use. Here’s a few links to help articles for some of the more popular options: 👉 WordPress. 👉 Squarespace. 👉 Zenfolio. NB. There’s no need to re-install a Form any time you make changes to it; it’ll automatically be updated wherever it’s installed.